Have you ever stood with mouth agape in disbelief after listening to a jaw-dropping acoustic guitar performance? That was me, some years back, caught in the thrall of the mesmerizing sound production capability of the Pod Go multi-effects processor on an acoustic guitar. But that’s a story for another time. Today, I’m here to demystify the process. Having plucked strings since I was six, my music journey has flowed across folk, classical, jazz, and world music, consistently chasing the magic of tone and sound.
I have a bold claim to make – the Pod Go multi-effects processor is possibly the best thing you can pair with an acoustic guitar. Why, you may ask? Well, stick around and all will be unveiled as we journey through the inner workings of Pod Go, unpack its acoustic simulator, apply impulse responses, and optimize your acoustic guitar tone with this digital wizard.
This guide is born out of years of experimentation and thousands of dedicated hours discovering the compatibility and limitless potential of Pod Go with an acoustic guitar. The end-goal? To elevate your sound from good to breathtaking. Let’s dive right in!
Understanding the Basics of Pod Go and Acoustic Guitar
Like many guitar enthusiasts, I fully immersed myself in the world of diverse guitar tones – entranced by the possibilities of creating distinctive sounds. It was during this sonic explorations that I came across a little gem, Pod Go from Line 6.
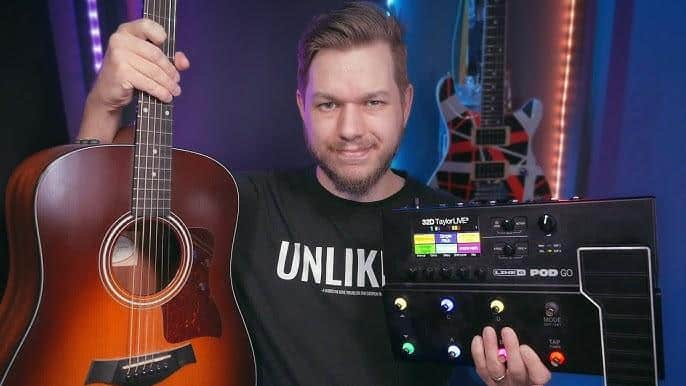
The Line 6 Pod Go impresses me as a brilliantly engineered multi-effects processor. It’s a compact and powerful device, designed to add an unparalleled richness to your acoustic guitar’s tone. But as with all things, understanding its foundations is key to unlocking its potential.
Pod Go, at its core, is a portable, lightweight, and highly user-friendly device. It offers premium-grade amp and effects models, borrowed from the Line 6 flagship Helix. This repertoire of sonic tools invites guitarists to experiment, and sculpt their sound according to individual style and preferences. That’s the magic of Pod Go, yet, it’s only the iceberg’s tip.
Did you know that the Pod Go is a small but mighty device, capable of adding an unparalleled richness to your acoustic guitar’s tone? It’s a sound artist’s dream, creating the perfect platform to redefine the acoustic tones. Through this device, you can create an equation of soulful rhythm and vibrant melodies, all emanating from the strings of your guitar.
Straight from my personal experience, using Pod Go with an acoustic guitar is a harmonious dance of tech and talent. This device has revved up the sonic possibilities, morphing my acoustic guitar into an orchestra of unique tones and profiles. Every strum now resonates with that little ‘extra’ that sets my music apart.
Of course, like any artistic instrument, the Pod Go requires a touch of understanding. Knowing your gear and understanding how it could translate and highlight your unique musicality is essential. The journey from confusion to clarity with Pod Go was indeed a trekked path, but its beautiful outcomes resonate with my music every day.
Knowing the potential and understanding the workings of Pod Go is what this chapter offers. Let’s delve deeper into its nuances, and together, unlock the door to a world of rich, distinctive, and deeply satisfying acoustic guitar tones.
As we venture forth in this guide, remember, it’s about enhancing your music, your way. The collaborative dance between my fingers, strings, and Pod Go has redefined my relationship with music. I hope that this personal insight not only arms you with the practical knowledge needed but also fuels your passion for expressive acoustic guitar playing.
So in the next chapter, we shall explore the process of setting up Pod Go for an acoustic guitar, delve into intricate configurations, take a good look at the application of impulse responses for natural acoustic tones, and so much more. Ready to go on this fascinating Pod Go journey? Let’s get strumming!
Setting Up Pod Go for an Acoustic Guitar
Configuring the Acoustic Simulator

Delving into the heart of the Pod Go configuration process, let’s explore how to work with the acoustic simulator to enhance your acoustic guitar’s sound through the Pod Go Multi-Effects Processor. My odyssey with acoustic simulators began with that shared objective: to emulate a genuine acoustic sound as accurately and realistically as possible.
Acoustic simulators are integral to the Pod Go setup, especially when working with an acoustic guitar. The acoustic simulator generates a sound that closely replicates the bright and crisp vibrations of an acoustic guitar. Understanding this tool can truly elevate your sound and provide an enriched, authentic feel to your music.
Conventionally, the acoustic simulator configuration within Pod Go involves adjusting the EQ, fine-tuning the compression, and playing with the reverb controls. But there’s an artistry to tweaking these parameters that is learned through experienced insight and hands-on experimentation. In my journey, I learned that minor modifications in settings could lead to profound changes in the output, which is the beauty of this tool.
For instance, I found that a slightly increased reverb duration combined with a moderate bass boost and mild compression produced a sound that was resonant, full, and boundlessly natural. The acoustic simulator’s fine adjustments, if done with meticulousness, have the potential to deliver an acoustic tone that is remarkably close to the actual instrument
One caveat to remember with the acoustic simulator is its inherent capacity for great pitch accuracy. This means that precise tuning of the guitar itself is paramount. Any deviation or imbalance in tuning can be unintentionally amplified, creating a less than desirable output. So, be sure to tune your acoustic guitar before fiddling with the acoustic simulator on your Pod Go.
In retrospect, the time I dedicated to mastering the acoustic simulator proved invaluable to my understanding and exploitation of Pod Go’s remarkable features. Each experiment with the acoustic simulator’s settings not only took me a step closer to achieving the quintessential acoustic sound but also deepened my appreciation for Pod Go’s versatility.
Remember, the unique nature of each guitar and player means that what worked for me might not necessarily yield the exact same results for you. However, this provides a solid foundation and direction for the acoustic simulator’s potentials within your Pod Go setup.
As we transition from the acoustic simulator to impulse responses in our journey with Pod Go and acoustic guitars, remember that taking the time to thoroughly understand and configure each feature is vital to truly unlocking Pod Go’s magic and maximizing your acoustic guitar’s sonic potential.
Applying Impulse Responses for Natural Acoustic Tones
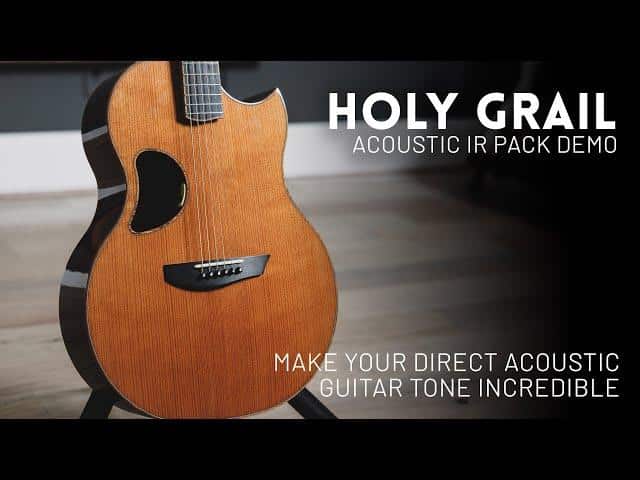
One of the most intriguing aspects of setting up the Pod Go for an acoustic guitar is the ability to apply Impulse Responses (IR) to capture those elusive natural acoustic tones. My personal journey delving into this technique began when I was recording for ‘Duets’. I sought to depict a real, raw acoustic sound; devoid of artificial intervention that cloaked the authentic essence of my guitar’s sound. It was then that I discovered the remarkable effect of IR in enhancing my guitar’s natural acoustic tones.
So, what’s the magic behind IR? An Impulse Response is essentially the sonic fingerprint of a particular space or object. Applying an IR of a high-end acoustic guitar to your Pod Go setup is almost like ‘cloning’ the natural tones of that guitar onto your own instrument. The result? A beautiful emulation of those nuanced acoustic tones that would normally cost you thousands in high-end mics and studio time.
But for all its wizardry, applying IR requires some finesse and in-depth knowledge about your guitar preamp and your Pod Go. In my experience, the key to this process lay in meticulously selecting the right IR for my particular guitar model, understanding how it interacts with my guitar preamp, and tailoring the parameters within the Pod Go to create a seamless blend.
Whenever I run my acoustic guitar through the Pod Go, I ensure to apply IR as part of my effects chain, maintaining its order and making sure it blends well with other effects. When applied correctly, this methodology can make a significant difference. This not only enhances the already established natural harmonic richness of an acoustic guitar but it also allows a customizable tonal palate that fits every individual player’s needs.
However, one crucial point I must emphasise is that IR is not a miracle cure for poor setup or lacklustre recording practices. It should be viewed as a tool for enhancement, rather than a quick fix for fundamental problems. Having a well set up guitar and Pod Go and basic sound engineering knowledge will always form the bedrock of good acoustic tones. IR can then serve as the cherry on top, the secret ingredient that takes your sound from good to great.
In my next chapter, we’ll dive into important details on how to optimize your acoustic guitar tone with Pod Go, building upon these strategies and furthering our journey into the realm of acoustic sonic excellence. For now, explore the power of Impulse Responses and start to unlock the true potential of your acoustic guitar through the use of your Pod Go multi-effects processor.
Optimizing Your Acoustic Guitar Tone with Pod Go
Using Effects Processing for Amplification

From my wealth of experience playing at varied venues, I can’t overstate the profound impact effects processing avails when optimising your acoustic guitar tone with Pod Go. Intimate spaces or large international stages, the value remains the same.
Within the myriad of tools offered by Pod Go, effects processing can be directly employed to enhance the amplification of our beloved acoustic. The energy of your performance, the soul of your sound, can thus be amplified accurately and emotively.
A common misunderstanding I’ve noticed among many aspiring guitarists is the supposed divide between effects processing and amplification. Yet, when you dive deep into the intricacies of Pod Go’s functional matrix, you see that this divide is, in fact, an integration.
The employment of effects processing is an empowerment to amplification, not a competition. We must see this integration as a golden opportunity to mould and elevate the acoustic tones we produce. That’s the essence of optimising your acoustic guitar tone with Pod Go.
To truly tap into the possibilities of this integration, we need to understand, to feel, the nuances in our acoustic guitar’s tone and how they morph under varied effects processing. Take reverb, for instance. A touch of this layered onto your sound increases dimensions, contributing a depth that transcends your listeners, wherever on the globe they maybe.
Or consider the power of delay. It’s not just about replicating and extending your acoustic vibrations; it’s an opportunity to control the pacing, cadence, and mood of your music. Use these tools as a wave-tamer would his oars, navigating, directing and defining the tides of your amplified sound.
Incorporating effects processing for amplification within the Pod Go universe truly lets you sculpt your sound as per the venue, ambiance, and your distinctive musical style. It’s about delicately painting with sonic hues, cloaking your sound with textures for an authentic and vibrant rendition.
As we progress to our next section on Utilizing Guitar Patches for Sound Enhancement, remember this concept of integration. Keep in mind: each tone, effect, and patch is another stroke on our vibrant soundscape, contributing to a sincere and immersive live experience.
Utilizing Guitar Patches for Sound Enhancement

In our exploration of enhancing your acoustic guitar tone with Pod Go, we can’t overlook the instrumental role of guitar patches. For sound enhancement, these digital effects settings have been my secret weapon on countless occasions.
I started using guitar patches extensively during my early performance days. They quickly became key tools in my arsenal, giving my acoustic guitar a distinctive edge. Emboldened by their transformative potential, I incorporated them into my album work, where they’ve proved vital for defining my signature sound.
Guitar patches allow me to craft my acoustic sound with precision and artistry. The possibilities with Pod Go are extraordinary; ranging from loud, resonant echoes, delicate, sparse reverbs to robust, rich distortions. By blending these guitar patches, I can manipulate their contributions to coax the desired tones from my instrument.
What I find fascinating about Pod Go, is its compatibility with third-party patches, swelling my sound palate to near-infinite proportions. I’ve built an extensive library over the years, accumulating a wide range of tones. These patches enable me to delve into the sonic depths and create unique, signature sounds that stand out in an ocean of guitar music.
A key to effective guitar sound enhancement is the judicious use of these patches. Applied with subtlety, they can enhance and deepen your acoustic guitar’s natural tone. Overuse risks muddying your sound or masking your instrument’s raw beauty. Keep in mind that the goal is to augment and not mask the authentic tones of your Acoustic guitar.
Using guitar patches with an acoustic guitar and Pod Go is a balancing act of art and science; experimenting with settings, understanding the interaction of different patches, and, of course, being attentive to your guitar’s response. After all, it’s this fierce dedication to detail that facilitates the transformation of our acoustic tones.
So, as we navigate the vast world of sound enhancement, remember the invaluable addition of guitar patches. Employ them wisely with Pod Go, and you’ll find they’re as much a part of your creative process as your guitar and your hands. In the next section, we’ll help you up your game with a few advanced Pod Go tips and tricks that I swear by.
Advanced Pod Go Tips and Tricks

After making our way through configuring your acoustic simulator, applying impulse responses, optimizing your tones, and utilizing patches for sound enhancement, it’s now time to delve into some expert-level strategies. Over the years, as a devoted guitarist and Pod Go devotee, I’ve managed to gather an array of Pod Go tips and tricks. These insights have substantially enhanced my sound quality and eased my playing technique. Learning from personal experiences and heaps of trial and error, I’ve come to understand the depths and capabilities of the Pod Go. Let me tell you—the world of creative sound manipulation only gets more exhilarating the further you dive in. Are you ready to unleash the full potential of your Pod Go and take a deep dive into the advanced arena of sound shaping and processing?
One of my most treasured tips revolves around the Worship Tutorials. I’ve been an avid viewer of these online demos and found countless gems of advice on there. They’ve been instrumental in tuning my Pod Go strategy, especially in crafting articulate, emotive acoustic tones suitable for a variety of genres. I recommend using the Worship Tutorials in conjunction with playing around with your Pod Go—you’ll be amazed at how much you’ll learn and evolve as a musician.
A crucial aspect of advancing your Pod Go knowledge lies in staying updated with the latest POD Go software updates. Line 6 regularly releases firmware updates to improve functionality and add fresh features. A simple act of keeping your Pod Go software updated lets you exploit the best of these innovations, and leads to a more enriched, versatile sound palette. It’s akin to having a new, more advanced Pod Go every few weeks or so!
Remember, the essence of it all should be rooted in toying around. No amount of tutorials or guides can replace the personalized learning you acquire from hands-on experimentation. Feel at liberty to play with the countless options Pod Go offers, exploring different avenues of sound shaping until you encounter a tone that truly resonates with your artistic preference.
To wrap this section up, it’s important to remember that learning advanced Pod Go tips and tricks is not a destination, rather an ongoing journey. Sound modification is an art-form that best blossoms with time, passion and constant learning. It’s about evolving with your guitar and technology, embracing the recurring updates and tutorials on offer, and above all, continually pushing your boundaries. As we move forward in our mutual journey of musical exploration, I believe these tips and tricks will open new doors of creativity for you. So, let’s continue to strum on, and make the most of this incredible technology that is Pod Go!
Frequently Asked Questions
What is a Pod Go Multi-Effects Processor?
Can I use Pod Go Multi-Effects Processor with an acoustic guitar?
How do I connect my acoustic guitar to the Pod Go Multi-Effects Processor?
What is the best way to use the Pod Go Multi-Effects Processor with an acoustic guitar?
Conclusion
How might your acoustic guitar journey transform with the power and versatility of Pod Go? As we conclude, let’s recap the insights, and power-ups this guide has given you. We kicked things off by understanding the basics of Pod Go and the acoustic guitar. A firm foundation always paves the way for mastering any craft.
Taking the next step, we dived into setting up your Pod Go for an acoustic guitar. This involved configuring the Acoustic Simulator and applying Impulse Responses for natural acoustic tones. Bearing in mind that the essence of acoustic guitar lies in its genuine, unprocessed tone, we made sure to emphasize on optimizing your acoustic tone with Pod Go.
We then explored the effect processing – a tool for better amplification and an avenue to experiment with your sound. Do you remember the guitar patches? These are your secret weapons for sound enhancement. Unleashing the full potential of Pod Go, we guided you through advanced tips and tricks, enabling you to tweak your sound until it’s personalized and perfect.
Finally, before wrapping up, we addressed frequently asked questions. These nuggets of wisdom were collected from my first-hand experience with the Line 6 Pod Go and its application with an acoustic guitar.
My journey with acoustic guitar has never stopped surprising me. With each twist and turn, new lessons crop up. I hope this comprehensive guide will aid you on your surreal journey with Pod Go and acoustic guitar. Leaning into the power of Pod Go means harnessing its versatility and potential to unlock new dimensions of musical expression.