As a seasoned guitar journalist and editor, I’ve had the privilege of watching the evolution of technology that transforms the way we create music. Enter Guitar Rig 6 LE, a tool that has completely shifted my perspective on music production. With its sheer breadth of features and its user-friendly design, this software is a revelation, a game changer. It has promised innovation and delivered more. But is it really as revolutionary as it seems? That’s what I aim to explore in this article.
With a decade of experience in this field, I’ve seen many software and tools, but none surprised me with such versatility as Guitar Rig 6 LE. This is more than just an upgrade, this is a new direction, a different approach to what you thought you knew about guitar rigs. So, let me show you the ropes, as we deep dive into the features of this new player in the digital music field.
This isn’t just an introduction to Guitar Rig 6 LE; it’s a journey through the evolution of guitar rig technology. Strap yourself in, we’ve got an incredible ride ahead.
What is Guitar Rig 6 LE
Features of Guitar Rig 6 LE
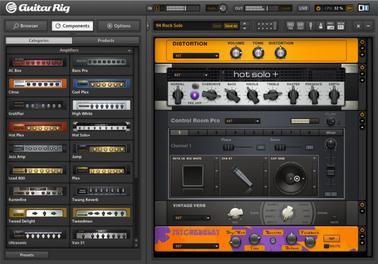
Transitioning from a basic understanding of Guitar Rig 6 LE, let’s delve deeper into its rich feature set, which underscores its relevance in today’s music industry. Brambling from my personal experience of transcribing music and writing for acclaimed guitar publications, I can confidently vouch for the distinctive features that Guitar Rig 6 LE offers. Suitable for both onstage performers and studio professionals, its functions are a testament to the versatility and adaptability musicians need.
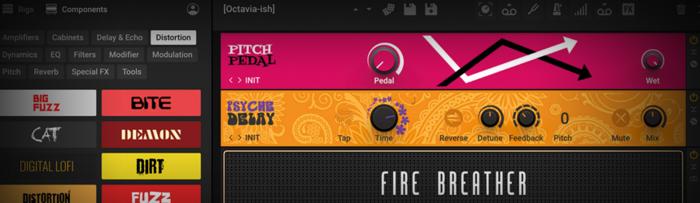
Guitar Rig 6 LE thrives with an array of powerful sound modifiers for creating rich and unique tones. It nails down the essence of classic amp modelling, keeping your sound authentic yet novel. The mix control and speaker cabinet emulations are just perfect for finding that sweet spot in the sound mix, while the built-in effects offer a wide palette of enhancements. Its standout feature, however, is its user-friendly interface, encouraging sound exploration and tinkering without hindrances. Amplifying this, its ability to create and store custom presets allows musicians to capture and replicate their perfect sound settings easily.
In essence, the features of Guitar Rig 6 LE offer what every musician seeks – a tool that excels in generating groundbreaking tones while maintaining a user-friendly methodology. This provides a seamless transition to our next chapter, where we will tackle its usage.
How to Use Guitar Rig 6 LE
Before delving into the ‘How’, let me share a bit of my journey with you. My interactions with various musical tools is a part of my everyday working life as an editor and transcriber. I’ve spent countless hours exploring the nuances of tools like Guitar Rig 6 LE. Along the way, I’ve discovered how achieving mastery of these tools can unlock creative potential unlike any other.
With that in mind, have you ever wondered how proper utilization of a tool can enhance your creativity? This is how transformative understanding and properly using Guitar Rig 6 LE can be. It’s an extraordinary tool, and I am excited to guide you on how to use it to its maximum potential.
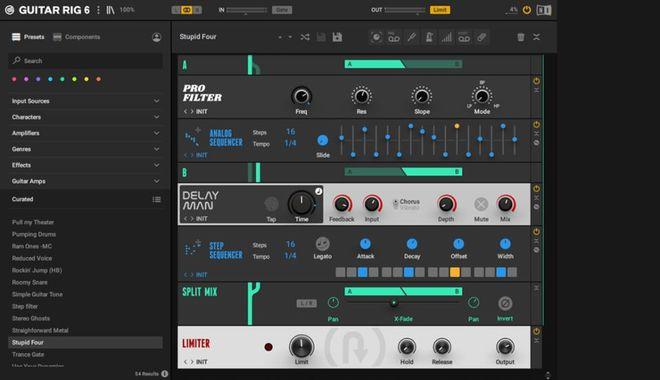
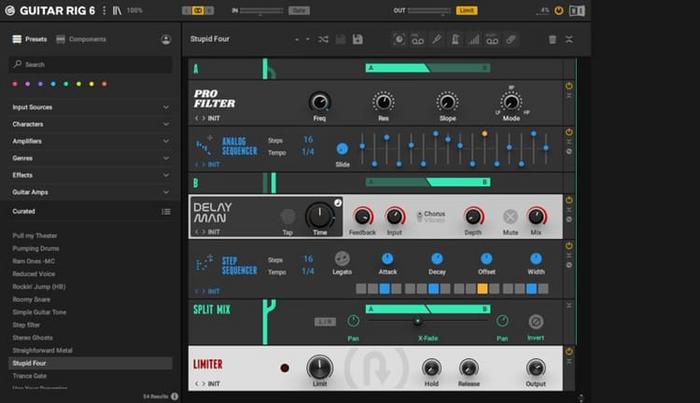
Let’s start with understanding the interface of Guitar Rig 6 LE. Once you have the software open, you’ll see rows of knobs, buttons, and switches. Don’t be overwhelmed; learning how to use these can make your musical journey more vibrant and exciting.
Several presets exist for different genres and sounds. Select one that suits your style and start playing. The presets can be a lifesaver if you’re pressed for time or just starting with the software. But, going beyond these presets is where the real fun begins.
To create a custom sound, begin by adding an amplifier. Pay attention to the gain, volume, and master knobs – these play a crucial role in shaping your sound. Next, add an effects unit. Experiment with different combinations of effects units and amplifiers – you’ll be amazed at the variety of sounds you can produce.
Finally, don’t forget to save your setup once you’re satisfied with your sound. Trust me, there’s nothing more annoying than creating the perfect tone, forgetting to save it and then not being able to reproduce it.
To use Guitar Rig 6 LE effectively, you need creativity and a deep understanding of music. It may appear complex at first, but once you get a hang of it, it becomes an integral part of your musical repertoire. Remember, music tools such as Guitar Rig 6 LE are not obstacles but rather platforms for your creativity to soar. I hope, with this guided walk-through, you’re well on your way to making the best use of your Guitar Rig 6 LE.
Differences Between Guitar Rig 6 LE and Other Versions
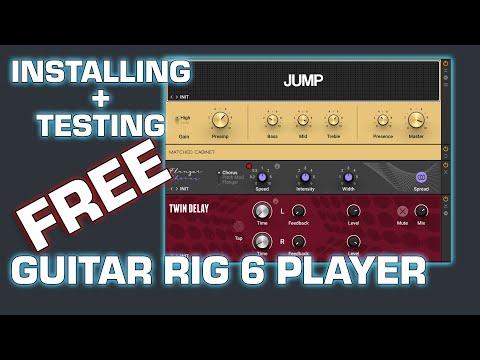
Comparison with Guitar Rig Player
Having encountered both Guitar Rig 6 LE and Guitar Rig Player in multiple scenarios, their divergent characteristics and communalities became apparent to me. Guitar Rig 6 LE shines in its simplistic design and usability, while the Guitar Rig Player excels due to its comprehensive versatility and range.
Guitar Rig 6 LE provides excellent default tones and effects, making it suitable for those wanting an easy-to-use rig. With its straightforward functionality, it significantly reduces setup time, ideal for practice sessions or quick recording. In contrast, Guitar Rig Player, offering a colossal range of tone options and detail control, caters to more advanced users who prefer customizing their sound extensively. Its endless possibilities may seem overwhelming to novices, but are a goldmine to experienced guitarists.
With my usage experiences, these versions appeal to different user groups and have variant benefits. Therefore, I found no clear ‘winner’ amongst them. It’s instead about choosing the software that fits your personal requirements and playing style seamlessly. Effectively, understanding these nuances will guide you towards making an informed decision. As we proceed, we will further delve into the intricate differences between other versions, contributing to your comprehensive understanding of the subject matter.
Comparison with Full Version
As a musician who frequently navigates between the Guitar Rig 6 LE and the full version, I see each variant possessing unique strengths tailored for different scenarios. For straightforward tasks or beginners seeking to grasp the basics, LE proves more than efficient. It provides essential features in a user-friendly and compact design ideal for starting your digital audio processing journey.
However, for professional work needing a broader suite, I find myself leaning towards the full version. It offers an arsenal of advanced tools and a plethora of effects, catering to complex functioning better than the LE. While both deliver fantastic sound quality, the superior flexibility of the full version elevates it as the preferred option for serious guitarists or professional contexts.
Understanding the distinction between Guitar Rig 6 LE and the full version is crucial in selecting the right tool for your requirements. While Guitar Rig 6 LE is perfect for beginners, the full version stands as the unrivaled choice for professionals. Both variants cater to distinct usage scenarios and deliver powerful performance within their respective scope.
Where to Obtain Guitar Rig 6 LE
When I dig deep into my initial days as a musician, I remember the search for the perfect gear required patience and persistence. I’ve spent countless hours forging partnerships and trading ideas with the mavens in the music industry to get an insightful perspective on what defines a true musician’s arsenal. One such gem that has greatly influenced my musical journey is Guitar Rig 6 LE.
Hold that thought a minute. Curious about where to find this masterpiece for your guitar playing skills? It’s important to note that acquiring Guitar Rig 6 LE is not like plucking a guitar from a local shop. With burgeoning advancements in the music gear industry, one has to adopt a more sophisticated approach for sourcing such advanced equipment.
Guitar Rig 6 LE can be obtained through Native Instruments’ official website under the ‘Products’ section. The website offers an immersive customer experience, providing detailed narratives about each product, and facilitating easy transactions. Sometimes, you may also find it at local music equipment stores or larger retail chains with specialized music gear sections. However, I’d strongly recommend purchasing it directly from the publisher to ensure authenticity and receive essential customer support.
My journey has taught me that transforming your music from good to great requires not only talent but also the right tools. And tool sourcing, especially something as distinctive as Guitar Rig 6 LE, requires a discrete understanding of the music industry’s intricacies. It’s an inside game, and in subsequent sections, you’ll learn more about benefiting from my experiences, tips, and tricks.
Troubleshooting Common Issues
Beginning a journey into the world of music software tools like Guitar Rig 6 LE can spark a sense of anticipation, tinged with a hint of potential frustration. As you navigate through creating your musical masterpiece, you’ll be greeted not only by the awe-inducing possibilities Guitar Rig 6 LE presents but also by the occasional bumps and obstacles along the way.
Ever felt stumped by software issues while you should be focusing on your music? You’re not alone. Let’s conquer those together. Troubleshooting these common issues is not as daunting as it may initially appear, and armed with some knowledge and practical tips, you’ll soon push past these roadblocks.
Over the years, I’ve found myself in the same frustrating situation more times than I care to admit. But as an experienced music engraver turned Guitar Rig 6 LE aficionado, I’ve found the silver lining in these technical hitches. They’ve given me an opportunity to dive deep and understand the intricacies of this powerful tool, perfect my troubleshooting process, and develop valuable insights I am eager to share with you.
Navigating issues with Guitar Rig 6 LE may involve addressing challenges related to installation, sound configuration, plugin compatibility, or other setup-related complexities. Yet, however confounding these may seem, rest assured there are solutions aplenty to overcome them. Begin with the basics: ensure your rig is correctly installed and configured, rule out hardware issues, and always keep your software updated. For problems that persist, further investigation and adjustment of settings may be required.
By sharing this journey together, this seemingly challenging process can actually help you gain a deeper understanding and appreciation of your Guitar Rig 6 LE. So before you let initial problems dampen your enthusiasm, remember that troubleshooting is not merely a step towards resolution; it’s a path towards mastery.
The information and tips contained in this article should substantially alleviate and streamline your troubleshooting process. Stick with it, and before long, you’ll find those initial pitfalls have gifted you a rounded command and gratifying control over your Guitar Rig 6 LE. Embrace the learning, create the music, and let Guitar Rig 6 LE become your trusted partner in your musical journey.
FAQs
What is Guitar Rig 6 LE?
What are the key features of Guitar Rig 6 LE?
What are the differences between Guitar Rig 6 LE and the previous versions?
How to effectively use Guitar Rig 6 LE?
Conclusion
Ready to rock the world with this newfound understanding of Guitar Rig 6 LE? Let’s recap what we covered. We familiarized ourselves with the unique features of Guitar Rig 6 LE, dived into its significant differences compared to other versions, and even navigated through its usage guide.
Guitar Rig 6 LE is not just a tool, it’s a platform for creativity. Through this guide, my ultimate aim was to educate you about its features and potential, simplifying the complexity behind this advanced tool. I believe I was able to impart my personal joy and passion for guitars and their supplements.
Remember, practice is the key. The troubleshooting guide and FAQs should help you navigate any hurdles you come across. And who knows? Soon enough, you too might be passing on your knowledge about Guitar Rig 6 LE to others, just as I am doing. As you embark on this journey of exploration and discovery, I hope you will fully experience the joy this wonderful tool can bring.
To wrap it up, understanding and effectively using the Guitar Rig 6 LE is about merging technical knowledge with creative passion, thereby enabling you to create the music that truly resonates with your spirit. Here’s to making great music!