The moment I discovered Tru-Oil’s transformative power in guitar finishing was a turning point in my lutherie journey. That first coat opened my eyes to its *unmatched ability* to enhance the natural beauty of wood while delivering a resilient, professional finish. Intrigued by how something so simple could completely revive the aesthetic and playability of a guitar, I dove deeper, uncovering the secrets behind its *unparalleled advantages*. Yet, the true magic lies not just in the product itself but in the techniques that accompany its application. With years of experience in crafting and restoring instruments, I’ve learned that a finish can indeed *make or break* an instrument’s appeal.
In this guide, I will share my insights and expertise, guiding you through the nuanced world of Tru-Oil guitar finishing. We’ll explore its benefits, the optimal techniques for **wood finishing**, and the subtle tricks that can elevate your guitar to new heights.
What is Tru-Oil?
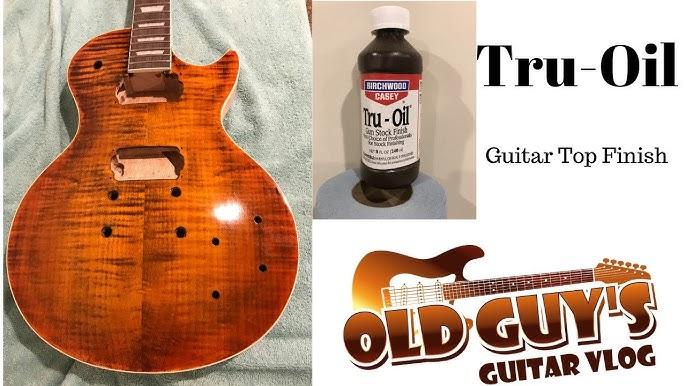
As an editor of the Savart Journal, I’ve delved into the world of guitar finishes, meticulously comparing options for both their aesthetic and functional qualities. In my journey, one product consistently stands out: Tru-Oil. But what if I told you that a simple oil can alter the destiny of your guitar? This statement may sound bold, yet Tru-Oil holds that transformative power. Its unique blend isn’t just about enhancing visual appeal; it’s a medium that penetrates deeply into the wood, fortifying it while unveiling its innate beauty.
Tru-Oil is more than just another finishing option; it’s a legacy finish that has been trusted by luthiers and craftsmen for decades. This remarkable oil melds non-toxic properties with durable, lasting protection, making it an appealing choice for both professionals and hobbyists alike. In comparison with other finishing oils, Tru-Oil excels in its ability to penetrate finishes effectively, offering a rich, glossy finish that is surprisingly easy to maintain. Its adaptability on various wood surfaces renders it not just a finish, but a personal statement carved into the history of your instrument.
Tru-Oil challenges us to reevaluate the relationship between artistry and practicality in guitar finishing. As we explore this guide further, you’ll discover when and why Tru-Oil might be the perfect choice for your next project, enriching both your skills and your instrument’s legacy.
Why Use Tru-Oil for Guitar Finishing?
Could an oil finish actually enhance your guitar’s tonal qualities? This question intrigued me on my journey to find the perfect finish for my instruments. From my personal experience, I discovered that Tru-Oil offers a fusion of protection and tonal enhancement, making it an exceptional choice for guitar finishing.
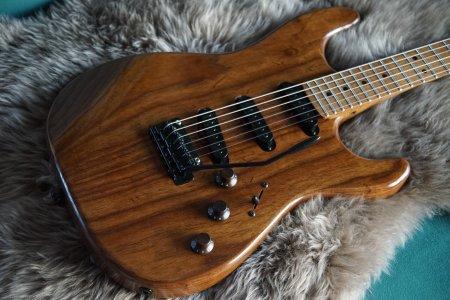
One of the primary advantages of using Tru-Oil is its ability to bring out the visual beauty of the wood while enhancing its natural sound properties. Unlike thicker finishes, Tru-Oil is thin enough to allow the wood to resonate freely, which many believe can improve the overall acoustic performance of the instrument. In my experience, it not only protects but also allows the wood to breathe, optimizing resonance.
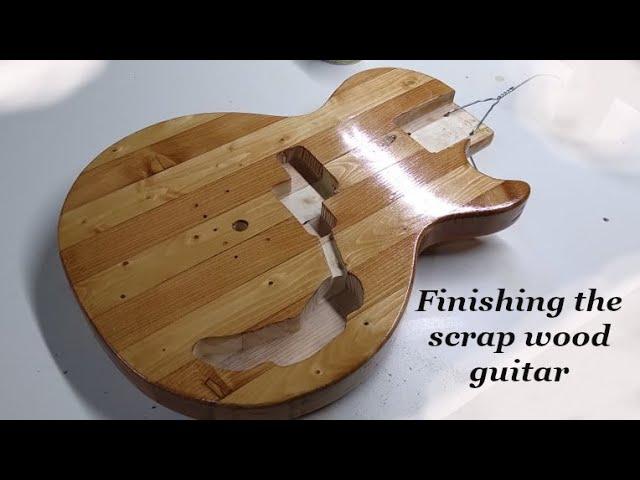
An oil finish for guitars like Tru-Oil also provides a stunning visual transformation, highlighting the wood grain enhancement so effectively that each unique pattern of the wood is showcased impeccably. Applying this finish has often felt like revealing the hidden character of the wood, producing a warm, inviting glow that synthetic finishes cannot replicate.
For these reasons, Tru-Oil remains my preferred choice, merging aesthetic appeal with the potential for enhanced sound quality. As you consider options for finishing your guitar, keep in mind the unique balance of protection, beauty, and resonance that Tru-Oil can offer.
Who Should Use Tru-Oil?
Embarking on the journey of guitar finishing can feel daunting, especially for beginners. Whether you’re a first-time hobbyist or a seasoned luthier, the process of applying a finish to your guitar is a transformative step. Is Tru-Oil just for seasoned luthiers, or could it be the perfect choice for beginners too? As someone who has guided many newcomers through their first guitar projects, I’ve witnessed first-hand how Tru-Oil can empower anyone to achieve professional-grade results.
Hobbyists and tinkerers often wonder if they’re tackling more than they can handle with a guitar-finishing project. Fortunately, Tru-Oil serves as a bridge between ambition and achievement. Its user-friendly application process and stunning final results make it a popular choice in the beginner’s guide to Tru-Oil. Unlike more complex finishes that require spraying equipment and a controlled environment, Tru-Oil can be applied by hand and allows for a forgiving experience when learning the best practices of guitar maintenance.
In essence, Tru-Oil can offer just as much to the novice as it does to the expert. Its popularity is built on not just its ease of use, but also on the quality finish it offers, inviting any would-be guitar craftsman to discover their potential. You’ll find that as you navigate this guide, even as a first-time user, Tru-Oil can open doors to impressive craftsmanship.
When to Finish a Guitar with Tru-Oil?
Timing is everything when it comes to finishing a guitar with Tru-Oil, and through years of hands-on experience, I’ve developed a keen intuition about when to move forward in the coating process. What’s the secret timing that can make your Tru-Oil finish shine brighter? The answer lies in establishing a meticulous finishing schedule that works with the wood’s natural ability to absorb the oil while allowing it ample time to cure.
Over the years, I’ve learned that patience is a critical virtue; waiting for each coat to dry thoroughly is paramount. It’s tempting to rush ahead, driven by enthusiasm to see that glossy sheen appear. However, this eagerness can inadvertently compromise the finish, leading to uneven coatings or, worse, a tacky surface that never quite hardens. Using my developed expertise, I normally allow at least 24 hours between coats, all while carefully monitoring the ambient temperature and humidity levels, which also play a crucial role in the curing process. This attentiveness ensures each layer bonds perfectly with the previous one, building up a truly remarkable, professional-grade finish.
How to Apply Tru-Oil Finish
Preparation

Having built many instruments, I’ve learned that the journey to a great finish begins long before the oil touches the wood. This preparation phase is paramount in wood finishing and guitar care, ensuring a smooth and even application of Tru-Oil that highlights the instrument’s natural beauty. The foundation of a stellar finish rests on a meticulously prepared surface.
Firstly, we must sand the guitar body thoroughly, starting with a coarse grit and progressively moving to a finer grit until the surface is glassy smooth. This attention to detail prevents any imperfections from marring the final result. Vacuum and tack cloths are invaluable for removing dust particles that could embed in the finish. Secondly, ensure the workspace is clean and free from contaminants. This prevents unwanted particles from adhering to your work and ensures a pristine environment for application.
In my experience, patience and due diligence in these preparatory steps are crucial. Proper preparation sets the stage for the next phase: the actual application techniques, where the magic of Tru-Oil truly begins to shine.
Application Techniques
Understanding the nuances of guitar finishing techniques is essential in achieving a perfect Tru-Oil finish. Having experimented with various methods, I’ve discovered that technique can greatly influence the finish’s aesthetics and durability. Here’s how I’ve refined my process.
First and foremost, it’s crucial to start with a smooth, clean surface. Sand the guitar body evenly with fine-grit sandpaper; I find that 320 to 400 grit works best. Once the surface is prepped, apply the Tru-Oil in thin, even coats. Some prefer to use lint-free cloths, but I’ve had excellent results using my fingertips, which allows for more control and a closer feel to the wood.
Layering is key. Apply a coat and then let it dry for several hours. I typically apply between three to ten coats, depending on the desired depth of finish. Allow each layer to dry thoroughly before gently smoothing it with 0000-grade steel wool. This not only removes imperfections but creates a base for subsequent layers to adhere better, enhancing the finish’s durability.
Transitioning smoothly into the next stage, curing is essential for achieving maximum durability. As you can see, these application techniques are the backbone of ensuring that your Tru-Oil guitar finish not only looks stunning but stands the test of time.
Curing and Maintenance
After the application of Tru-Oil, the focus shifts to the *essential processes* of curing and maintenance. In my lutherie practice, I’ve seen innumerable times how the successful **curing stage** can impact the longevity of a guitar finish, and a well-cured Tru-Oil finish holds up beautifully over time. Curing involves allowing the oil to harden adequately, which typically takes several weeks. I’ve learned to exercise patience during this phase to ensure the finish achieves its maximum durability.
Once cured, maintenance becomes the cornerstone of preserving that glossy luster. Regular *guitar maintenance* is crucial—not just for appearance, but also for protection against wear. Occasionally, you may need to address minor scratches or dull spots, and knowing how to *effectively repair a Tru-Oil finish* is a skill that rewards with significant returns. Regular maintenance, combined with proper care during the curing stage, can extend the life and beauty of your instrument’s finish indefinitely, making it a *worthy investment* for any guitar enthusiast.
Tips for Achieving Desired Results

As an educator in lutherie, I’ve spent years helping students and clients perfect their guitar finishes, and I’ve gathered invaluable tips along the way that have repeatedly proven successful. Achieving a flawless finish with Tru-Oil is an art, one that combines the right techniques with patience and practice. What are the insider secrets that can help you achieve that flawless Tru-Oil finish? Let me share some of the best practices that I’ve found to be most effective.
First, always start with a meticulously prepared surface. Sanding your guitar to a fine grit, such as 600, provides the smooth canvas Tru-Oil needs to reveal its true advantages. The trick is to apply thin, even coats. Too much too soon can lead to uneven surfaces and longer curing times. Use a clean cloth, not a brush, to maintain control and avoid streaks.
Between applications, allow sufficient time for curing. Depending on your environment’s humidity and temperature, this might mean waiting a full day. Trust me, patience is your ally here. During this period, a light buff with ultra-fine steel wool can help maintain the surface’s smoothness and prepare it for the next layer.
Finally, remember, keep your workspace clean. Dust can be your biggest enemy, so constant vigilance is essential. These finishing techniques, once mastered, can dramatically enhance the aesthetic and protective quality of your guitar finish. Follow these guidelines, and you’re well on your way to transforming your project with an amazing, professional-grade Tru-Oil finish.
Troubleshooting Common Issues
In the ever-evolving world of guitar finishing, the application of Tru-Oil can be both rewarding and, at times, challenging. What should you do when things don’t go as planned with your Tru-Oil finish? With each project I’ve undertaken, I’ve encountered my fair share of unpredictable hurdles, transforming each misstep into a valuable learning experience. When working with Tru-Oil, being prepared to address issues is crucial for achieving that flawless, professional finish.
The first step in repairing a Tru-Oil finish is to identify the specific problem. A common issue is the appearance of blotches or streaks. This often results from uneven application or inadequate drying between coats. To tackle this, gently sand the affected area with fine-grit sandpaper, ensuring that you blend the edges seamlessly with the surrounding finish. Follow this by reapplying thin, even coats, allowing ample time for each layer to dry completely.
Another frequent challenge involves the Tru-Oil’s durability under varying conditions. If your finish begins to show wear too quickly, reassessing the curing process is advisable. Allowing the finish to cure in a controlled environment, free from dust and excess moisture, enhances its longevity and resilience.
With experience comes the wisdom of troubleshooting; I’ve faced many challenges and learned how to resolve them effectively. By approaching each obstacle with patience and precision, you can transform potential setbacks into opportunities for improvement, ensuring your next Tru-Oil finish is robust and beautiful.
FAQs
What is Tru-Oil and why is it popular for guitar finishes?
How do you apply Tru-Oil on a guitar?
How many coats of Tru-Oil are recommended?
Can Tru-Oil be used over an existing finish?
How do you maintain a Tru-Oil finish on a guitar?
Conclusion
What are the lasting impressions you’ll take away from mastering Tru-Oil applications? As I reflect on my lutherie journey, the mastery of Tru-Oil has been a highlight that continuously rewards both makers and players alike. Delving into the art of *wood finishing*, Tru-Oil offers distinct advantages for *guitar finishing techniques*, transforming raw wood into an exquisite instrument with its deepening sheen and enduring protection.
Through meticulous steps from preparation to curing, *Tru-Oil advantages* become clear: it enriches the wood’s natural beauty and safeguards it against the rigors of performance. Whether you are a seasoned luthier or a passionate DIY enthusiast, the techniques explored here ensure you achieve a professional finish that resonates with quality and resonance.
Ultimately, the journey with Tru-Oil transcends mere application; it’s an immersive art that melds tradition with innovation, allowing your craftsmanship to shine. This mastery not only *elevates your skill* but ultimately enhances the musical experience for those who play with your creations.
R.M. Mottola, an engineer-turned-luthier, revolutionizes stringed instrument design with his deep focus on acoustics and ergonomics since 1994. As editor of the Savart Journal and a key contributor to American Lutherie, Mottola merges science with artistry in lutherie. He enriches the field with his extensive knowledge, shared through his Liutaio Mottola website, making him a beacon in the world of modern instrument craftsmanship.