Imagine, you’re about to step onto the stage, guitar in hand. The buzzing anticipation of the crowd is nearly palpable. As you take your first striding step, your guitar strap gives way, and your cherished instrument plummets towards the stage. That was my reality in one of my earliest performances, and it’s a memory that still strikes a note of discomfort. What’s more uncomfortable is that this could have been avoided with a proper understanding of ‘how to put a strap on a guitar’.
Many dismiss the guitar strap as just one of many ‘guitar playing accessories’, but my years of experience touring the world as a professional guitarist has taught me, it’s a vitally important extension of the performer. From ensuring your ability to play comfortably and move freely, to safeguarding your precious guitar from accidental falls, using a guitar strap correctly is integral to your performance.
You may be thinking it’s a simple task to attach a strap to a guitar, and you wouldn’t be entirely wrong. However, this seemingly simple task holds more depth than meets the eye. To this end, I’m eager to share my expansive knowledge on the matter. Tune your attention in and get ready to step up your guitar game, one strap at a time.
Identifying the Guitar Strap Parts
Understanding Strap Buttons
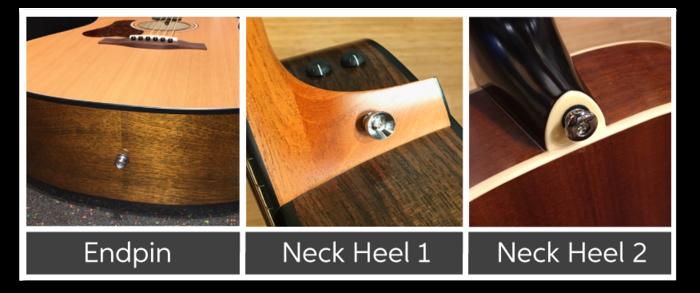
Prior to diving into the process of attaching the strap, it’s essential to have a thorough understanding of ‘guitar strap buttons.’ As we explore the anatomy of your instrument’s strap components, my wisdom from years of experience demonstrates that strap buttons often underestimated, play a fundamental role.
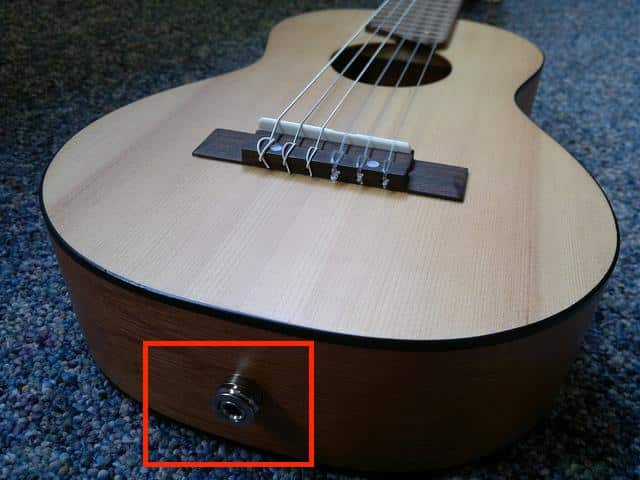
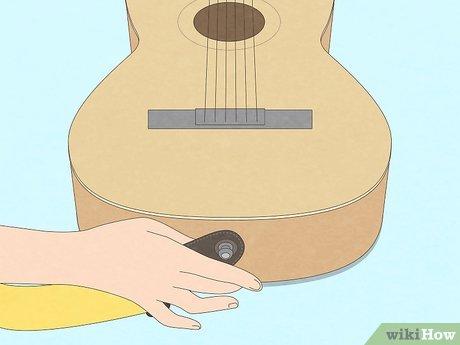
Guitar strap buttons are small, usually metal, knobs placed at two end points of the instrument, one near the base of the body, the other on the upper bout or the horn of the guitar. Their primary function is to securely hold the strap, thereby aiding in maintaining balance while playing. The strap buttons ensure the safety of your valuable instrument by keeping it secured to your body and preventing accidental drops or guitar slip-offs.
In my professional career as a guitarist, I’ve seen too many mishaps caused by neglect of these tiny but significant components. Therefore, I have learned to treat them with respect. I’ve also seen how customizing or upgrading them can make a world of difference in the overall playing experience.
So, before we delve into attaching straps to different types of guitars, remember that patience and care in handling and understanding the functionality of strap buttons will set the foundation for a smooth, accident-free performance-tuned setup. They form a small but critical piece in the puzzle of strapping your guitar correctly and secure.
Now that you are well-versed in the relevance of strap buttons, our next stop in this journey is learning the attachment process starting with electric guitars.
How to Attach a Strap to an Electric Guitar
Installing Strap Locks
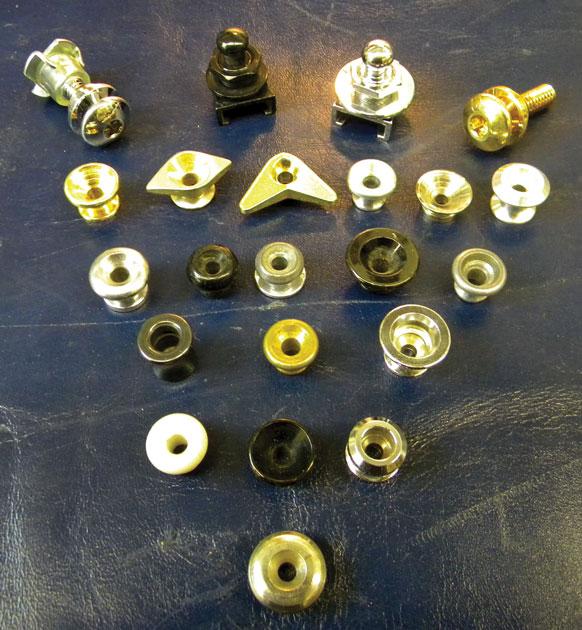
Continuing from understanding how to attach a strap to an electric guitar, let’s now delve deeper into enhancing security with strap locks. As a guitarist, I strongly recommend installing strap locks on your guitar. Strap locks are an absolute lifesaver. I cannot count the times, they’ve saved my guitar from an accidental drop. Let me share with you how to install them correctly.
You begin by removing the existing strap buttons on your guitar using a screwdriver. Then, install the new strap locks according to the manufacturer’s instructions. Usually, this involves screwing the base of the lock into the guitar where the old strap buttons were, and attaching the lock mechanism to the strap itself. Now, your guitar strap can securely attach to your guitar. Simply slide the lock through the strap button, and it will lock into place, providing a solid and secure connection.
Not only do strap locks offer inherent safety for your instrument but they also allow more freedom in your onstage movements. This way, you don’t have to worry about your guitar getting dropped during an energetic performance.
Moving onto our next section, we will look at how to attach a strap to an acoustic guitar. A slightly different process, but with the same end goal in mind – secure and comfortable playability. Although the value of strap locks isn’t lost on acoustic guitars, the process of installation differs slightly, given the structural differences in the instruments themselves. Let’s dive in and explore the nuances.
In conclusion, taking the time to install strap locks on your guitar can save you from potentially costly repairs and ensure your performances proceed without hitch. Remember, a little bit of prep work can go a long way in ensuring your peace of mind while playing.
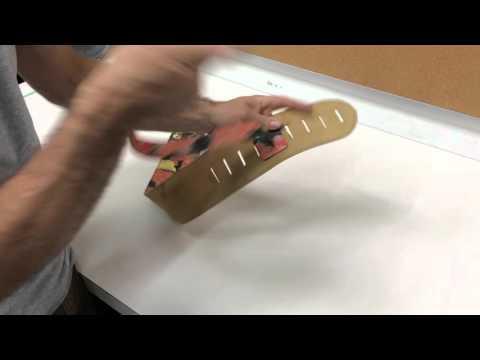
How to Attach a Strap to an Acoustic Guitar
Tying a Guitar Strap
Continuing from our exploration of attaching straps, there are circumstances when you might not have strap buttons or you may prefer a different sort of suspension. Enter the method of tying a guitar strap. This technique has been a reliable fallback for me in many performances and it’s a valuable skill to adopt.
Firstly, ensure your guitar strap is fit for purpose. Leather straps, while durable, are not ideal for this method. Aim for a strap made of cloth or soft, pliant material. The strap should have a string or lace at one end. If not, an old shoelace is a decent stand-in.
Start by detaching the end of the strap with the string from the lower strap button. Lasso the lace around the headstock, above the nut and below the tuners. Making sure to avoid entangling the tuning pegs, thread the lace back through the hole at the end of the strap. Pull tight, ensuring the knot is secure.
Now comes the fine-tuning. Adjust the strap’s length so that your comfort and playing posture is maximized. The guitar’s neck should be angled slightly upwards facilitating easy access to the fretboard. Being comfortable, relaxed and natural during performances is greatly boosted by this small tweak in the tying a guitar strap process.
This technique greatly contributes to the parent category ‘How to Attach a Strap to an Acoustic Guitar’. When traditional methods aren’t applicable, knowing an alternative such as this, is far from being a trivial trick up your sleeve. Crafted from my personal trial and error over countless performances, this method is all about flexibility, adaptability, and ensuring utmost comfort.
As we move forward in our comprehensive guide, keep these highlighted points in mind as they are essential in not only tying a guitar strap but also, as you’ll later see, in adjusting and securing it. This is just another step in your guitar journey, let’s advance to discover more.
Attaching Strap Without Button
Continuing from our insightful discussion on tying a guitar strap, let’s tackle an interesting chapter that emerges from my personal experiences – Attaching Strap Without Button. There have been times when I’ve needed this workaround, and I’m thrilled to share those with you.
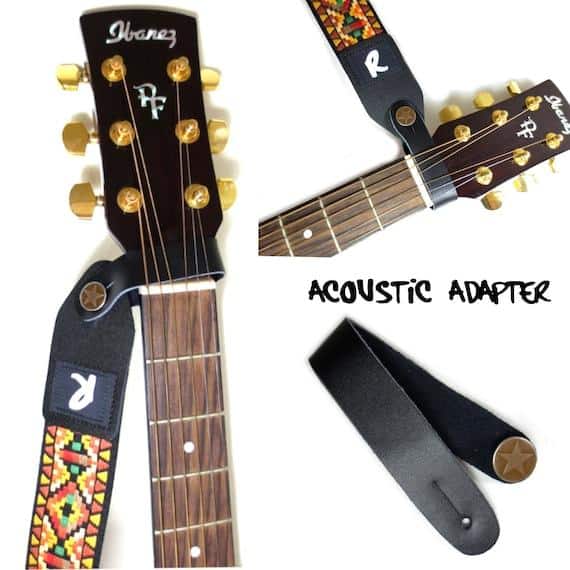
First and foremost, it goes without saying that not all acoustic guitars come with strap buttons. Some have a single button at the bottom, while others come with none. But does that limit your ability to attach a strap? Absolutely not. Over the years, I’ve mastered a few workarounds that’ll help you get your guitar strapped up and ready to rock, even without a button.
Consider using a headstock strap button adapter. This tool loops around the headstock of your guitar, allowing you to attach the top end of your strap there. You can also use strap locks designed for guitars without buttons. These locks clamp onto the guitar’s edge, either at the base or behind the neck, providing an attachment point for your strap.
In some cases, you may need to combine multiple solutions. Always remember, your comfort and the guitar’s safety are paramount when attaching a strap without a button.
Mastering this technique is a testament to your adaptability and commitment to your craft. It takes patience and practice, but keep at it, and soon it’ll be second nature.
Understanding these complexities in the strapping process contributes significantly to our broader topic ‘How to Attach a Strap to an Acoustic Guitar’. Stay tuned as we delve into further details in the upcoming section on ‘Adjusting Your Guitar Strap’. Let’s continue this journey in creating an easily comprehensible guide on ‘How to Put a Strap on a Guitar’.
Adjusting Your Guitar Strap
So, we’ve got our strap set up and secured, it’s now time to dial in the perfect length for your comfort and performance. But where do you start? With guitar strap adjustment, it’s all about balance and personal preference.
When I first hit the stage many moons ago, I had my guitar strap adjusted incorrectly, making it uncomfortable to play for lengthy periods. If your guitar feels like it’s wrestling against you, you’re on the wrong path, my friend. Over the years, I’ve learned that optimising the guitar strap length takes some trial and error, and it’s a process unique to each player.
Did you know a well-adjusted guitar strap can elevate your performances to the next level? The guitar should feel like an extension of your body, hanging in a place that lets you move and perform with ease. If your guitar feels awkward or out of place, it’s time to fine-tune that strap!
When embarking on the process of guitar strap adjustment, first take note of your general playing style. Whether you agilely prance around the stage or you’re more of a low-key strummer, these traits will dictate the length of your strap. Too high and you might look like you’re cradling a ukulele, too low and you risk straining your wrist or putting unnecessary pressure on your back.
The sweet spot? Aim to position your guitar so your hand naturally lands on the neck at roughly a 120-degree angle, still enabling full chord reach without straining. Remember: comfort is key!
Do keep in mind, though, there is no one-size-fits-all when it comes to guitar strap length. You might need to adjust it section by section, play a bit, adjust it again, repeating until it feels “just right”. There’s no shortcut here.
Once you’ve found your ideal strap length, give it a test run during a practice session. Beyond feel, a properly adjusted strap can dramatically impact your performance – freeing up your hands for expressive playing and limiting any chances of fatigue or strain.
Your strap is not just a tool to keep your guitar from falling off your shoulder; it’s a critical element of your performance. So, finesse it, adjust it, and make it your own. In the next section, we will dive into the DIY setup of your guitar strap to ensure the best possible playing experience. My years of stage experience taught me this: a well-balanced setup is well worth the time investment!
DIY Guitar Strap Setup
Building off the foundation we’ve laid out about the intricacies of a guitar strap setup, let’s add a dash of creativity. With your newfound knowledge about various aspects of guitar straps, their buttons, attachment methods, and adjustments, we’re now ready to explore how to craft a unique DIY guitar strap setup. It’s in these small personal touches where you can truly express yourself and your style.
Want to stand out from the crowd? Let’s create a unique guitar strap setup that is all you!
As a performing artist, I’m often inspired to personalize my guitar setup, including the strap. Embracing this DIY spirit not only gives a creative outlet but it also serves a practical purpose; a well-crafted DIY guitar strap can be just as durable, if not more so, than conventional straps. Plus, it’s bound to be a conversation starter among fellow musicians or observers.
When I start to conceptualize my DIY guitar strap setup, I always consider the material first. Fabric straps offer flexibility and can be sewn together with complex patterns or embellishments. Leather straps, on the other hand, provide a sturdy base for heavier guitars but allow less room for intricate designs. Still, carving, etching, or beadwork can turn a simple leather strap into a masterpiece.
Next, think about the length and width of your strap. Trust me, nothing is worse than a beautiful strap that doesn’t sit right or a strap that is too skinny to be comfortable over time. When cutting material, keep in mind your playing style, height, and the weight of your guitar. A well-planned guitar strap setup ensures not just aesthetic pleasure but also optimal performance.
Now, emboldened with your straps’ perfect lengths and widths, let’s detour into the world of embellishments. Personalizing your strap with unique motifs, band patches, name initials, or personal artwork can transform a simple strap into a statement piece. Always ensure that the embellishments are securely attached and believe me, they’ll endure countless performances.
Now, the last, yet equally important stage, attaching those buttons. Remember from our earlier discussions about the importance of secure attachments? The same applies here. When working on your DIY guitar strap, make sure that your strap buttons are secured onto the ends of the straps correctly and snugly. It’s your peace of mind knowing that your beloved guitar will not fall off mid-performance.
In my experience, a DIY guitar strap setup not only delivers a platform for expressing creativity, but it also provides unparalleled comfort and design. From choosing the material and sizing it all the way to the moment of fastening the strap buttons, this labor of love is worth every stitch, every bead, and every etch.
Putting together your DIY strap requires patience, creativity, and above all, the will to make something truly personal. The sense of accomplishment and pride you feel when strapping on a guitar with your own uniquely crafted strap is unparalleled. It’s another layer of connection to your music and your instrument. So, I encourage you; let’s invest that small extra time and effort to create something truly memorable and special.
FAQs
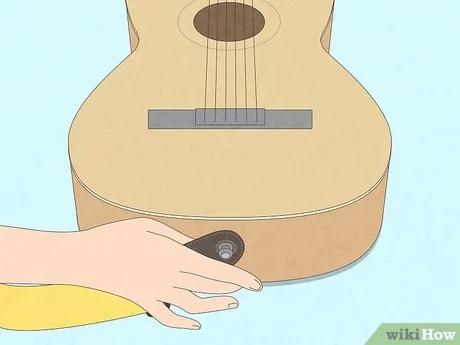
Securing a Guitar Strap
Securing a guitar strap correctly is the cornerstone of any DIY guitar strap setup. The safety and stability of your instrument while playing relies heavily on this step. I’ve spent countless hours onstage and in rehearsal making sure my strap is securely fastened—not only for the peace of mind but also to enhance my performance quality.
Properly securing a guitar strap doesn’t just keep your instrument safe, it also allows you to explore your full range of movement as an artist. From my experience, I’ve learned that a well-secured strap supplies the confidence needed in every performance, knowing your guitar will be there with you no matter how hard you rock out.
It’s not an elaborate process, and everyone—novice or pro—can master it with practice. You don’t want your guitar slipping or falling while you are engrossed in your music. By accurately attaching your strap, you can prevent such mishaps and maintain focus on your performance.
To sum up, securing a guitar strap profoundly contributes to a seamless performance, and is an essential skill in the toolkit of every guitarist. Stay tuned as we dive deeper into this process in the next sections of this comprehensive guide.
Conclusion
In our exploration of guitar strap installation, we’ve covered every crucial aspect; from identifying the parts and understanding strap buttons to attaching and adjusting the strap, even offering DIY solutions. We’ve also delved into the specifics of strap locks and solutions when there’s no button available.
Remember, properly installing and adjusting your guitar strap not only adds to your comfort while playing, but it also deepens your bond with your instrument. And that’s why understanding and implementing these steps is vital. So, are you now ready to make the most of your guitar strap and enhance your performance?
I hope this comprehensive guide has offered you valuable insights into the necessity and process of setting up your guitar strap correctly. The key takeaway: a well-installed and adjusted strap maximizes your performance potential and playing comfort. No matter the type of guitar you own or the music you love to strum, a properly installed strap should be a significant part of your set-up. Never underestimate its relevance or neglect its setting.
By following these guidelines, you’re not just securing your instrument; you’re elevating your musical journey. Here’s to creating beautiful music, comfortably and confidently.