Few sounds capture the grit, power, and intensity of a rock concert like the blast of a Flying V guitar, launched into musical orbit by its master. Ahead of the curve since the late 1950s, this iconic instrument has been synonymous with the rock ‘n’ roll revolution. Imagine crafting your own piece of that revolution with your DIY Flying V guitar kit.
This is more than just an article; it’s your stepping stone to creating musical magic.
As a luthier and engineer with over two decades of experience, I’ve spent years exploring the beautiful canvas of custom guitar building. Like an astronaut gearing up for a cosmic voyage, harnessing the power of physics to evoke emotion through music has been a thrilling journey. Delving into the heart of a Flying V guitar kit is not merely an assembly process – it’s a transformative ritual.
A blank canvas, your Flying V guitar kit awaits your personal touch. Take a deep breath, and let’s plunge into the vibrant world of guitar production, where science and sentiment intersect to create symphonic nirvana.
Why Choose A Flying V Guitar Kit?
Understanding the Features of Flying V Guitar
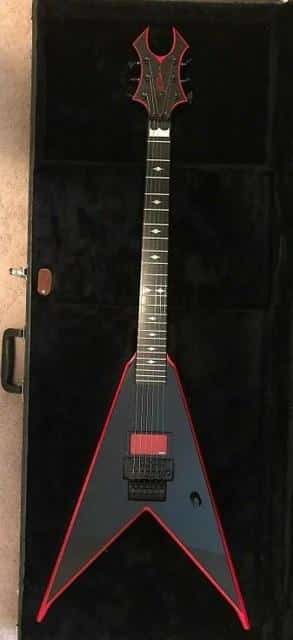
In my years of researching instrument acoustics, I’ve come to understand that each feature of a guitar contributes significantly to its overall sound. The Flying V Guitar kit exemplifies this principle with its unique features—an ebony fretboard, a basswood body, and humbucking pickups.
The ebony fretboard is revered for its bright, sharp tonality and impressive sustain. Its dense, smooth surface not only gives you a fast and comfortable playing experience, but it also offers longer-lasting tones that resonate beautifully. In essence, the ebony fretboard gives the Flying V its distinctive crisp and clear sound.
Complementing this is the basswood body. Lighter in weight than many other tone woods, basswood is appreciated for its balanced sound—from warm lows to well-defined highs. But it doesn’t stop there; the basswood body also enhances comfort, making the Flying V easier to handle during lengthy gigs or practice sessions.
Then there are the humbucking pickups. These are a game-changer, eliminating frustrating hum noises and boosting output. Humbuckers are key to attaining that clean, flawless sound, making them indispensable for metal and rock genres.
Together, these features set the Flying V guitar kit apart, providing not only fantastic sound quality but also ease and comfort of use. As we progress through this guide, you’ll learn how these elements come together in assembly, culminating in a guitar truly unparalleled in its quality and performance.
Introduction to Custom Guitar Building
Delving deeper into the world of custom guitar building can significantly enhance your experience with your Flying V Guitar kit. Drawing from my extensive knowledge, honed over the years by my engineering background, love for music, editorial services for assorted lutherie books, and frequent contributions to the American Lutherie Journal, I shall guide you through this fascinating journey.
Building your own guitar is more than merely following assembly instructions. It extends to a personalised crafting process that can render unique tonal characteristics to your instrument. The Flying V guitar’s iconic design offers a fantastic canvas for customisation, making it an excellent choice for those interested in custom guitar building.
Your involvement in the building process allows for a deeper connection with your instrument and an enriching understanding of its intricacies. Assembling a Flying V guitar kit offers a hands-on exploration of guitar mechanics and acoustics, opening a doorway to the diverse world of lutherie.
Let us embark on the transformative journey of building your own guitar. As we go on, you’ll realise that this endeavour is not just about creating personalised music equipment; it represents the art of lutherie, the science of sound, and the appreciation for fine craftsmanship. So gear up as we delve into the next section: understanding the features of your Flying V guitar.
How to Assemble your Flying V Guitar Kit
Step-by-Step Assembly Guide
After a careful study of intricacies of Flying V Guitar and the science of custom guitar building, let’s now delve into the vivid world of guitar kit assembly with this comprehensive Step-by-Step Assembly Guide. Cognizant of the worth vested in each component and the delicate interplay among them, we will methodically piece together your Flying V Guitar Kit.
Following my years of experience, structural understanding, and the quintessence captured from my numerous publications on the scientific and ergonomic aspects of stringed instrument making, I am thrilled to lead you through this enriching and fascinating endeavor.
I will elucidate each pertinent move, describe each tightening of a screw, and lay bare the subtleties of a successful kit assembly process. We will traverse this journey from the perspective of an artisan, evoking a sensorial experience that blends the aesthetics of a craft with the architectural precision of a scientific pursuit.
The fusion of two worlds—the abstract and the concrete, the artistic and the technical—has been the driving force of my enduring fascination with guitar kit assembly. It is my heartfelt hope that as you begin to appreciate this blend of craftsmanship and engineering, you too will fall in love with the process. This kit assembly guide is not just about transforming a pile of parts into a functional instrument, but about creating something beautiful that you can take immense pride in.
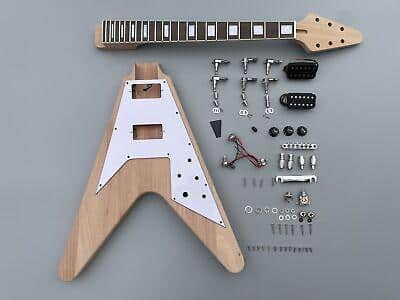
So, with a guitar’s anatomy in mind, we will first gather the components: the body, neck, bridge, and strings, among others. We will study each of these parts together, understanding their unique contributions to the symphony a guitar creates. Then, slowly and deliberately, following my proven step-by-step method, we will assemble these pieces into the iconic Flying V form.
After completing this guide, you will not only acquire a fascinating new skill, but also a profound sense of accomplishment. The guitar you craft with your own hands from this kit will sound even more extraordinary because of the hours, the dedication, and the love you invested in its creation. Your new Flying V will truly be a reflection of you — unique and filled with the energy and passion you put into it.
In the following section, we will further expand on the art of guitar wiring and soldering, shedding light on the essence of personalized guitar sound and tonal character. With such a degree of understanding and skill in guitar assembly, soon you’ll be wielding your very own, self-assembled, customized Flying V Guitar Kit.
Continue ahead, with the rhythm of an artisan echoing within, to explore the next frontier of your journey. The song gains momentum; the harmony is yet to unfold.
Guitar Wiring and Soldering
Guitar wiring and soldering are the beating heart of your Flying V guitar, a realm of craftsmanship that lies at the intersection of science and artistry. Having honed my skills in the scientific and technical realms of guitar assembly, I consider it my honor to guide you towards sculpting the true sound and soul of your guitar.
I should emphasize, first and foremost, that a deep understanding of guitar wiring is crucial. The intricate labyrinth of wires that channel your music from point A to point B, need to be correctly arranged and connected. This doesn’t only ensure the clarity of your sound, but it opens the door to a whole universe of tonal modifications and customization options.
At its core, wiring a guitar involves connecting pickups to the potentiometers (volume and tone knobs), to the pickup selector switch, and finally to the output jack. While this process may sound straightforward, it’s the subtleties in these connections that will be the deciding factors in your guitar’s performance.
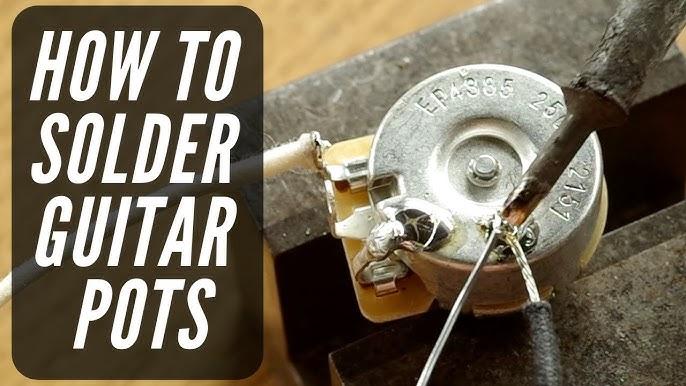
Now, as you dive into the procedure, you’ll need to navigate soldering guitar parts. This is where your technical ability reaches its crescendo as you melt tiny blobs of solder wire to create enduring electrical connections. Take my word, your neatness in soldering is as important to your Flying V Guitar’s sound as the elegance of your guitar solos on stage.
Remember, soldering is the tango of heat and metal; too little heat and your solder won’t flow well, creating a weak connection. Too much heat and you risk damaging your components. Perfect soldering requires patience, precision and practice. A key tip here: always solder on a stable, heat-resistant work surface. Safety should be your prime concern.
Soldering and wiring your guitar contributes significantly to your sound quality. It helps ensure that the electrical signals from your pick-ups are strongly and clearly carried through to your amp. It’s the hidden mastery that makes a difference, the one that most guitarists overlook. And, you, you’re now in the know.
In the succeeding chapter, we will delve more into the delectable world of customization and making your Flying V truly stand out. But always remember, like every melody needs its rhythm, your Flying V Guitar’s assembly is inseparable from its effective wiring and soldering. It is the symphony in the silence, the hidden artistry that goes into crafting every chord, every note, every melody that emerges from your Flying V guitar.
Customizing your Flying V Guitar
As a luthier with years of experience in custom guitar kits crafting, I’ve discovered that the joy in our craft isn’t just about assembling a functional instrument. Rather, it’s about imbuing a piece of our soul into that instrument, creating something distinctly unique. And what better way to do this than by personalizing your Flying V guitar? Let’s delve deeper into this.
After assembling your guitar, are you ready to make it uniquely yours? Indeed, this is where the real fun begins – imprinting your personality on your instrument, transforming your superior Flying V Guitar kit into a guitar that speaks your musical language. Herein is the true essence of instrument crafting.
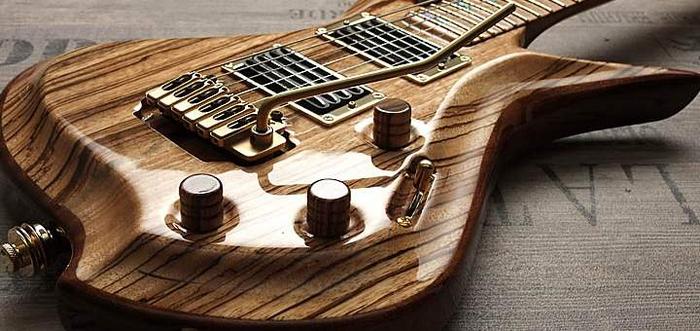
One of the critical areas to pay attention to is the finish. This is more than just the color or pattern on your guitar; it affects how you feel and interact with your instrument. Your choice should be a blend of something that not only aesthetically excites you but also feels great under your fingers. From glossy lacquers to satin finishes, and even raw, unfinished wood – there’s a myriad of options at your disposal.
However, remember this: whatever your choice, the process is not rushed. Guitar kit finishing requires patience and precision, allowing each layer to dry properly and sanding between coats to ensure a smooth, professional appearance. Take your time on this step, and your efforts will be rewarded greatly when you finally string up your completed masterpiece.
Yet, customizing your Flying V Guitar goes beyond finer aesthetics. Consider custom parts and hardware, all of which have the potential to take your guitar to new sonic heights. Whether it’s high-output humbuckers for those powering metal riffs or vintage-style tuners for that classic vibe, this is where you get to shape and refine your instrument’s voice.
Be adventurous! You can even venture into custom inlays on your fretboard, giving your guitar a distinctive aesthetic signature that’ll turn heads at every gig. It’s all about making this instrument something that’s part of you, an outward emblem reflecting your inner musical soul. After all, isn’t that the heart of custom guitar kits?
To truly excel at this craft, you’ll need to adopt a tinkerer’s mindset. Give yourself permission to experiment, to make mistakes, and learn from them. The path to mastery in instrument crafting isn’t paved with flawless successes but lessons learned through personal experience. So, go forth and explore the world of customizing, and remember – your Flying V guitar is more than just a block of wood, strings, and metal. It’s a personal expression, an exploration of your imagination brought to life through the art of lutherie.
As we now transition to some common questions (and their answers) regarding custom guitar building, keep these principles in mind. They’ll guide you on your journey, aiding you in realizing your vision of the perfect Flying V guitar. Remember, practice makes perfect, but personal touch breeds uniqueness. That’s instrument crafting for you.
FAQs
What is a Flying V Guitar Kit?
Do I need special skills to build a Flying V Guitar from a kit?
What will I find in the Flying V Guitar Kit?
How long does it usually take to build a Flying V Guitar from a kit?
Can I customize my Flying V Guitar when building from a kit?
Conclusion
In wrapping up this comprehensive guide, we have covered a vast array of topics from understanding the unique features of a Flying V guitar to intricate steps for assembling your DIY guitar kit. We’ve dived deep into custom guitar building, wiring, soldering, and how to personalize your Flying V guitar. The process of building your own guitar encompasses a blend of precision and creativity, tying into the gratifying journey of becoming a hands-on guitar enthusiast or even a budding luthier.
So, are you ready to strum your own tune on a guitar built by you? This sense of fulfillment is what pushed me to enter the magical world of stringed instruments, delving into every nook and cranny to uncover their secrets. It’s been a rewarding process and remains the core reason why I continue to explore and share these experiences with you.
With this guide, you now hold the keys to build your own guitar. Embrace the joy and challenges of the process. The experience will deepen your bond with the instrument, allowing you to truly make it your own. Strum your tune with the sense of accomplishment that comes from having built something from the ground up, with both skill and passion.