From the beating heart of rock n’ roll to the soulful blues – every note brings a guitar to life, but did you know it’s the frets that make that possible? I remember the first time I fell under the spell of these tiny trapezoidal wonders, sparking a curiosity that turned into a lifelong love affair – refretting a guitar.
The decision to dive into DIY guitar repair wasn’t easy, but a worn-out old guitar with fretbuzz and poor intonation pushed me. I was young, fearless, and utterly fascinated; I wanted that guitar to sing again as it once had. The path wasn’t straightforward. But where does the road take me? Hang on; we’re getting ahead of ourselves.
Before we delve into this journey, let’s establish the intriguing fact that refretting is more than just a repair task. It’s an art that affects the playability, tone, and performance of your guitar. It’s a craft rooted in precision, attention to detail, and, most importantly, patience. In this guide, you’ll learn not just the techniques but get to understand the essence of fret maintenance.
I’ve worked as a professional luthier for years, but my humble beginnings started with dilemmas and victories, many shared right here as I learned to master the art of refretting. Welcome to this exciting course, the culmination of those years packed with experience, passion, and dedication to this craft. Let’s dive right into it!
Understanding Guitar Fret Basics
Importance and Role of Frets
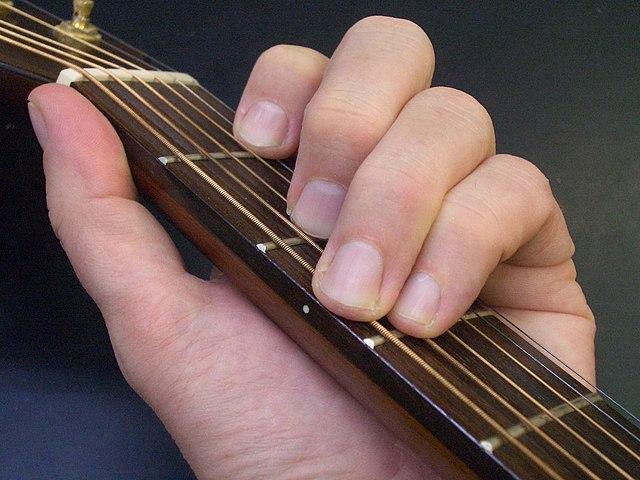
Understandably, ‘Understanding Guitar Fret Basics’ has appropriately set the stage for contemplating the significance and function of frets. From my extensive engineering and lutherie background, I’ve developed a profound appreciation for frets, recognizing them as far more than mere metal strips on a guitar’s neck. Indeed, frets incredibly shape the pitch, playability, and overall sound of a guitar.
Fret wear is an inevitable condition over time, especially with frequent guitar use. When frets lose their shape and height, intonation issues surface, making the guitar sound off-pitch or producing buzzing noises. Thus, a fret replacement becomes crucial to restore your instrument’s best performance. With this, a well-leveled and correctly installed new fret contributes significantly to an optimal guitar setup.
Recognizing this necessitates a certain finesse and precision that impacts almost every aspect of playing. Thus, frets take on a silently pivotal role in a guitar’s sound—and ultimately, the music you create.
Difference between Acoustic and Electric Guitar Refretting

Building on our broad understanding of guitar fret basics, let’s delve deeper into the specific nuances that separate an acoustic guitar refret from an electric guitar refret. My hands-on experience refretting both types of guitars gives me the advantage of sharing firsthand insights about these differences.
Acoustic guitar refretting requires more cautious handling due to the sensitive nature of the hollow body and the fretboard’s usual construction from softer, more delicate woods. Acoustic guitars often require precise neck adjustments pre and post refret. Adjustments are also essential if the original frets have grooves from prolonged usage.
In electric guitar refretting, the emphasis rests on maintaining the precision of the fret slots. This is critical due to the electric guitar’s reliance on electrical signals and the need for exact intonation. Unlike acoustic guitars, electric models are crafted from harder materials and therefore, might demand significant pressure while inserting new frets.
Remember, each guitar inherently carries its unique characteristics, irrespective of whether it’s acoustic or electric. Therefore, each refret project is an opportunity to familiarize yourself with these intricate variances and improve your mastery over this essential craft. The beauty of this learning process lies within these details and contributes significantly to the quality of your finished project. So, be patient, practice, and remember: every refret adds to your skills as a guitar enthusiast or a budding luthier.
Required Tools for Refretting
Armed with years of personal experience as a luthier, I’ve honed my techniques in guitar fretwork and built a cache of essential tools. These luthier tools for refretting and their proper usage have since become a revelation to me, making the process more straightforward, easily manageable, and even enjoyable.
Did you know refretting a guitar requires a specialized set of tools, with some that are unique to lutherie? It wasn’t long into my career before I understood that not just any tool could accomplish the precision-based tasks that refretting presents.
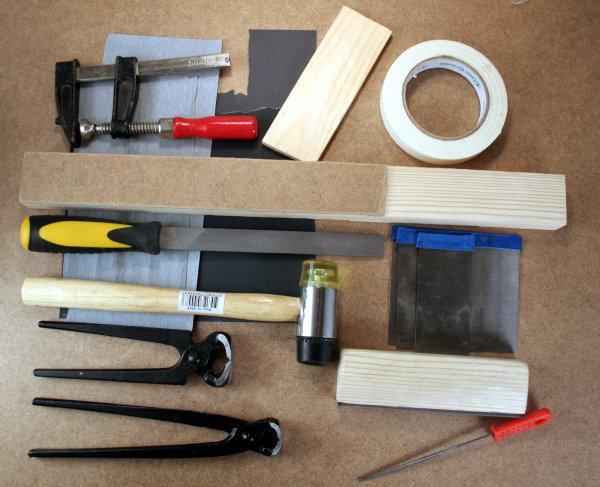
An essential part of my toolkit for decoiling fret wires is the soldering iron. Contrary to its usual applications, a soldering iron for frets isn’t used to mend electronic circuits but to warm and straighten the fret wire, easing its insertions into the slots on the fretboard.
Among the unique luthier tools, the fret puller stands out. Designed with a tapered jaw, it allows a secure grip on the fret, reducing chances of damage to the fretboard upon removal of the old frets. Meanwhile, the fret slot cleaning tool, thin and sharp-edged, enables swift removal of dirt and the barring adhesive from the slots.
Next, we have the fret press and fret hammer for setting new frets in place, exhibiting different approaches. The fret press grants more control and even pressure during use, which I prefer; however, the fret hammer demands less financial investment and is loved by DIY enthusiasts.
Lastly, the fret end file, crowning file, and polishing tool become indispensable for refining installed frets. With consistent usage, I’ve witnessed how these fretwork tools contribute to the longevity and playability of guitars.
In conclusion, the right tools and techniques simplify the refretting process, bringing joy to what could be viewed as demanding work. I’m eager to delve deeper into the process of using these tools effectively, ensuring you can embark on your refretting project confidently.
Choosing the Right Fret Wire
Into the depths of my journey as a luthier, I realized the profound effect one simple element could have on a guitar’s overall sound and playability: the fret wire. A deceptively small detail, the fret wire catalyzed a novel exploration through the fascinating world of guitar craftsmanship.
Just as unique strings alter your guitar’s intonations, did you know fret wires have a similar influence too? The complexity of your guitar’s personality lies not only in the choice of wood or strings but also in the fret wire you select. A seemingly minor detail, but with implicative nuances in terms of playability, tone, and design.
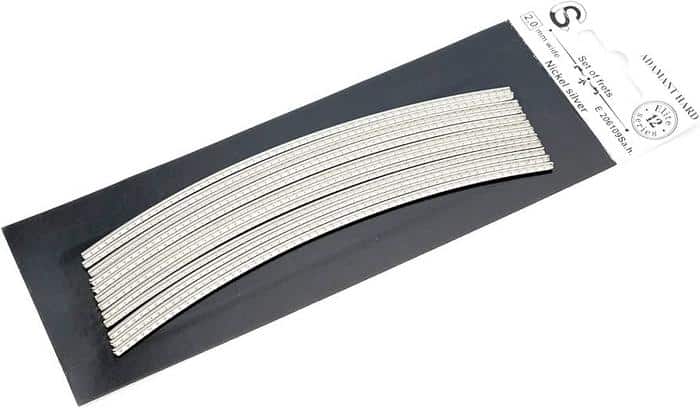
Delving deeper into fret wire selection, three primary features are crucial. Size, material, and profile essentially frame your choice. They are the ABCs of fret wire selection – the foundations of a guitar’s voice.
Size is all about the dimensions: fret wire’s height, width, and crown play key roles. Your playing style, finger comfort, note bending capability, and overall preference will ultimately determine the size that suits you best.
The choice of material lies between nickel-silver and stainless steel. While nickel-silver is traditional, soft, and easy to work with, stainless steel offers more longevity and brightness in tone. It’s a matter of preference between time-honored tradition and modern innovation.
The profile, or the shape of the fret wire, is equally significant. Whether you prefer vintage, medium, or jumbo profiles depends on your style of play and tactile preference.
Diving into fret wire selection, you realize its impact permeates beyond the surface. The fusion of science, art, and choice shapes the essence of your guitar and the music it births. From my experiences, this choice is as personal as the unique music you create. Choose wisely, for the right fret wire leaves reverberating echoes in your melody.
Process of Refretting a Guitar
Removing Old Frets
Continuing on the path to masterful refretting, we now dive into the crucial step of removing old frets. My experience as a luthier has led me to remove countless frets, honing my skills and knowledge on how to remove guitar frets in the most effective way. Let me steer you through this significant phase.
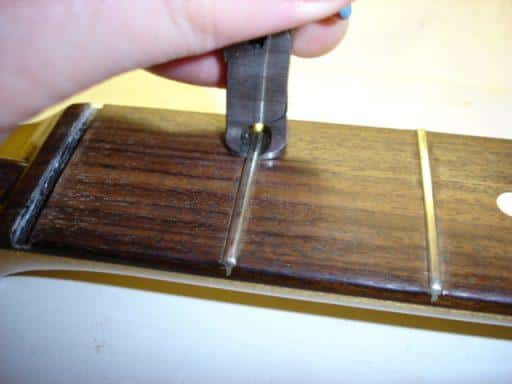
The removal process begins by loosening the strings and taking them off. Now, using a soldering iron, gently heat each fret. This facilitates easier removal as it loosens any glue present. Be careful—improper heating can damage your fretboard.
Once heated, carefully slot a thin spatula or purpose-made fret puller under each fret. Apply steady pressure to lift the fret upwards, working from one end to the other. This method, honed over years of practice, minimizes damage to the fretboard. However, patience is of the essence here; hasty exertion can lead to wood chip-outs.
Remember, this part of the refretting process requires not only technical knowledge but also a delicate touch. Each fret removed leaves a vacant slot, a blank canvas for the new fret wire. Clean the slots thoroughly, prepping for the subsequent steps.
By successfully mastering the art of removing old frets, you’ve accomplished a significant part of the larger refretting process. Each step taken further validates the considerable role frets play in providing superior sound quality.
To add context, as we transition to the next part of this journey—preparing the fretboard and adjusting the neck—it’s important to reflect on the relevance of the work done so far. With the old frets removed, your guitar is ready for its rebirth. Let’s continue this rewarding journey together.
Preparing the Fretboard and Neck Adjustments
After removing the old frets, fretboard preparation and exact neck adjustments are the next important steps in creating a playable, comfortable instrument. These steps are crucial, and in the past, it took me countless trials to learn the best methods.
Initially, I take a close look at the fretboard’s condition. Any prominent grooves or divots in the wood are gently sanded down, using a radiused block to maintain the curvature. Your aim should be a clean, smooth surface that provides the perfect bed for your new frets.
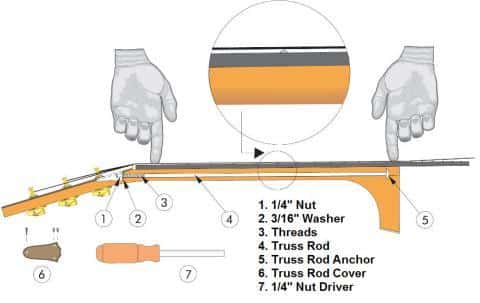
Next, comes the delicate task of neck adjustments, starting with the truss rod adjustment. To ensure the neck is straight, I apply minimal pressure, adjusting the truss rod with precision. Be cautious not to over tighten—truss rods can break if too much strain is put on them, a costly and time-consuming repair. Part of the expertise I’ve gained is understanding this vital balance, which can greatly influence playability.
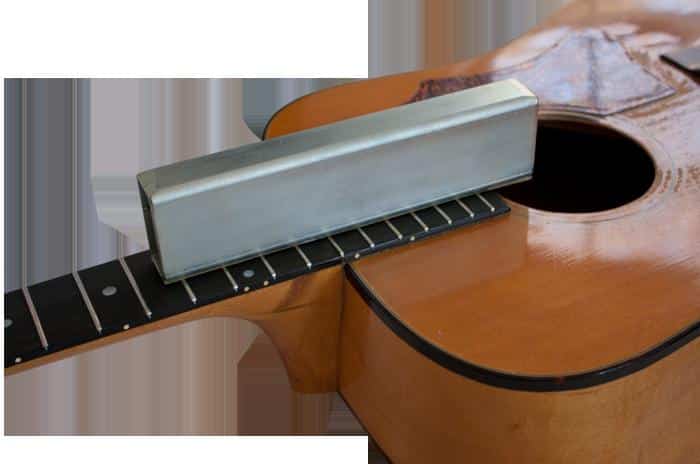
After adjusting the truss rod, I check the neck’s flatness with a notched straight edge. If there’s still a slight bow, the fretboard might require dressing—fine sanding to guarantee an absolutely flat surface.
Both fretboard preparation and neck adjustments require a great deal of practice and patience. However, their importance cannot be overstated in the refretting process—it’s a laborious journey, but the resulting professional-standard refret is worth every moment spent on refinement.
With the guitar neck now straight and the fretboard prepared, it’s time to continue our refretting journey. Let’s move on to the next exciting step—installing the new fret wires.
Installing New Frets

Now, let’s get down to the real task: installing new frets. This critical process can be both exhilarating and nerve-wracking. I still remember the first time I successfully installed new frets onto a guitar; the sense of accomplishment was beyond words. Trust me, it gets easier with practice and patience.
Proper placement is paramount when installing new frets. Ensure each fret wire sits snugly into the fret slot, covering the entire width of the fretboard. The ends must align perfectly with the edges. As you cannot rush perfection, take time ensuring each fret wire is perfectly situated before moving onto the next.
For a more secure fit, I recommend you taper the fret wire ends, creating a slight overhang. This allows them to grip the fretboard better, enhancing the instrument’s tone and longevity. However, always remember to remove any excess material to avoid injuries and keep the guitar neat.
Are you nervous yet? Don’t be – remember, asserting pressure is the key. Place the fretting hammer directly over the fret wire and apply steady pressure down as you tap it into place. This ensures each fret’s consistent height across the fretboard, which is crucial to maintain a pleasant tone and playability.
The process of installing new frets requires immense patience and precision. But don’t let this deter you. Encountering hiccups and making a few mistakes along the way is part of the learning curve. With each mishap, you gain insights and sharpen your skills.
As we move forward to the next stage, ‘Refining the Frets’, remember, each step in the process enhances not just the guitar’s look and feel, but its anchoring soul – its sound. So trust the process, and be ready for the transformation – you’re doing great!
Refining the Frets: Leveling, Crowning, Polishing, & Dressing
After installing new frets, refining them is the fulfilling crescendo that will breathe new life into your instrument. This final phase comprises four essential techniques: fret leveling, fret crowning, fret polishing, and fret dressing. Each step important to ensure optimal playability and tone in the arduous process of refretting a guitar.
Fret leveling involves making all frets perfectly level with each other, to avoid buzzing, uneven fret wear, or loss of sustain. It’s a meticulous process, much like varnishing a painting, adding that subtle touch that makes all the difference. The purpose of fret crowning follows suit – it refines the shape of the frets, making them well-rounded again after the leveling process, thereby improving the intonation and overall playability. Keep in mind, achieving perfect crowning requires patience and a discerning eye.
The process of fret polishing goes beyond giving your frets a shiny appearance. It creates a smooth, friction-free surface that enhances both movement and accuracy. You will notice your fingers gliding effortlessly across the fretboard like never before. This is where your work starts to reflect visually.
Fret dressing, finally, eliminates sharp fret ends and makes the neck comfortable to hold. This step, akin to slicing off the rough edges of a sculpture, culminates my method. Imagine, what better feeling than a smoother, more comfortable guitar neck to ease your play!
In conclusion, the process of refining the frets: leveling, crowning, polishing, and dressing, is as artistically fulfilling as it is essential. As we transition to evaluate the cost of refretting, bear in mind that this extensive labor of love adds not just monetary but also immense personal value to your beloved instrument.
The Cost of Refretting

After years of strumming away at your guitar, did you notice a difference in its sound lately? Perhaps the notes aren’t as clear as they used to be or the frets are worn out. If this sounds familiar, then you may be in need of a refret. But wait, hang onto your strings! Ever wondered how much a proper refretting procedure could cost you? I did, too, when I first started out as a luthier in 1994, and I remember well the sticker shock that came with it.
Refretting a guitar isn’t a straightforward operation; it’s an art. You need proficiency, precision, and patience, and that’s something you pay for when availing professional fretwork services. The refretting cost can be significant, with many factors influencing the total expense.
Oftentimes, you can expect to pay between $200 and $400, based on the complexity of the work and the luthier’s expertise. An acoustic guitar, with its intricate bracing and delicate balance, might bump up the cost a bit. Factor in the type of fret wire you’ve chosen, be it nickel-silver or stainless steel, which also affects the final bill.
Don’t be disheartened by the numbers, however. I’ve always believed that a well-done refret is worth every penny. The improved playability, the rejuvenated sound quality, and the extended life of your instrument make the investment worthwhile.
Over the years, the biggest lesson I’ve learnt is to approach refretting as an investment, not an expense. Yes, the prices can seem steep, especially if you’re a hobbyist or an emerging musician. But remember, a well-refretted guitar is like a well-restored vintage car – it retains its value and even appreciates over time.
So, are you ready to dive deep into the world of guitar refretting? Stay tuned as we explore more aspects of this essential guitar maintenance procedure in the following chapters. And always remember, while there’s a cost to refretting, the rewards you reap in sound enhancement and playing comfort are beyond measure.
FAQs
What is refretting a guitar?
Why do I need to refret my guitar?
What tools do I need to refret a guitar?
How do I perform refretting on my guitar?
Conclusion
Drawing this guide to a close, I hope my intricate dive into the world of guitar refretting has equipped you with the confidence and skills to undertake your DIY guitar repair. The shared knowledge from my experiences intends to light your path forward, as you ready to embark on the beautiful journey of becoming your guitar’s personal luthier.
Touched upon from the basics of understanding frets, contrasting acoustic and electric guitar refretting, choosing the right tools, to the detailed process of removing old frets, preparing your fretboard, installing new frets and refining them; every step was designed to enhance your fretting techniques.
Mastering guitar refretting is not a task accomplished overnight. Precision, patience, and practice are inevitable ingredients in the pursuit of lutherie. But I assure you, the delight in seeing your beloved instrument breathe new life under your ministrations is matchless.
Embrace the joy of becoming your guitar’s caretaker and let this incredible journey shape and refine your abilities, as it did mine. I make a closing toast to the promising luthier in you and wish you well in your endeavours.