Have you ever wondered why some guitars sound crisp and clear while others suffer from unwanted buzz? The secret often lies in the wiring. As a guitar journalist and editor of ‘Acoustic Guitar’ magazine, I’ve witnessed countless instruments transformed by proper guitar wiring. One memorable instance involved a vintage Gibson that had lost its spark. After rewiring with cloth-covered 22 AWG wire, it roared back to life, leaving its owner speechless.
This experience ignited my passion for understanding guitar electronics from the ground up. I’ve since explored every aspect of guitar wiring, from wire types and gauges to soldering techniques and innovative projects. In this guide, I’ll share the knowledge I’ve gained through years of hands-on experience, helping you unlock your instrument’s full potential. Whether you’re a curious beginner or a seasoned tinkerer, get ready to dive into the intricate world of guitar wiring and elevate your sound to new heights.
Understanding Guitar Wire Types
Solid Wire vs. Stranded Wire

When it comes to guitar wiring, the choice between solid wire and stranded wire is crucial. In my experience, solid wire offers excellent conductivity and is easier to solder, making it ideal for beginners. However, it can be prone to breaking if bent repeatedly. Stranded wire, on the other hand, provides superior flexibility, which is particularly useful in areas of the guitar that require frequent movement, like the pickup selector switch connections.
I’ve found that stranded wire’s flexibility also makes it more resistant to vibration-induced failures, a common issue in gigging guitars. However, it can be trickier to solder cleanly. For most guitar wiring projects, I recommend using a combination of both: solid wire for stationary connections and stranded wire for areas that need flexibility. This approach has consistently yielded the best results in my builds, balancing durability with ease of installation.
Cloth-Covered Wire
Cloth-covered wire holds a special place in the world of guitar wiring. As someone who’s deeply interested in vintage guitar tones, I’ve researched extensively on this classic option. Cloth wire for guitars offers a unique combination of flexibility and durability that modern plastic-coated wires can’t match. I’ve found that its woven exterior not only provides excellent insulation but also contributes to a warmer, more organic tone that many players seek.
In my experience, cloth-covered wire excels in vintage-style builds, where authenticity is key. It’s particularly effective in reducing unwanted capacitance, which can subtly enhance your guitar’s high-end response. However, it’s important to note that working with cloth wire requires extra care during installation to prevent fraying. Despite this minor challenge, I’ve consistently found that the tonal benefits and aesthetic appeal of cloth-covered wire make it a worthwhile choice for discerning guitarists looking to capture that elusive vintage vibe.
Wire Gauges for Guitar Wiring
Common AWG Sizes for Guitar Wiring
In my years of experience and countless conversations with luthiers and guitar techs, I’ve found that 22AWG wire is the most commonly used guitar wire gauge. This size strikes an ideal balance between flexibility and current-carrying capacity, making it suitable for most guitar wiring applications. However, I’ve also seen 24AWG used in tight spaces where extra flexibility is needed, and 20AWG for high-current applications like ground wires.
It’s crucial to understand that the choice of wire gauge can significantly impact your guitar’s tone and performance. Thicker wires generally offer lower resistance, which can result in a slightly brighter tone, while thinner wires might introduce a subtle warmth to the sound. Through my hands-on experience, I’ve learned that matching the wire gauge to your specific guitar’s needs is key to achieving optimal tone and functionality.
Choosing the Right Gauge
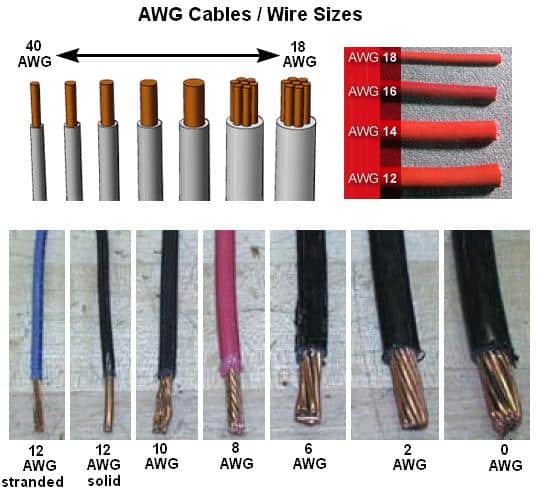
When it comes to choosing the right gauge for guitar wiring, I’ve learned through countless setups that it’s not just about following a standard. Each guitar has its unique needs. AWG wire sizes typically range from 18 to 24 for guitar applications, but the choice depends on several factors. I’ve found that thicker gauges, like 18 or 20 AWG, work best for ground wires and high-current paths, providing robust connections and minimal resistance. For signal-carrying wires, I often opt for 22 or 24 AWG, which offer flexibility without compromising tone.
The guitar wire gauge you select can subtly influence your instrument’s sound. In my experience, thinner wires can sometimes add a touch of brightness, while thicker gauges may contribute to a slightly fuller tone. It’s a nuanced aspect of guitar wiring that I’ve come to appreciate through years of hands-on work. Remember, the key is balancing practicality with tonal preferences to achieve your ideal setup.
Wire Materials for Guitar Wiring
Copper Wire
As I’ve delved into countless guitar wiring projects, I’ve come to appreciate the unparalleled versatility of copper wire. Its exceptional conductivity makes it the go-to choice for most guitar wiring applications. Through my research, I’ve found that copper’s malleability allows for easy manipulation during intricate wiring tasks, a crucial factor when working in tight guitar cavities. The material’s resistance to corrosion ensures longevity, maintaining signal integrity over time. I’ve noticed that copper wire for guitar wiring typically comes in various gauges, each suited to different components within the instrument. From my experience, 22 AWG is ideal for most guitar wiring needs, striking a balance between durability and flexibility. While alternatives exist, copper’s reliability and performance make it a staple in my guitar wiring toolkit, consistently delivering the crisp, clear tone that players demand.
Tinned Copper Wire

In my conversations with professional guitar techs, I’ve learned that tinned copper wire is a popular choice for guitar wiring. This wire combines the excellent conductivity of copper with the added benefit of a thin tin coating. The tin layer provides enhanced solderability and corrosion resistance, making it ideal for guitar applications where humidity and oxidation can be concerns.
I’ve found that tinned copper wire is particularly useful in vintage-style builds or restorations, as it closely mimics the look and feel of original wiring. Its flexibility allows for easy manipulation in tight guitar cavities, while its durability ensures long-lasting connections. When working with tinned copper wire, I’ve noticed that it requires slightly less heat for soldering compared to bare copper, which can be advantageous when working near heat-sensitive components. Overall, tinned copper wire offers a great balance of performance, ease of use, and longevity for guitar wiring projects.
Wiring Techniques for Guitars
Soldering Techniques

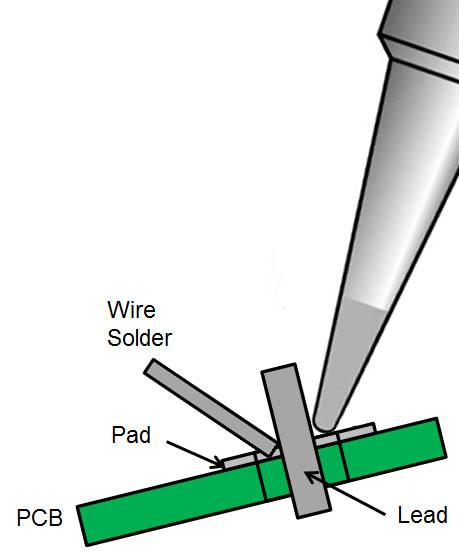
When it comes to guitar wiring solder techniques, I’ve learned that precision and patience are key. A steady hand and the right temperature make all the difference in creating solid connections. I always start by tinning both the wire and the solder point, ensuring a clean surface for optimal adhesion. It’s crucial to heat the joint, not the solder itself, allowing capillary action to draw the molten solder into the connection.
Over the years, I’ve found that using a temperature-controlled soldering iron gives the best results. For guitar wiring, I typically set it between 700-800°F. Remember, too much heat can damage components, while too little won’t create a reliable joint. I’ve also discovered that using flux can significantly improve solder flow, especially when working with older or oxidized components. These techniques have consistently yielded professional-grade results in my guitar wiring projects.
Solderless Wiring Options
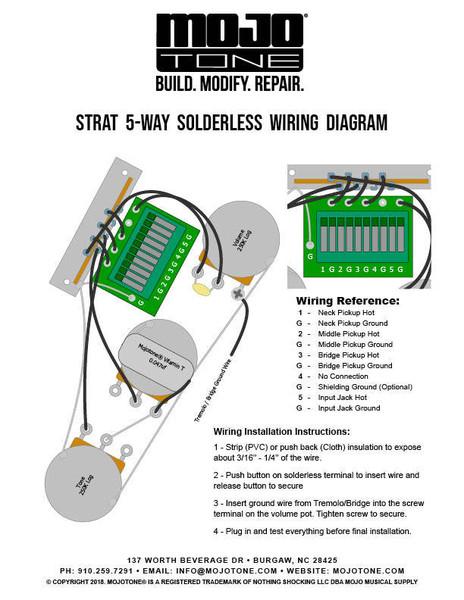
As someone who’s extensively reviewed guitar wiring products, I can attest that solderless wiring options have revolutionized DIY guitar modifications. These systems typically use quick-connect terminals and pre-wired components, making them ideal for beginners or those wary of soldering. In my experience, brands like Emerson Custom and Mojotone offer reliable solderless kits that significantly reduce the learning curve.
However, it’s crucial to understand that while solderless options provide convenience, they may sacrifice some tonal purity and long-term reliability. I’ve found that traditional soldered connections often yield better results for serious tone enthusiasts. That said, for quick mods or frequent tinkerers, solderless systems can be a game-changer. They allow for easy experimentation without the commitment of permanent connections, making them an excellent stepping stone into the world of guitar customization.
Guitar Wiring Projects
Wiring a Control Plate

When it comes to wiring a control plate, I’ve learned that organization and precision are key. Through my work on Color Your Chords, I’ve developed a systematic approach to guitar control plate wiring that ensures consistency and reliability. First, I lay out all components and wires, creating a visual map of the circuit. Then, I carefully strip and tin the wire ends, ensuring solid connections. As I solder each component, I double-check the wiring diagram to avoid errors. One trick I’ve discovered is to use different colored wires for various functions, making troubleshooting easier down the line. Proper grounding is crucial, so I pay extra attention to connecting all ground wires securely. Finally, I test each connection before mounting the plate, saving time and frustration later. This methodical approach has served me well in countless guitar wiring projects.
Installing Effects Wiring

As a guitarist deeply invested in effects, I’ve found that installing effects wiring is a game-changer for expanding your sonic palette. My experience with contemporary improvisation has taught me the importance of seamless effects integration. When wiring for effects, I always start by planning the signal path carefully. This ensures optimal sound quality and minimizes noise interference.
I typically use 22 AWG stranded wire for effects loops, as it offers the right balance of flexibility and durability. When installing, I’m meticulous about proper shielding and grounding to eliminate unwanted hum. One trick I’ve learned is to use star grounding for cleaner signal routing. Remember, the key to successful guitar effect wiring lies in maintaining signal integrity throughout the chain. By paying attention to these details, you’ll create a versatile setup that can handle anything from subtle modulation to wild experimental sounds.
Tools and Supplies for Guitar Wiring
Essential Wiring Tools
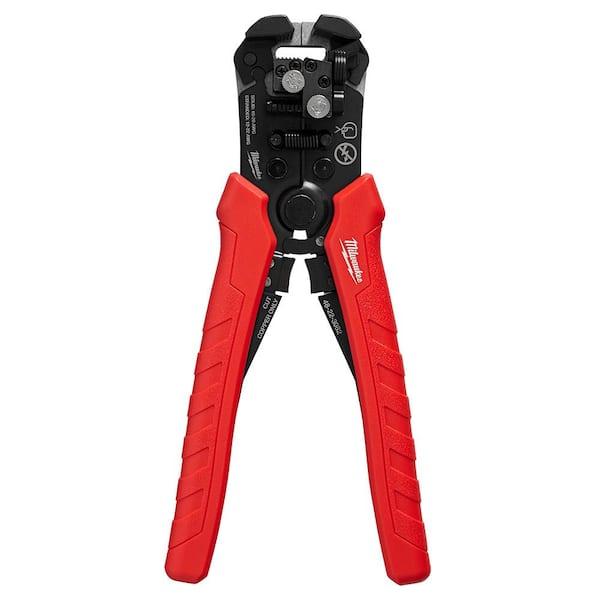
As a seasoned guitar tech, I’ve learned that having the right essential wiring tools is crucial for any guitar wiring project. Through my work with various guitar magazines, I’ve had the chance to test countless tools, and I can confidently say that a quality soldering iron is the cornerstone of your toolkit. Look for one with adjustable temperature control to handle delicate electronic parts for guitar without damaging them. A multimeter is indispensable for troubleshooting and verifying connections. Wire strippers, needle-nose pliers, and a set of precision screwdrivers are also must-haves. Don’t forget about a solder sucker and desoldering braid – they’re lifesavers when you need to redo a connection. Lastly, invest in a good helping hand tool with magnifying glass; it’ll make intricate work much easier on your eyes and hands.
Shielding Materials

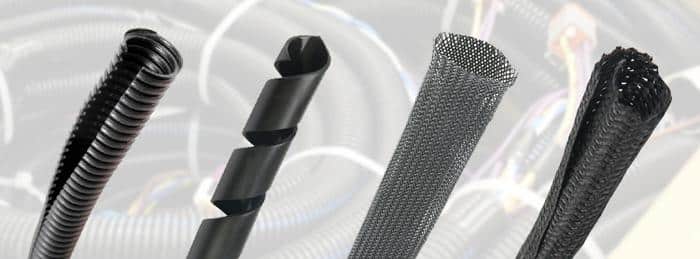
In my extensive research on noise reduction, I’ve come to appreciate the critical role of shielding materials in guitar wiring. Proper shielding is essential for minimizing unwanted interference and hum, particularly in single-coil pickup configurations. Among the most effective guitar shielding supplies, copper foil tape stands out for its versatility and ease of application. I’ve found that lining the guitar’s control and pickup cavities with this conductive material creates a Faraday cage effect, significantly reducing electromagnetic interference.
While aluminum foil can be used as a budget-friendly alternative, my experience has shown that copper’s superior conductivity makes it the preferred choice for serious noise reduction. When applying shielding, I always ensure continuous contact between shielded areas to maintain an unbroken conductive path. This attention to detail in shielding can make a noticeable difference in your guitar’s overall sound quality and performance.
Tips for Successful Guitar Wiring
Using Heat Shrink Tubing
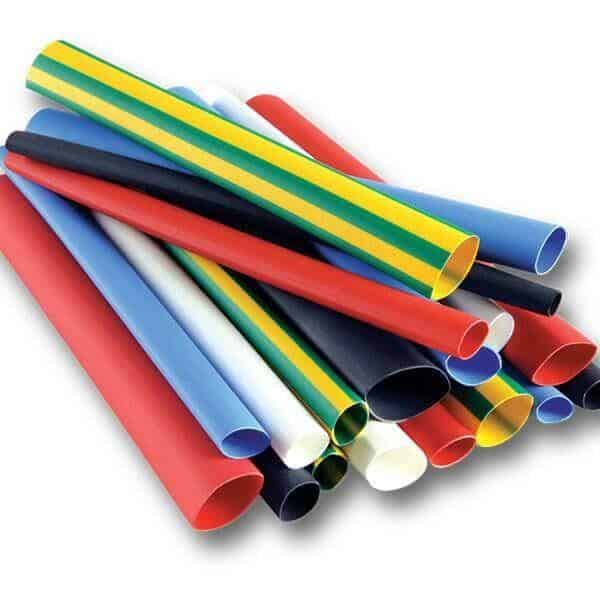
In my years of guitar wiring, I’ve found heat shrink tubing to be an indispensable tool. Professional techs have shown me how this simple component can elevate the quality and durability of guitar wiring. Heat shrink for guitar wiring not only insulates connections but also provides a clean, professional finish. I always keep a variety of sizes on hand, from 1/16″ for single wire connections to 1/4″ for larger bundles.
To apply, I slide the tubing over the connection before soldering, then carefully heat it with a heat gun or lighter. The tubing shrinks to form a snug, protective layer. This technique is particularly useful for strain relief on jack connections and protecting exposed wire ends. By incorporating heat shrink tubing, you’ll significantly improve the longevity and appearance of your guitar’s wiring, ensuring a tidy and reliable setup that withstands the rigors of regular playing and transportation.
Wire Management Techniques
As I’ve learned through my work on “Jim Hall: Signature Licks,” proper wire management is crucial for both performance and maintenance. I always start by planning my wire routes, ensuring they’re as short and direct as possible. Using wire nuts for guitar wiring can be a game-changer, especially when dealing with multiple connections. They not only secure the wires but also make future modifications a breeze.
I recommend bundling wires together with zip ties or twist ties, leaving a bit of slack for flexibility. This prevents tangling and makes tracing circuits easier. Color-coding your wires is another technique I swear by. It’s a simple step that can save hours of troubleshooting down the line. Remember, neat wiring isn’t just about aesthetics; it’s about creating a guitar that’s reliable and easy to work on for years to come.
FAQs
What gauge of wire is best for guitar wiring?
For most guitar wiring applications, 22 AWG (American Wire Gauge) is the ideal choice. It’s thick enough to handle the current while being thin enough to fit in tight spaces. For hookup wire, 24 AWG is also commonly used.
Should I use solid core or stranded wire for guitar wiring?
Both solid core and stranded wire can be used, but stranded wire is generally preferred for guitar wiring. Stranded wire is more flexible and resistant to breaking from repeated bending, making it ideal for applications where the wire may need to flex, such as in tremolo-equipped guitars.
What type of insulation is best for guitar wiring?
PVC (polyvinyl chloride) insulation is the most common and suitable for most guitar wiring applications. It’s durable, flexible, and provides good electrical insulation. For vintage-style wiring, cloth-covered wire can be used for an authentic look, but it’s not necessary for functionality.
How do I choose the right wire colors for guitar wiring?
While there’s no strict standard, it’s helpful to use different colors to distinguish between different connections. Common conventions include:
– Black for ground
– Red for hot (signal)
– White for switch connections
– Green for bridge ground
Ultimately, consistency and clear documentation of your color scheme are most important.
Is shielded wire necessary for guitar wiring?
Shielded wire isn’t strictly necessary for most guitar wiring, but it can be beneficial in reducing electromagnetic interference, especially in single-coil pickup guitars. It’s most commonly used for the longer runs from the output jack to the volume pot. For shorter connections, standard unshielded wire is usually sufficient.
Conclusion
Ready to transform your guitar’s tone from the inside out? Let’s recap your journey into the world of guitar wiring. As we’ve explored, choosing the right wire is crucial for achieving optimal tone and performance. From solid to stranded, cloth-covered to bare, each type serves a unique purpose in your guitar’s circuitry. Remember, gauge matters – 22 AWG for most applications, 24 AWG for tighter spaces.
Throughout my years in guitar journalism and personal tinkering, I’ve learned that DIY guitar wiring is more than just a technical task; it’s an art form. Whether you’re rewiring a control plate or installing new effects, the right tools and techniques make all the difference. As you embark on your own guitar wiring projects, keep in mind the importance of proper soldering, wire management, and shielding. With patience and practice, you’ll unlock a new level of tonal control and personalization in your instrument. So grab your soldering iron, and let’s make some noise!