I’ll never forget the day I first laid eyes on a custom-painted guitar. It was a Stratocaster with a mesmerizing galaxy swirl finish that seemed to come alive under stage lights. That moment ignited a passion that would shape my entire career. As a luthier with decades of experience, I’ve seen firsthand how a custom paint job can transform a guitar’s aesthetics and even its sound. My engineering background has given me unique insights into how finishes interact with wood and affect tonal qualities. From wild abstract designs to intricate landscapes, I’ve had the privilege of bringing countless guitarists’ visions to life. In this guide, I’ll share my expertise on custom guitar paint jobs, covering everything from initial inspiration to final execution. Whether you’re a seasoned player looking to rejuvenate your favorite ax or a beginner dreaming of a one-of-a-kind instrument, you’ll find invaluable tips and tricks to make your guitar truly sing – visually and sonically.
Understanding Custom Guitar Paint Jobs
Types of Custom Guitar Finishes

As a researcher for the Savart Journal, I’ve extensively studied custom guitar finishes and their impact on both aesthetics and acoustics. The world of guitar finishes is vast and nuanced, offering endless possibilities for personalization. From classic nitrocellulose lacquer, prized for its thin, resonant qualities, to modern polyurethane finishes that offer superior durability, each type brings its own character to the instrument. I’ve found that satin finishes can subtly warm the tone, while high-gloss options tend to brighten it slightly. For those seeking unique textures, there are specialized finishes like crackle, metallic, or even glow-in-the-dark options. Through my research, I’ve learned that the choice of finish can indeed influence your guitar’s sound, albeit in subtle ways. It’s this delicate balance between visual appeal and tonal impact that makes custom finishes such a fascinating aspect of guitar craftsmanship.
Popular Guitar Paint Designs
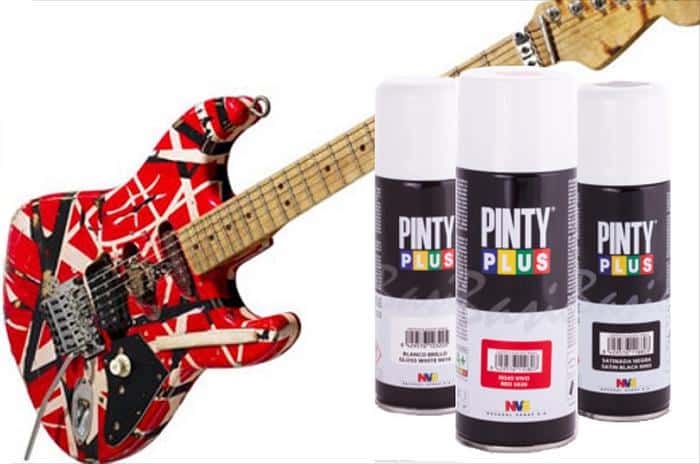
As a seasoned luthier, I’ve witnessed a fascinating evolution in popular guitar paint designs. Through my connections in the New England Luthiers group, I’ve seen countless innovative approaches that blend aesthetics with acoustic considerations. Burst finishes remain a classic choice, with subtle variations like tobacco sunburst and cherry burst gaining popularity. I’ve noticed a trend towards metallic finishes, particularly in custom-built electric guitars, offering a striking visual appeal without compromising tonal qualities. Figured wood designs have also surged, with luthiers expertly applying translucent finishes to showcase the natural beauty of flame maple or quilted tops. Interestingly, some avant-garde designers are experimenting with texture-based finishes, incorporating elements like crackling or distressed effects to create unique, aged appearances. These diverse paint designs not only reflect personal style but also contribute to the guitar’s overall character and sound.
Professional Custom Guitar Painting Services
Finding the Best Custom Guitar Painters
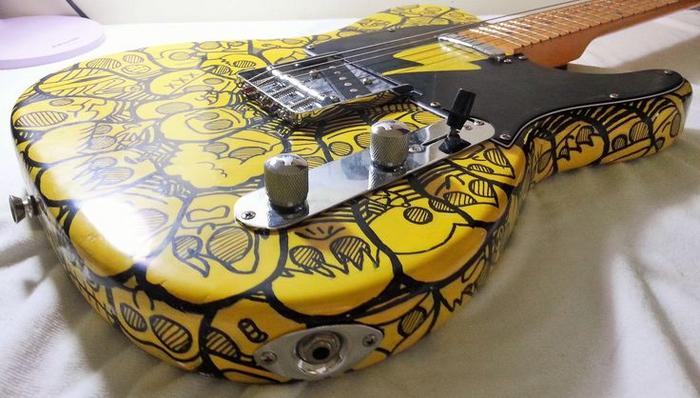
In my years of experience, finding the best custom guitar painters is crucial for achieving a stunning, professional finish. I’ve learned that the most skilled artisans possess a unique blend of artistic vision and technical expertise. When searching for a painter, I always look for someone who understands the delicate balance between aesthetics and acoustics. The best painters I’ve worked with don’t just create beautiful designs; they also consider how their work might affect the instrument’s sound. It’s essential to review portfolios, read customer testimonials, and, if possible, see their work in person. I’ve found that painters who specialize in guitars often produce the most impressive results, as they’re intimately familiar with the instrument’s unique contours and requirements. Remember, a truly great custom guitar painter is an artist, engineer, and musician rolled into one.
What to Expect from Professional Guitar Refinishing

As a seasoned editor of lutherie books, I’ve gained extensive insight into professional guitar refinishing. When you entrust your instrument to an expert, expect a meticulous process that goes far beyond a simple paint job. The refinisher will carefully strip the old finish, address any structural issues, and prepare the wood for its new look. This preparation phase is crucial for achieving a flawless final result. The actual refinishing involves multiple layers of paint or lacquer, each carefully applied and cured. Throughout the process, the refinisher will consider how their work might affect your guitar’s tone and playability. A professional understands the delicate balance between aesthetics and acoustics, ensuring that your guitar not only looks stunning but also maintains or even improves its sound quality. The final product should be a harmonious blend of visual appeal and musical excellence.
DIY Guitar Painting: A Step-by-Step Guide
Preparing Your Guitar for Painting
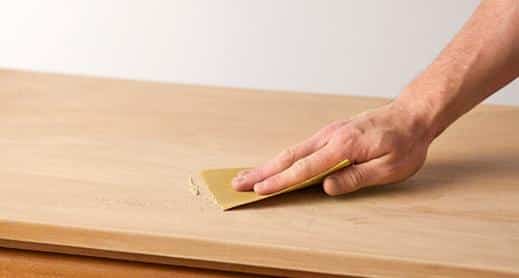
As an engineer-turned-luthier, I’ve learned that proper preparation is crucial for successful guitar paint customization. Before applying any paint, I meticulously strip the existing finish, ensuring a clean surface for the new coat. This process requires patience and precision, as rushing can compromise the guitar’s structural integrity. I use a combination of chemical strippers and gentle sanding techniques, carefully navigating around delicate areas like the neck joint and bridge.
Next, I address any imperfections in the wood, filling dents or scratches with wood filler. Smooth sanding is key to achieving a flawless paint job. I progress through increasingly fine grits, paying extra attention to the guitar’s curves and edges. Finally, I apply a sealer to protect the wood and create an ideal surface for paint adhesion. This meticulous preparation sets the stage for a stunning, long-lasting custom paint job that enhances, rather than compromises, your guitar’s sound and playability.
Applying Paint and Finishes
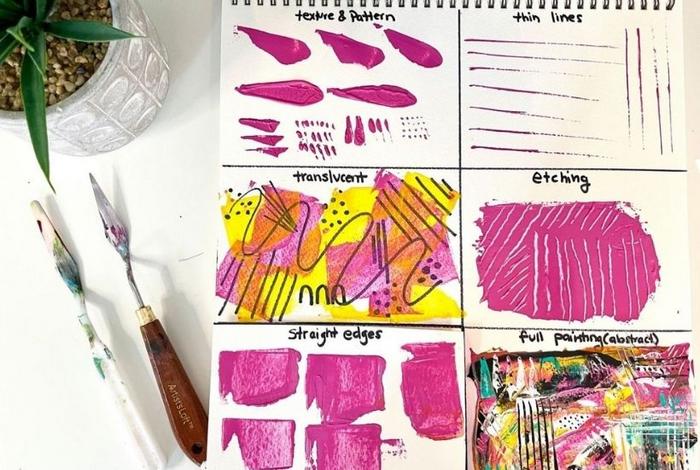
After meticulously preparing your guitar, it’s time for the exciting part – applying paint and finishes. From my years of hands-on experience, I’ve learned that this step can make or break your custom paint job. I always start with a high-quality primer to ensure optimal paint adhesion. When it comes to the actual painting, I’ve found that multiple thin coats yield far better results than a single thick layer.
As I guide you through various guitar painting tutorials, you’ll discover techniques to achieve different effects, from classic solid colors to intricate designs. The key is patience – allowing each coat to dry completely before proceeding. Finally, I’ll show you how to apply a protective clear coat, which not only safeguards your artwork but can also enhance the guitar’s resonance. Remember, the finish isn’t just about looks; it plays a crucial role in your instrument’s overall sound and feel.
Inspiration for Unique Guitar Paint Jobs
Showcasing Creative Guitar Designs
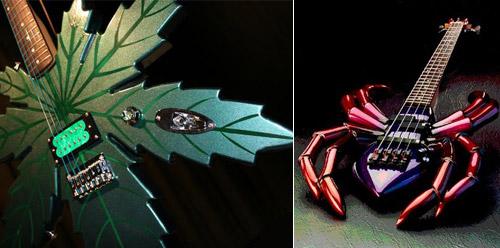
As a long-time contributor to the American Lutherie journal, I’ve had the privilege of witnessing some truly groundbreaking creative guitar designs. These innovative instruments not only push the boundaries of visual aesthetics but also challenge our perceptions of what a guitar can be. From holographic finishes that shift with the light to guitars adorned with intricate laser-etched patterns, the realm of custom designs is vast and ever-expanding. I’ve seen guitars transformed into living canvases, featuring embedded LED lights that pulse with the music, and others that incorporate unconventional materials like recycled skateboards or salvaged wood from historical buildings. These designs serve as a wellspring of inspiration, demonstrating how paint jobs can elevate a guitar from a mere instrument to a true work of art. By showcasing these creative designs, we open up a world of possibilities for guitarists seeking to express their unique style and personality through their instrument.
Personalized Guitar Paint Ideas

As a luthier with years of experience in ergonomic instrument design, I’ve seen firsthand how personalized guitar paint can transform not just the look, but the entire feel of an instrument. When considering unique paint ideas, I always emphasize the importance of balancing aesthetics with playability. Your guitar should be an extension of your musical identity, reflecting your style while enhancing your performance.
I’ve found that incorporating personal elements—like favorite colors, meaningful symbols, or even textures inspired by your surroundings—can create a truly one-of-a-kind instrument. Whether it’s a subtle customization or a bold statement piece, the key is to ensure that the design complements the guitar’s natural contours and doesn’t interfere with your playing comfort. By carefully considering these factors, you’ll end up with a guitar that’s not just visually striking, but also a joy to play.
When and Where to Get Your Guitar Painted
Timing Your Guitar Refinishing Project

When it comes to timing your guitar refinishing project, I’ve learned that strategic planning can make all the difference. From my experience managing complex lutherie projects, I’ve found that the best time to undertake a refinish is often during the off-season for guitar repaint services. This typically falls in late fall or early winter when demand is lower, potentially resulting in quicker turnaround times and even better rates. However, it’s crucial to consider your personal schedule as well. If you’re a gigging musician, plan your refinish during a break in your performance calendar. For DIY enthusiasts, I recommend choosing a time when you can dedicate several uninterrupted days to the project, ideally in a well-ventilated space with stable temperature and humidity. Remember, rushing a refinish job can lead to disappointing results, so patience is key.
Choosing Between Local Shops and Online Services

When it comes to choosing between local shops and online services for your custom guitar artwork, I’ve found that both options have their merits. Through my connections in the lutherie community, I’ve gained valuable insights into various service providers. Local shops offer the advantage of face-to-face interactions, allowing you to discuss your vision in detail and potentially see examples of their work firsthand. On the other hand, online services often provide a wider range of styles and techniques, as you’re not limited by geographical constraints. I’ve seen stunning results from both avenues, but it’s crucial to thoroughly research your chosen provider, regardless of their location. Reviews, portfolios, and communication are key factors in making an informed decision. Ultimately, the choice depends on your specific needs, budget, and the level of personal interaction you desire throughout the process.
FAQs
What are the basic steps for a custom guitar paint job?
The basic steps for a custom guitar paint job are:
- Stripping the old finish
- Sanding the guitar body
- Applying primer
- Painting with your chosen color(s)
- Applying clear coat
- Buffing and polishing
What types of paint are best for guitar paint jobs?
The best types of paint for guitar paint jobs are:
- Nitrocellulose lacquer: Traditional finish with a vintage look
- Polyurethane: Durable and resistant to chemicals
- Acrylic urethane: Easy to apply and provides a glossy finish
- Water-based finishes: Environmentally friendly option
How long does a custom guitar paint job take?
A custom guitar paint job can take anywhere from 2-6 weeks, depending on the complexity of the design, the type of paint used, and the drying time between coats. Simple solid color jobs may be quicker, while intricate designs or special effects can take longer. It’s important to allow sufficient time for each layer to dry and cure properly to ensure a high-quality finish.
What tools are needed for a DIY guitar paint job?
For a DIY guitar paint job, you’ll need:
- Sandpaper (various grits)
- Paint stripper (if removing old finish)
- Primer
- Guitar paint
- Clear coat
- Paint sprayer or spray cans
- Masking tape
- Safety equipment (respirator, gloves, eye protection)
- Buffing wheel (for final polish)
How can I protect the guitar’s electronics during painting?
To protect the guitar’s electronics during painting:
- Remove all electronic components if possible
- If removal is not an option, cover pickup cavities and control holes with painter’s tape
- Use newspaper or plastic to cover larger areas
- Seal edges of tape carefully to prevent paint seepage
- Consider using a removable putty to fill small openings
Conclusion
Ready to transform your guitar into a unique masterpiece? Let’s recap the essential steps to make your vision a reality. Drawing from my decades of experience in lutherie and instrument design, I can confidently say that a custom electric guitar paint job is more than just aesthetics—it’s an expression of your musical identity. Remember, preparation is key: properly stripping the old finish, sanding, and priming set the foundation for a flawless result.
Whether you choose a classic solid color, a psychedelic swirl, or an intricate airbrush design, always consider how your chosen finish might affect the guitar’s tone. Professional painters can guide you through this process, ensuring your instrument not only looks stunning but maintains its acoustic integrity. For the brave DIYers, patience and attention to detail are your best friends. Ultimately, a custom paint job is an investment in your guitar’s uniqueness and your personal style. With the right approach, your six-string canvas will sing both visually and sonically.