Have you ever wished you could be in two places at once with your guitar tone? Well, I’m about to let you in on a secret that changed my musical journey forever. Years ago, as I stepped onto a big stage for the first time, I realized my guitar signal needed to go to both my amp and the house mixer. That moment of panic led me to discover the game-changing technique of splitting a guitar signal.
As the editor of ‘Acoustic Guitar’ magazine and a seasoned guitarist, I’ve since explored countless signal splitting techniques. This guide draws from my years of experience in both studio and live settings, offering you insights that I’ve gathered throughout my career. Whether you’re looking to enhance your recording setup or revolutionize your live performances, understanding how to split your guitar signal is a crucial skill. Let’s dive into the world of signal splitting and unlock new possibilities for your sound.
Understanding Guitar Signal Splitting
Benefits of Splitting Guitar Signals
As a transcriber for Premier Guitar, I’ve dissected countless professional recordings, uncovering the secret sauce behind those rich, layered tones. Signal splitting is often the unsung hero. By dividing your guitar’s output, you open up a world of sonic possibilities. It’s like having multiple guitarists playing in perfect unison, each adding their unique flavor to the mix. This technique allows you to blend a clean DI signal with a mic’d amp, creating depth and dimension that’s impossible to achieve with a single signal path. In live settings, splitting enables you to feed both your onstage amp and the front-of-house mixer, ensuring consistent tone for you and the audience. Moreover, it provides a safety net – if one signal path fails, you’ve got a backup. Mastering signal splitting is crucial for modern guitar recording techniques, offering unparalleled flexibility in tone shaping and mixing.
Common Applications
As a seasoned guitarist and writer, I’ve explored countless applications for signal splitting. One of the most versatile setups I’ve encountered is the dual amp setup guitar. This configuration allows you to blend the unique characteristics of two different amplifiers, creating a rich, layered sound that’s impossible to achieve with a single amp. In the studio, I’ve used this technique to record rhythm parts with a clean amp and lead parts with a high-gain amp simultaneously, saving time and preserving the natural interplay between the two tones. For live performances, I’ve found that splitting the signal between a stage amp and the front-of-house system ensures consistent tone both on stage and through the main PA. These applications showcase how signal splitting can dramatically enhance your sonic palette and give you greater control over your guitar’s voice in any setting.
Methods for Splitting Guitar Signals
Using a DI Box
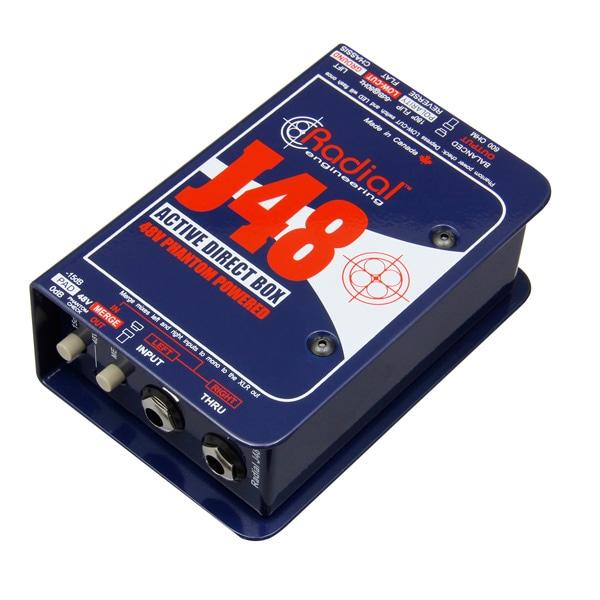
In my studio work, I’ve used countless guitar DI boxes, and they’re an indispensable tool for splitting signals. A DI box converts the high-impedance, unbalanced signal from your guitar into a low-impedance, balanced signal that’s perfect for recording or sending to a mixer. I’ve found that using a DI box not only splits the signal but also improves its quality and reduces noise. When selecting a DI box, consider whether you need active or passive circuitry. Active DI boxes, which I prefer for their cleaner sound, require phantom power but offer better impedance matching and signal boosting capabilities. Passive DI boxes are more rugged and don’t need power, making them great for live performances. Remember to properly ground your DI box to avoid unwanted hum. With the right DI box, you can achieve a clean split while maintaining your guitar’s tone integrity.
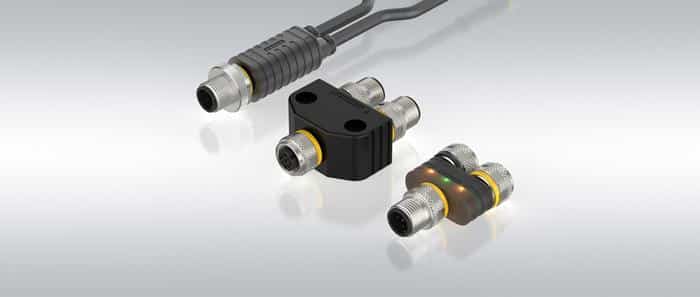
Y Cables for Signal Splitting
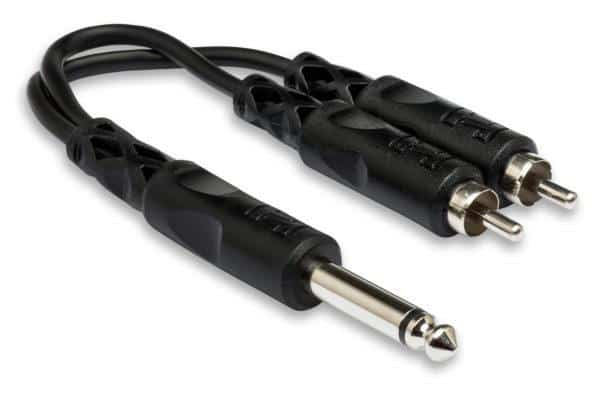
As a budget-conscious musician in my early days, I’ve extensively experimented with Y cables for guitar signal splitting. These simple, affordable tools can be a great starting point for those looking to explore signal splitting. A Y cable essentially takes your guitar’s single output and divides it into two separate paths, allowing you to send your signal to multiple destinations simultaneously.
In my experience, Y cables work best for short-term solutions or in controlled environments like home studios. They’re incredibly easy to use – just plug and play. However, they do have limitations. I’ve found that they can introduce signal loss and potential noise issues, especially with longer cable runs. Additionally, they don’t provide any isolation between the split signals, which can lead to impedance mismatches and potential tone degradation. Despite these drawbacks, Y cables remain a viable option for those just starting to experiment with signal splitting or in situations where simplicity is key.
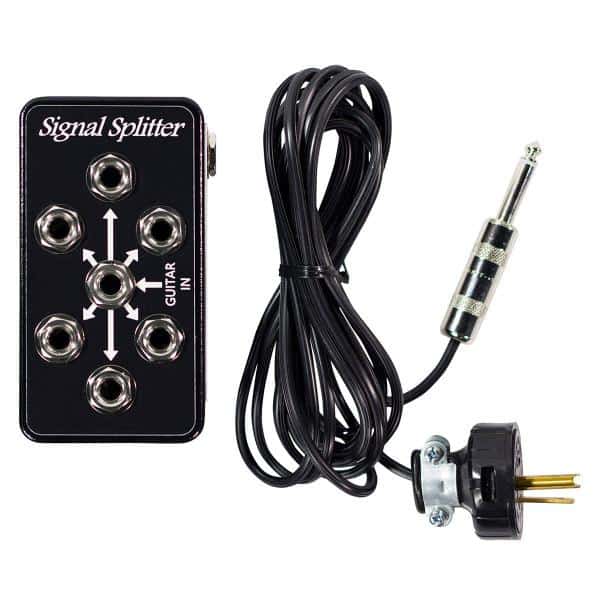
Amp Splitters and ABY Boxes
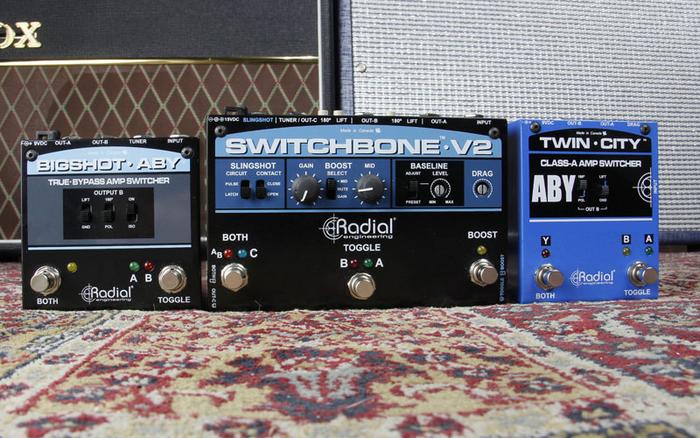
As we delve into amp splitters and ABY boxes, I’m reminded of my extensive experience reviewing these devices for Premier Guitar. These tools are essential for guitarists seeking versatile signal routing. A quality guitar amp splitter allows you to send your signal to multiple destinations simultaneously, opening up a world of tonal possibilities. I’ve found that ABY boxes, in particular, excel in live settings, enabling seamless switching between two amplifiers or signal paths. The best models I’ve tested offer features like phase correction and ground lift switches, which are crucial for maintaining signal integrity and eliminating unwanted noise. Whether you’re looking to blend amp tones or create complex signal chains, understanding the nuances of these devices is key to achieving your desired sound.
Effects Pedal Signal Splitters
When exploring Jim Hall’s innovative pedal setups for my work on his signature licks, I discovered the transformative power of effects pedal signal splitters. These devices are game-changers for guitarists seeking to expand their tonal palette. By routing your guitar signal through an effects pedal signal splitter, you can simultaneously send your signal to multiple effects chains or amplifiers. This opens up a world of sonic possibilities, allowing you to blend clean and distorted tones, create stereo effects, or even run parallel processing chains. I’ve found that using a quality splitter in my pedalboard not only enhances my creative options but also improves my overall signal integrity. When choosing a splitter, consider factors like buffer quality, isolation between outputs, and phase correction capabilities to ensure optimal performance in both studio and live settings.
Considerations When Splitting Guitar Signals
Impedance Matching
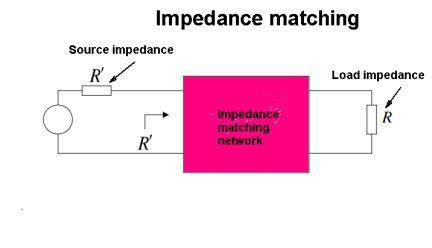
When splitting your guitar signal, impedance matching is crucial for maintaining tone quality and signal integrity. During my research for Acoustic Guitar magazine, I learned firsthand how mismatched impedances can wreak havoc on your sound. Essentially, impedance matching ensures that your guitar’s output signal is properly transferred to your gear without degradation. This is where a buffered signal splitter becomes invaluable. It acts as a mediator, preserving your guitar’s high-impedance signal while feeding low-impedance inputs to your various devices. Without proper matching, you might experience tone loss, increased noise, or even signal dropouts. I’ve found that understanding and implementing correct impedance matching is often the key to achieving crystal-clear tone when splitting your signal, whether you’re recording in the studio or performing live.
Signal Loss and Noise
When splitting your guitar signal, signal loss and noise are critical factors to consider. As a recording artist, I’ve learned that every component in your guitar signal chain can impact your tone. Splitting inevitably introduces some degree of signal loss, potentially dulling your sound or reducing overall volume. Moreover, longer cable runs and additional connections can introduce unwanted noise, like hum or interference. I’ve found that using high-quality cables and connectors is crucial for maintaining signal integrity. Additionally, strategic placement of buffer pedals in your signal chain can help preserve your tone and reduce noise. It’s a delicate balance, but with careful attention to your setup, you can achieve a split signal that maintains the full character of your guitar’s voice while minimizing unwanted artifacts.
Active vs Passive Splitting
When it comes to splitting guitar signals, understanding the difference between active and passive splitting is crucial. In my years of experience, I’ve found that passive DI boxes are often sufficient for most applications, offering a clean, transparent split without requiring power. However, for longer cable runs or when dealing with vintage pickups, active DI boxes can be a game-changer. They provide the necessary gain to compensate for signal loss and can even enhance your tone. I’ve used both extensively in studio sessions and live gigs, and I can attest that the choice between active and passive splitting can significantly impact your sound.
The key is to consider your specific setup and requirements. If you’re splitting your signal for recording and live monitoring simultaneously, an active splitter might give you the edge you need. On the other hand, for simple stage setups, a passive splitter could be all you need. Remember, the goal is to maintain signal integrity while achieving the flexibility you desire in your rig.
Setting Up Your Split Signal Chain
For Recording
When it comes to recording with a split guitar signal, I’ve found that the possibilities are truly endless. Through my years of transcribing and analyzing professional recordings, I’ve developed a keen ear for the nuances of studio setups. The key is to create a clean, isolated signal for your DAW while maintaining a rich, full tone for your amp. I typically use a high-quality DI box to send a direct signal to my audio interface, while simultaneously feeding my amp. This allows me to capture both the raw guitar sound and the colored amp tone, giving me maximum flexibility during mixing. By experimenting with different mic placements on the amp and blending it with the DI signal, I’ve achieved some of my best guitar recordings. Remember, the goal is to preserve the integrity of your tone while providing options for post-production.
For Live Performance
When it comes to live performance, splitting your guitar signal opens up a world of sonic possibilities. From my experiences gigging and observing countless shows, I’ve found that a dual amp setup can be a game-changer. It allows you to blend different tones, creating a fuller, more dynamic sound that cuts through the mix. I often use an ABY box to switch between amps or combine them, giving me instant access to varied tones without changing guitars.
One crucial tip I’ve learned is to always have a backup plan. I recommend using a DI box in your signal chain, sending a clean signal to the front-of-house mixer. This ensures that even if an amp fails, you’re still heard through the PA. Additionally, proper cable management is essential for a hassle-free performance. I’ve seen too many shows derailed by tangled wires or loose connections. By mastering these aspects, you’ll create a reliable, versatile live rig that enhances your performance and wows your audience.
Troubleshooting Common Issues
As a seasoned audio engineer and guitarist, I’ve encountered my fair share of signal splitting challenges. Ever wondered why your split signal setup sometimes results in unwanted noise or tone loss? Let’s unravel these mysteries together. Over the years, I’ve developed a knack for diagnosing and resolving these issues, and I’m excited to share my insights with you.
When troubleshooting, I always start with the basics. First, I check all connections, ensuring each cable is securely plugged in and free from damage. It’s surprising how often a simple loose connection can be the culprit. Next, I examine the signal splitter for guitar and bass itself. If it’s a passive splitter, I consider whether an active one might be more suitable for my setup, especially if I’m dealing with long cable runs or multiple effects pedals.
One common issue I’ve encountered is ground loop hum. To combat this, I use isolation transformers or a power conditioner. If you’re experiencing signal loss, don’t overlook impedance matching. I’ve found that using a buffer pedal before the splitter can work wonders in maintaining your tone’s integrity. Remember, each element in your signal chain impacts the overall sound, so methodically isolating and testing each component is key to identifying the problem source.
FAQs
What is guitar signal splitting?
Why would someone want to split a guitar signal?
- To blend different amp tones
- To create stereo effects
- To send a clean signal to the PA while using effects on stage
- To record both a direct (DI) and amplified signal simultaneously
- To use multiple effects chains in parallel
These applications can significantly enhance a guitarist’s sonic palette and recording options.
What equipment is needed to split a guitar signal?
- A dedicated signal splitter or ABY box
- A DI (Direct Injection) box with a thru output
- A buffered splitter pedal
- An audio interface with multiple inputs (for recording)
- Y-cable splitters (not recommended for long cable runs)
The choice depends on your specific needs and whether you’re splitting the signal for live performance or recording purposes.
How do I split my guitar signal for recording?
- Use a DI box or audio interface to capture a clean, direct signal
- Use the thru output or a splitter to send a signal to your amp
- Mic up your amp to capture the amplified sound
- Record both the direct and amplified signals to separate tracks
This method allows you to blend the direct and amplified signals during mixing, offering greater flexibility in shaping your tone.
Are there any drawbacks to splitting a guitar signal?
- Signal loss or weakening, especially with passive splitters
- Potential for ground loop issues and unwanted noise
- Phase cancellation between multiple signal paths
- Increased complexity in signal routing and troubleshooting
These issues can often be mitigated by using high-quality, buffered splitters and proper grounding techniques.
Conclusion
Ready to transform your guitar rig and unlock a world of tonal possibilities? Electric guitar signal splitting is the key to expanding your sonic horizons. As we’ve explored, this technique offers a myriad of benefits for both recording and live performance. From creating rich, layered tones to simultaneously feeding multiple amps or recording devices, signal splitting empowers guitarists to craft their ideal sound.
Drawing from my extensive experience in guitar journalism and performance, I can confidently say that mastering signal splitting is a game-changer. Whether you opt for a DI box, Y-cable, ABY box, or effects pedal splitter, each method has its unique advantages. Remember to consider impedance matching and potential signal loss when setting up your rig. With proper implementation, you’ll achieve cleaner recordings, more versatile live setups, and unparalleled tonal control. Don’t be afraid to experiment – your perfect split signal chain is waiting to be discovered. Now, go forth and split those signals!