As a long-time editor of ‘Acoustic Guitar’ magazine, I’ve witnessed countless guitarists grapple with the enigmatic G# minor chord. It’s a shape that has brought both frustration and epiphany to players of all levels. I remember the day a young guitarist walked into our studio, her fingers calloused and her spirit nearly broken. She had been struggling with this chord for weeks, ready to give up. But as we sat down together, something magical happened. With a few simple adjustments, the G# minor rang out clear and true, and her face lit up with a joy I’ll never forget. That moment encapsulates why I’m passionate about demystifying challenging chords like the G# minor. In this guide, I’ll share the secrets I’ve gathered over years of experience, helping you unlock the full potential of this essential chord and elevate your guitar playing to new heights.
Understanding the G Sharp Minor Chord
Basic Chord Structure
As I explain in my book ‘Color Your Chords’, understanding basic chord structure is crucial when learning the G# minor chord. Chords are built on triads – three-note combinations that form the foundation of harmony. In the case of G# minor, we’re dealing with a minor triad consisting of G#, B, and D#. This structure is what gives the chord its distinctive melancholic sound. When consulting guitar chord charts, you’ll notice these three notes arranged in various positions on the fretboard. By grasping this fundamental concept, you’ll not only master the G# minor but also gain insights into countless other chords. It’s like unlocking a musical puzzle – once you see the pattern, you can apply it across the entire fretboard, opening up a world of harmonic possibilities.
Importance in Music
As a guitarist and music theory enthusiast, I’ve come to appreciate the profound impact of minor chords in creating emotional depth. During my studies at the New England Conservatory, I learned how crucial these chords are, and G# minor, in particular, has a unique melancholic quality that I’ve grown to love. In many G# minor chord progressions, this chord serves as an anchor, evoking feelings of introspection and vulnerability. Its importance in music cannot be overstated, especially in genres like blues, jazz, and alternative rock. Mastering the G# minor chord opens up a world of expressive possibilities, allowing you to convey complex emotions through your playing. As we delve deeper into the techniques for playing this chord, remember that understanding its musical significance will greatly enhance your ability to use it effectively in your own compositions and performances.
Playing the G Sharp Minor Chord
Standard Fingering
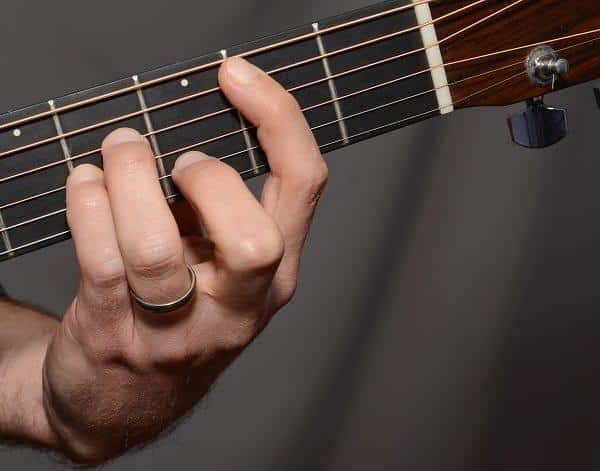
In my years of transcribing for ‘Premier Guitar’, I’ve encountered numerous fingering techniques. Here’s the most efficient way I’ve found to play the G# minor chord. Place your index finger on the first fret of the A string, your middle finger on the second fret of the G string, and your ring finger on the third fret of the B string. The key is to arch your fingers, allowing each note to ring clearly. This standard fingering forms the foundation of the G# minor chord, creating a rich, melancholic sound that’s essential in many musical genres.
Mastering the guitar finger positions for G# minor takes practice, but it’s crucial for smooth chord transitions. Remember, slight adjustments in finger placement can significantly impact the chord’s resonance. As you progress, this fingering will become second nature, opening doors to more complex chord progressions and song structures.
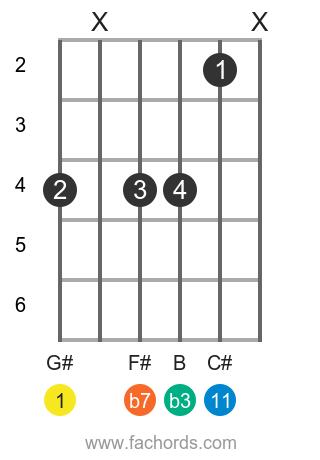
Barre Chord Technique
As a guitar instructor, I’ve found that barre chords are often a stumbling block for beginners. However, they’re crucial for expanding your chord repertoire, especially when tackling the G#m guitar tutorial. In my years of teaching, I’ve developed a foolproof method for mastering barre chords, which we’ll apply to the G# minor. The key lies in proper hand positioning and gradual pressure application. Start by placing your index finger across all six strings at the fourth fret, ensuring it’s close to the fret wire. Then, shape your remaining fingers for the minor chord. Apply pressure gradually, focusing on achieving a clean sound string by string. Remember, it’s not about strength, but technique. With consistent practice, you’ll find that barre chords, including G# minor, become second nature, opening up a world of musical possibilities.
Common Challenges and Solutions
Finger Placement Issues
As a guitar instructor and writer for Acoustic Guitar magazine, I’ve encountered numerous students struggling with finger placement issues when learning the G sharp minor chord. The challenges often stem from the chord’s complex structure and the need for precise guitar finger positions. Many beginners find it difficult to stretch their fingers across multiple frets while maintaining proper pressure. Through my experiences, I’ve developed several techniques to address these concerns. Proper hand positioning is crucial; I recommend keeping the thumb centered on the back of the neck for better leverage. Additionally, practicing finger independence exercises can significantly improve dexterity and reduce strain. Remember, mastering finger placement is a gradual process that requires patience and consistent practice. By focusing on these aspects, you’ll not only conquer the G sharp minor chord but also enhance your overall guitar playing skills.
Achieving Clean Sound
In my private lessons and workshops, I often focus on achieving a clean sound. Let me share some tips I’ve refined over years of teaching. When tackling the G#m chord in a G#m guitar tutorial, clean sound is crucial. Start by ensuring each finger is placed precisely on the correct fret, just behind the metal bar. Apply firm, even pressure across all strings, especially when using the barre technique. Practice lifting and replacing your fingers as a unit to build muscle memory. Listen carefully for any muted or buzzing strings, adjusting your hand position as needed. Gradually increase your strumming speed while maintaining clarity. Remember, a clean G#m is the foundation for smooth chord transitions and expressive playing. With patience and consistent practice, you’ll master this challenging chord and elevate your overall guitar technique.
Variations and Alternatives
Simplified G# Minor
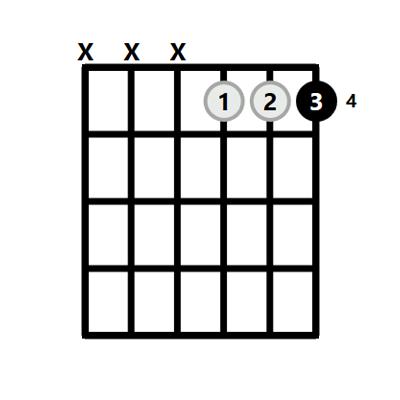
In my experience teaching guitar, I’ve found that many beginners struggle with the standard G# minor chord. That’s why, in my book ‘Color Your Chords’, I introduce simplified versions of complex chords. Here’s an easy G# minor chord that I often recommend to my students: place your index finger on the first fret of the A string, and your middle finger on the second fret of the B string. Leave the high E string open, and mute the other strings. This simplified version captures the essence of G# minor while being much more accessible for beginners.
This alternative fingering serves as a stepping stone, allowing new players to incorporate G# minor into their repertoire sooner. It’s particularly useful when transitioning between chords quickly or when playing songs that require rapid chord changes. As players gain confidence and dexterity, they can gradually work their way up to the full barre chord version.
Advanced Voicings
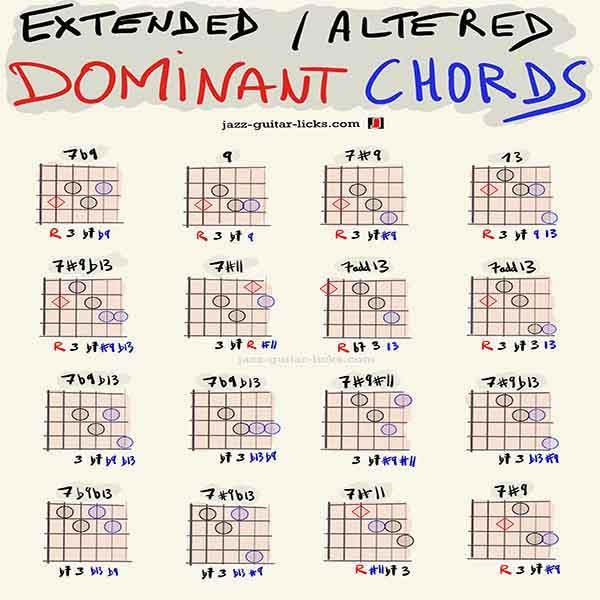
As I delved into G# minor chord variations for my work on “Jim Hall: Signature Licks,” I discovered a world of advanced voicings that can truly elevate your playing. These sophisticated structures go beyond the basic triad, incorporating extended tones and altered voicings to create rich, complex harmonies. By experimenting with different inversions and adding 7ths, 9ths, or 11ths, you can transform the standard G# minor into a more nuanced and expressive chord. One of my favorite techniques involves using drop voicings, where we lower one or more notes by an octave, creating a more open and resonant sound. This approach not only adds depth to your chord progressions but also opens up new melodic possibilities within the harmony. Mastering these advanced voicings will significantly expand your musical vocabulary and allow you to craft more intricate and emotionally compelling arrangements.
Practice Tips and Exercises
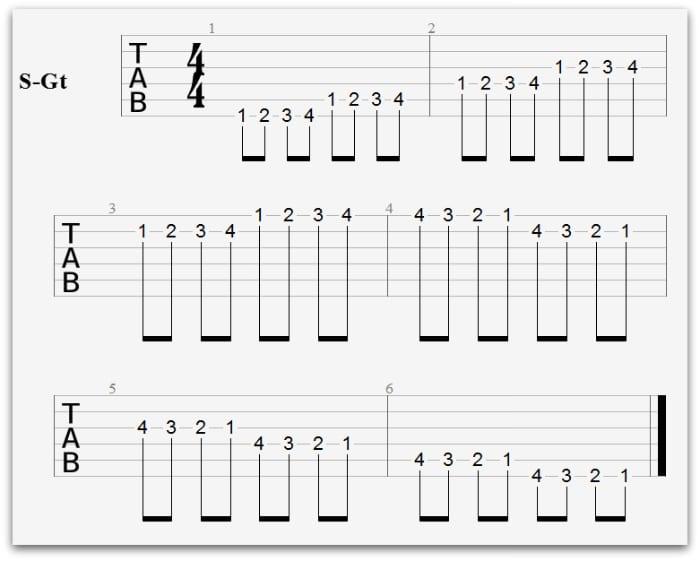
As a guitar educator and contributor to ‘Acoustic Guitar’ magazine, I’ve seen firsthand how the right practice techniques can accelerate learning. Mastering the G# minor chord requires consistency and focused effort. I always tell my students that short, regular practice sessions are far more effective than sporadic, lengthy ones.
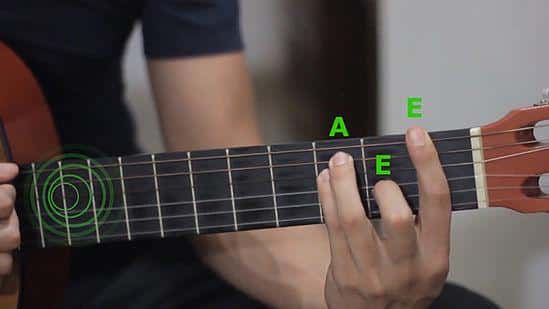
With these practice techniques, you’ll be playing the G# minor chord effortlessly in just 10 minutes a day. Ready to transform your playing? Start by isolating the chord, placing your fingers deliberately and slowly. Focus on clean transitions between G#m and other chords you’re familiar with. I’ve found that alternating between G#m and E major, for instance, helps develop muscle memory and improves overall dexterity.
In my G#m guitar tutorial sessions, I emphasize the importance of context. Try incorporating the chord into simple progressions or familiar songs. This not only makes practice more enjoyable but also enhances your understanding of how G#m functions in real music. For more structured guitar chord lessons, I recommend using a metronome to work on timing and rhythm while strumming G#m. Gradually increase the tempo as you become more comfortable.
Remember, patience is key. Every guitarist’s journey is unique, and consistent practice will yield results. Keep at it, and soon you’ll find G#m becoming second nature in your playing.
FAQs
What is the G Sharp Minor chord?
The G Sharp Minor chord (G#m) is a minor triad consisting of the notes G#, B, and D#. It’s a commonly used chord in various music genres, particularly in pop, rock, and blues.
How do I finger the G Sharp Minor chord on guitar?
To play the G#m chord:
- Place your index finger on the 1st fret of the A string (4th string)
- Put your middle finger on the 2nd fret of the G string (3rd string)
- Position your ring finger on the 3rd fret of the B string (2nd string)
- Strum from the A string (4th string) down
Are there any alternative ways to play the G Sharp Minor chord?
Yes, there are alternative ways to play G#m:
- Barre chord: Place your index finger across all strings at the 4th fret, then form a minor chord shape with your other fingers.
- Higher up the neck: Play it at the 9th fret using the A minor chord shape.
What are some common mistakes when learning the G Sharp Minor chord?
Common mistakes include:
- Not pressing the strings firmly enough, resulting in muted or buzzing notes
- Accidentally touching adjacent strings, causing them to not ring out clearly
- Incorrect finger placement, leading to an incomplete or incorrect chord
How can I practice the G Sharp Minor chord effectively?
To practice effectively:
- Start slowly, focusing on correct finger placement
- Practice transitioning between G#m and other chords you know
- Use a metronome to improve your timing
- Incorporate the chord into simple songs or progressions
- Practice regularly, even if only for short periods
Conclusion
As we conclude this guide on mastering the G# minor chord, I hope you’ve gained valuable insights into its structure, importance, and various playing techniques. Mastering the G# minor chord is just the beginning. Are you ready to take your guitar playing to the next level? Remember, this chord is just one piece of the vast musical puzzle that is guitar playing.
As a passionate guitarist and educator, I believe mastering chords like G# minor is crucial for musical growth. The journey from understanding basic fingering to exploring advanced voicings can be challenging, but it’s incredibly rewarding. Whether you’re struggling with finger placement or aiming for that perfect clean sound, persistence is key. Remember, practice and patience are key to becoming a skilled guitarist. Keep exploring, keep practicing, and most importantly, keep enjoying your guitar chord lessons. Your musical journey has only just begun!