Have you ever dreamed of owning a one-of-a-kind guitar that turns heads and reflects your unique style? As a luthier with decades of experience, I’ve witnessed countless musicians transform their ordinary instruments into stunning works of art through the magic of guitar painting. What began as a simple hobby for me evolved into a profound passion, merging my engineering background with artistic expression. I’ve discovered that a well-executed paint job not only enhances a guitar’s aesthetics but can also subtly influence its acoustics. In this ultimate guide, I’ll share my hard-earned secrets and techniques, empowering you to breathe new life into your beloved instrument. From selecting the perfect paint to mastering intricate designs, we’ll explore every step of the process. Get ready to embark on a journey that will forever change the way you look at your guitar – and perhaps even inspire your musical creativity in ways you never imagined.
Why Paint Your Guitar?
Benefits of Custom Guitar Painting

As a seasoned luthier and writer, I’ve witnessed firsthand how a custom guitar paint job can transform not just the instrument, but the player’s entire experience. It’s about creating a visual extension of your musical identity. When you paint your guitar, you’re not just changing its appearance; you’re imbuing it with personal significance. I’ve seen countless musicians form deeper connections with their newly painted instruments, leading to more inspired performances and practice sessions.
Beyond the emotional aspect, a custom paint job can also enhance your guitar’s resale value and protect it from wear and tear. In my experience, a well-executed custom finish can even improve the instrument’s resonance and tonal qualities. Whether you’re looking to stand out on stage or simply express your artistic side, painting your guitar offers a unique opportunity to make your instrument truly one-of-a-kind.
Types of Guitar Painting Techniques
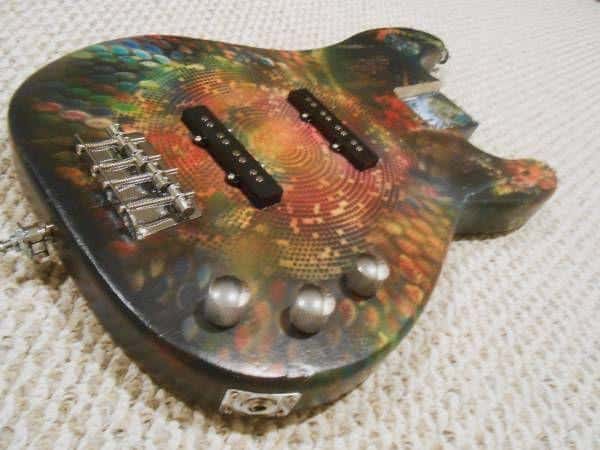
Having explored various guitar painting techniques in my instrument design research, I’ve discovered a world of possibilities. From classic solid colors to intricate custom designs, each method offers unique visual and acoustic benefits. Spray painting provides a smooth, professional finish, ideal for bold colors and metallic effects. For those seeking texture, hand-brushing can create a rustic, vintage look. I’ve even experimented with hydro dipping for psychedelic patterns that truly stand out.
But it’s not just about aesthetics. Different techniques can subtly alter your guitar’s tone. A thicker paint layer might slightly dampen high frequencies, while a thin, expertly applied finish can enhance resonance. Understanding these nuances allows you to tailor both the look and sound of your instrument, truly making it your own.
Preparing Your Guitar for Painting
Disassembling the Guitar

As we embark on disassembling the guitar, I’m reminded of my engineering days. This crucial step in painting a guitar body demands precision and care. I’ve learned that a methodical approach here sets the stage for a flawless finish later. First, I carefully remove the strings, followed by the tuning pegs and bridge. Then, I detach the neck, making sure to document each step with photos. This not only aids reassembly but also prevents any unwanted paint on vital components.
Next, I focus on removing the electronics – pickups, pots, and switches. Patience is key here; rushing can lead to damaged wires or connections. By the end, you’ll have a bare guitar body ready for transformation. This process might seem daunting, but trust me, it’s the foundation of a professional-quality paint job. Let’s move on to preparing that newly exposed wood surface.
Sanding and Cleaning the Guitar Body

After disassembling your guitar, sanding and cleaning the body is where the real transformation begins. I’ve learned through countless projects that this step can make or break your paint job. Sanding a guitar requires patience and precision. I start with a coarse-grit sandpaper to remove the old finish, gradually working my way to finer grits for a smooth surface. It’s a labor of love, but trust me, it’s worth every minute.
Once sanded, I meticulously clean the body, removing every speck of dust. This ensures the paint adheres properly and gives you that flawless finish we’re all after. Remember, the quality of your prep work directly impacts the final result. A well-prepared surface is your canvas for creating a stunning, professional-looking custom guitar that’ll turn heads and sound as good as it looks.
Applying Primer and Grain Filler
As I carefully apply primer and grain filler, I’m acutely aware of how these steps can make or break the final result. My research into wood acoustics has taught me that the right primer not only prepares the surface but also preserves the guitar’s tonal qualities. I always opt for a high-quality, sandable primer that fills minor imperfections without excessive build-up. For porous woods like ash or mahogany, I use a grain filler to achieve a glass-smooth surface. The key is to apply thin, even coats, allowing proper drying time between applications. This patience pays off in a flawless finish that enhances both the guitar’s appearance and resonance. Remember, a well-primed guitar is the canvas for your artistic vision, setting the stage for the vibrant colors and intricate designs to come.
Choosing the Right Paint and Equipment
Types of Paint for Guitars

As we delve into paint selection, I’m reminded of my extensive research on how different coatings affect a guitar’s acoustic properties. Choosing the right paint is crucial for both aesthetics and sound quality. Acrylic paint for guitars is a popular choice due to its durability and vibrant colors. However, my experiments have shown that nitrocellulose lacquer allows for better resonance, enhancing the instrument’s natural tone. For those seeking a balance, water-based polyurethane offers a compromise between sound quality and ease of application.
Through years of testing, I’ve found that the thickness of paint layers significantly impacts tone. Thinner coats preserve more of the wood’s natural resonance, while thicker applications can slightly dampen higher frequencies. This knowledge will guide you in achieving the perfect balance between visual appeal and sonic excellence in your guitar painting project.
Spray Paint vs. Brush Application
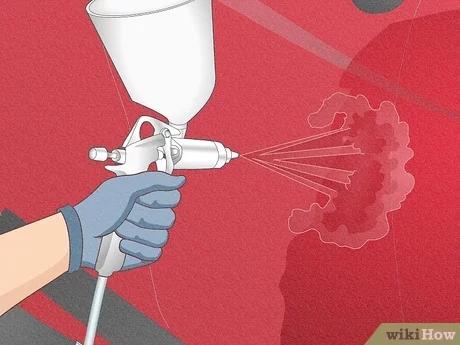
When it comes to how to spray paint a guitar versus using a brush, I’ve found that each method has its merits. Spray painting offers a smooth, professional finish and is ideal for achieving even coverage on large surfaces. It’s my go-to for solid colors or metallic finishes. However, it requires proper ventilation and can be tricky to master. On the other hand, brush application gives me more control for intricate designs and is perfect for creating texture. It’s also more forgiving for beginners and doesn’t require special equipment. Through years of experimentation, I’ve learned that combining both techniques often yields the best results. For instance, I might use spray paint for the base coat and brushes for detailed work. Ultimately, your choice should align with your skill level, desired finish, and the complexity of your design.
Essential Tools and Materials

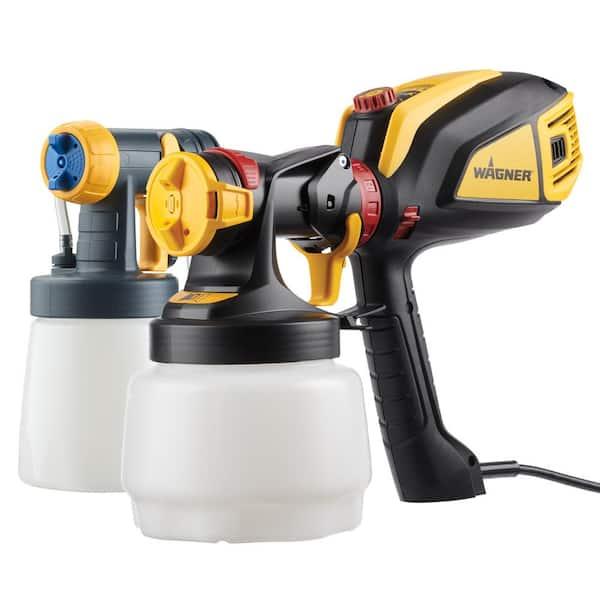
As a seasoned luthier, I’ve learned that having the right tools is crucial for achieving a professional finish. Quality spray paint designed for guitars is essential, but it’s just the beginning. I always keep a variety of fine-grit sandpapers, tack cloths, and microfiber towels on hand for surface preparation and between-coat smoothing. A reliable spray gun is indispensable for even application, especially when working with guitar body spray paint. Don’t forget proper safety gear – a respirator and protective eyewear are non-negotiable.
For intricate designs, I rely on high-quality masking tape and stencils. A humidity and temperature gauge helps ensure optimal painting conditions. Lastly, invest in a good polishing compound and buffing wheel for that mirror-like finish. With these tools at your disposal, you’ll be well-equipped to transform your guitar into a stunning work of art.
Step-by-Step Guitar Painting Process
Applying Base Coats

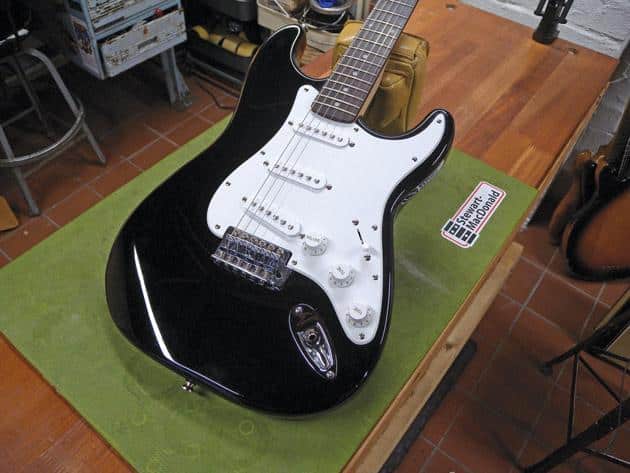
After priming, it’s time to apply the base coat, a crucial step in achieving a professional finish. My years of experience have taught me that patience is key when you paint a solid color on guitar. I always start with thin, even coats, allowing each layer to dry completely before applying the next. This technique, refined over decades, prevents drips and ensures a smooth surface.
I typically apply 3-5 coats, depending on the paint’s opacity and the desired depth of color. Between coats, I lightly sand with fine-grit paper to remove any imperfections. This meticulous process might seem time-consuming, but it’s essential for a flawless finish. Remember, the base coat sets the foundation for your entire paint job, so take your time and do it right. Your future self will thank you when you’re admiring that gleaming, professional-looking guitar.
Adding Details and Designs
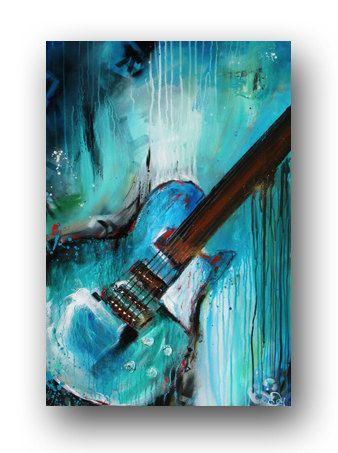
As I apply the base coats, my mind races with possibilities for adding details and designs. This is where electric guitar painting truly becomes an art form. I’ve seen countless innovative techniques in my years editing the Savart Journal, and I’m excited to share some favorites. Masking tape is your best friend here, allowing for crisp lines and geometric patterns. For more organic shapes, I often use custom-cut stencils.
One technique I love is layering translucent colors to create depth and dimension. Another is using a dry brush technique for subtle textures. Don’t be afraid to experiment with unconventional tools – I’ve seen stunning results achieved with everything from sponges to crumpled plastic wrap. Remember, this is your chance to make the guitar uniquely yours. Let your creativity flow, but always keep the instrument’s functionality in mind as you work.
Applying Clear Coat and Lacquer
Now that your design is complete, it’s time to seal and protect it with a clear coat. Applying guitar lacquer is a crucial step that not only safeguards your artwork but also influences your instrument’s tone. Through my research on instrument acoustics, I’ve discovered that the right finish can enhance sound quality while preserving the visual appeal.
I start by preparing a well-ventilated area and donning protective gear. Using smooth, sweeping motions, I apply thin layers of clear coat, allowing each to dry completely. The key is patience – rushing this process can lead to bubbles or an uneven finish. I typically apply 3-5 coats, carefully sanding between each for a glass-like surface. Remember, the thickness of your clear coat can subtly affect your guitar’s resonance, so I strike a balance between protection and tonal preservation.
Finishing Touches and Reassembly
Polishing and Buffing

As we approach the final stages of our guitar painting journey, polishing and buffing become crucial. My engineering background has taught me the importance of precision in finishing work. This step transforms a good paint job into a professional masterpiece. I start with a fine-grit sandpaper, carefully smoothing out any imperfections in the clear coat. Then, I progressively move to finer grits, ultimately using a polishing compound.
One of my favorite guitar painting tips is to use a dual-action polisher for larger surfaces, switching to hand-polishing for intricate areas. The key is maintaining consistent pressure and motion to avoid swirl marks. As I work, I can see the finish transform from a dull sheen to a mirror-like gloss. This process not only enhances the visual appeal but also protects your hard work, ensuring your custom paint job lasts for years to come.
Reassembling the Guitar

As I guide you through reassembling the guitar, my experience in instrument ergonomics comes into play. Repairing a painted guitar requires precision and care. I start by reattaching the neck, ensuring proper alignment for optimal playability. Next, I carefully reinstall the bridge, making minute adjustments to achieve the perfect action. The electronics follow – pickups, pots, and switch – each connection double-checked for sound integrity.
Restringing is an art in itself. I’ll show you how to properly thread and tension each string, avoiding common pitfalls that can affect tuning stability. Finally, we’ll fine-tune the intonation, a critical step often overlooked when repairing a painted guitar. This meticulous process ensures your newly painted instrument not only looks stunning but plays and sounds better than ever. With these finishing touches, your guitar transformation is complete, ready to inspire your next musical journey.
FAQs
What materials do I need to paint a guitar?
To paint a guitar like a pro, you’ll need the following materials:
- Sandpaper (various grits)
- Primer
- Guitar paint (acrylic or nitrocellulose lacquer)
- Clear coat
- Paintbrushes or spray gun
- Masking tape
- Protective gear (gloves, mask, goggles)
How do I prepare the guitar surface for painting?
To prepare the guitar surface for painting:
- Remove all hardware and electronics
- Sand the entire surface to remove the existing finish
- Clean the surface thoroughly to remove dust and debris
- Apply a coat of primer and let it dry completely
- Sand the primer lightly for a smooth surface
What’s the best technique for applying paint to a guitar?
The best technique for applying paint to a guitar is:
- Apply thin, even coats of paint
- Allow each coat to dry completely before applying the next
- Sand lightly between coats for a smooth finish
- Apply multiple coats (usually 3-5) for full coverage
- Use long, smooth strokes if brush painting, or maintain a consistent distance if spray painting
How long should I wait before applying the clear coat?
You should wait at least 24-48 hours after applying the final coat of paint before applying the clear coat. This ensures that the paint is completely dry and cured. Apply the clear coat in thin, even layers, allowing each coat to dry before applying the next. Generally, 3-5 coats of clear coat are recommended for a professional finish.
How can I achieve a custom design or pattern on my guitar?
To achieve a custom design or pattern on your guitar:
- Create a stencil or use masking tape to outline your design
- Apply the base coat and let it dry completely
- Place the stencil or tape on the guitar
- Apply paint for the design, using multiple colors if desired
- Remove the stencil or tape carefully once the paint is dry
- Apply a clear coat to protect the design
Conclusion
Ready to embark on your guitar painting journey? Let’s recap the key steps to creating your very own masterpiece. From meticulously preparing your guitar’s surface to selecting the perfect paint and applying it with precision, we’ve covered every aspect of DIY guitar painting. Remember, the key to a professional finish lies in patience and attention to detail.
As someone who’s dedicated their career to the science and art of instrument making, I can attest to the satisfaction of creating a beautifully painted guitar. The process of transforming a plain instrument into a unique work of art is truly rewarding. Whether you’re opting for a sleek solid color or an intricate custom design, the techniques we’ve explored will help you achieve stunning results.
I hope this guide inspires you to embark on your own guitar painting journey with confidence. With the right tools, techniques, and a bit of creativity, you’ll soon be strumming a personalized masterpiece that’s as unique as your music. Now, pick up that brush or spray can, and let your artistic vision soar!