The first time I saw a guitar with custom inlays, I was mesmerized. The intricate patterns dancing along the fretboard told a story that words couldn’t capture. That moment ignited a passion that would shape my career for the next three decades. As a luthier with an engineering background, I’ve come to appreciate the delicate balance of precision and artistry required to create these miniature masterpieces. Custom guitar inlays aren’t just decorative elements; they’re the soul of the instrument, reflecting the personality of both the creator and the player. In this comprehensive guide, I’ll share the techniques, tools, and insider knowledge I’ve accumulated over years of transforming ordinary guitars into extraordinary works of art. Whether you’re a seasoned luthier or a DIY enthusiast, prepare to embark on a journey that will challenge your skills and unleash your creativity. Let’s dive into the world of custom guitar inlays and unlock the secrets to crafting truly unique instruments.
Understanding Custom Guitar Inlays
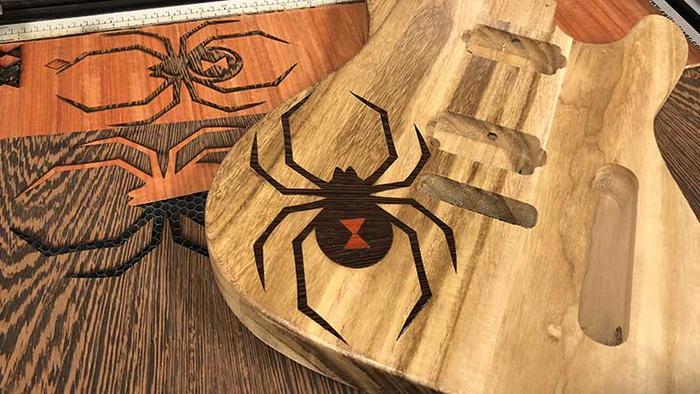
Types of Guitar Inlays
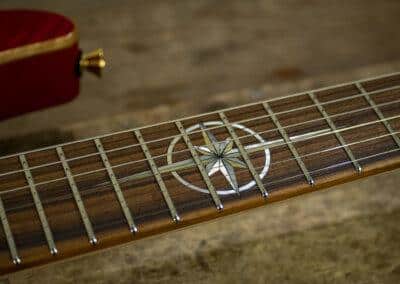
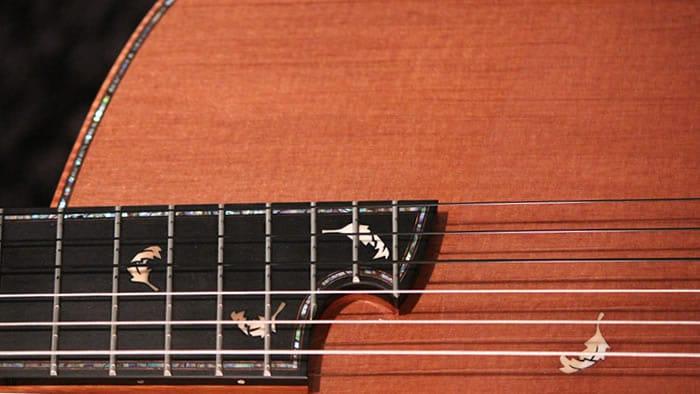
In my extensive research for the American Lutherie journal, I’ve encountered a vast array of fretboard inlays. From simple dots to intricate designs, each type serves a unique purpose. Dot inlays are classic and functional, guiding players effortlessly. Block inlays add a touch of elegance, while custom shapes allow for personal expression. I’ve seen how exotic materials like abalone and mother-of-pearl can transform a guitar’s appearance, creating visual masterpieces.
But inlays aren’t just about aesthetics. Through my studies, I’ve learned how different inlay types can subtly influence playability. Raised inlays offer tactile feedback, while flush inlays maintain a smooth feel. The choice of inlay can even affect the instrument’s tone, albeit minimally. Understanding these nuances is crucial for creating custom inlays that enhance both form and function.
Popular Inlay Materials

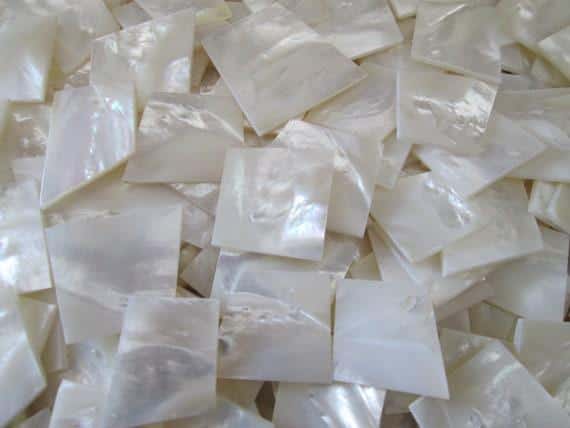
As a luthier with years of experience, I’ve explored a vast array of inlay materials for guitars. Through my work with the New England Luthiers group, I’ve discovered that each material brings its own unique character to the instrument. Mother of pearl remains a classic choice, offering a timeless iridescence that catches the eye. For a bolder statement, abalone provides vibrant colors and patterns. I’ve found that wood inlays can create a beautiful, organic contrast, especially when using exotic species. For durability and precision, synthetic materials like epoxy resin have become increasingly popular. Metal inlays, such as brass or silver, add a touch of elegance and can be intricately engraved. Understanding the properties of these materials is crucial for achieving the desired aesthetic and ensuring longevity in your custom inlays.
As we delve deeper into the inlay process, keep in mind how these materials can be combined to create truly unique designs that will set your guitar apart.
Designing Your Custom Inlays
Sketching and Planning
As I’ve pored over countless guitar inlay designs in my editorial work, I’ve come to appreciate the crucial role of sketching and planning. This phase is where your vision truly comes to life. I always encourage luthiers to start with pencil and paper, allowing creativity to flow freely without the constraints of digital tools. It’s during this stage that you’ll refine your ideas, considering both aesthetics and practicality.
Through years of experience, I’ve learned that the most successful inlays strike a balance between ambition and feasibility. Your sketches should explore various compositions, sizes, and placements. Don’t be afraid to push boundaries, but always keep in mind the guitar’s structure and playability. This planning phase is your opportunity to troubleshoot potential issues and ensure your design enhances, rather than hinders, the instrument’s functionality. Remember, a well-planned inlay is already halfway to becoming a masterpiece.
Digital Design Tools
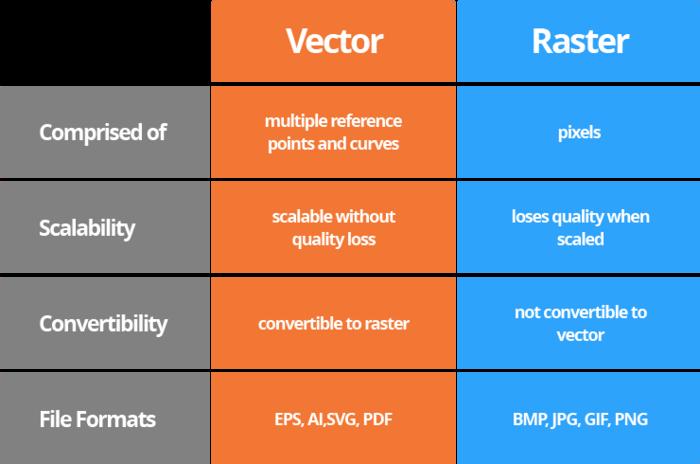
As we move from sketching to digital refinement, I’m excited to share how digital design tools have revolutionized my approach to custom fretboard designs. My engineering background has been invaluable in adapting to these powerful software solutions. With vector-based programs, I can transform rough sketches into precise, scalable designs that ensure perfect fit and symmetry. These tools allow for rapid prototyping and iteration, enabling me to experiment with complex patterns that would be challenging to visualize on paper alone.
What truly excites me is the ability to simulate different materials and finishes digitally, giving a realistic preview of the final inlay. This not only streamlines the design process but also helps in communicating ideas effectively with clients. By mastering these digital tools, you’ll unlock a new level of creativity and precision in your inlay work, elevating your craftsmanship to new heights.
Tools and Equipment for Inlay Work
Hand Tools for Inlays
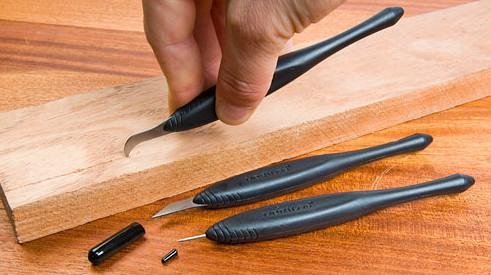
As we delve into the realm of hand tools for inlays, I’m excited to share my passion for handcrafted guitar inlays. Over the years, I’ve discovered that the right tools can transform your inlay work from good to extraordinary. My collection includes precision knives, chisels, and gouges, each playing a crucial role in creating intricate designs. I’ve found that a fine-tipped marking knife is indispensable for transferring patterns, while a set of micro chisels allows for unparalleled control when carving delicate details.
One of my favorite tools is the inlay knife, with its angled blade perfect for undercutting edges. I’ve learned that investing in high-quality hand tools not only improves the precision of your work but also enhances the entire inlay experience. The tactile feedback from these tools connects you intimately with the materials, allowing for a level of artistry that machines simply can’t replicate.
CNC Machines for Precision Inlays
As an engineer turned luthier, I’ve found CNC machines to be game-changers for creating precision guitar inlays. These powerful tools allow me to push the boundaries of intricate designs while maintaining the highest level of accuracy. With CNC technology, I can effortlessly replicate complex patterns and achieve consistent results across multiple instruments. The ability to work with various materials, from traditional mother-of-pearl to exotic woods, has opened up a world of creative possibilities.
However, it’s crucial to remember that CNC machines are just tools, and the artistry still lies in the hands of the craftsperson. I’ve learned to blend the precision of CNC with traditional hand-finishing techniques, ensuring each inlay retains its unique character. By mastering CNC guitar inlays, you’ll elevate your work to new heights, creating stunning designs that were once thought impossible. The satisfaction of seeing a meticulously crafted inlay come to life is truly unparalleled.
Step-by-Step Inlay Process
Preparing the Guitar

Before diving into the intricate world of guitar neck inlays, I always emphasize the importance of properly preparing the instrument. My years of experience have taught me that a well-prepared guitar not only facilitates smoother inlay work but also enhances the final result. I begin by carefully inspecting the neck, paying close attention to its curvature and any existing imperfections. This initial assessment is crucial for determining the ideal placement and depth of the inlays.
Next, I meticulously clean and sand the area where the inlays will be placed. This step is vital for ensuring proper adhesion and a seamless finish. I’ve developed a technique of using progressively finer grits of sandpaper to achieve an ultra-smooth surface. Remember, the quality of your preparation directly impacts the longevity and appearance of your inlays. With the guitar properly prepped, we’re now ready to move on to the exciting process of cutting and fitting the inlays.
Cutting and Fitting the Inlay
With the design finalized and materials prepared, I’m ready to tackle the most crucial step: cutting and fitting the inlay. Drawing from my years of experience and contributions to the Savart Journal, I’ve honed precision techniques that ensure a perfect match every time. For DIY guitar inlays, I start by carefully tracing the design onto the chosen material, then use a jeweler’s saw or CNC machine for intricate cuts. Each piece is meticulously shaped and test-fitted, with micro-adjustments made using fine files and sandpaper. The key is patience and attention to detail – rushing this stage can compromise the entire project. I’ve found that a slight bevel on the edges helps achieve a seamless fit. Once satisfied, I secure the pieces temporarily with masking tape, double-checking alignment before proceeding to the final installation.
This painstaking process is what transforms a good inlay into a great one, setting the stage for the finishing touches that will make your custom guitar truly shine.
Finishing and Polishing
As we approach the final stage of our inlay art for guitars, finishing and polishing become crucial. My engineering background has taught me that a flawless finish not only protects but also elevates your inlay work. I start by carefully sanding the inlaid area, ensuring a smooth transition between the inlay and the wood. Attention to detail is paramount here. I then apply thin coats of finish, allowing each layer to dry completely before proceeding. This gradual build-up creates depth and clarity, making your inlays truly pop.
For the final polish, I use a series of increasingly fine abrasives, culminating in a high-gloss buffing compound. The result is a mirror-like finish that showcases your inlay’s intricate details. Remember, patience is key in this stage. Rush the process, and you risk undermining all your hard work. Take your time, and you’ll be rewarded with a stunning, professional-grade inlay that will turn heads for years to come.
Advanced Inlay Techniques
Complex Patterns and Designs
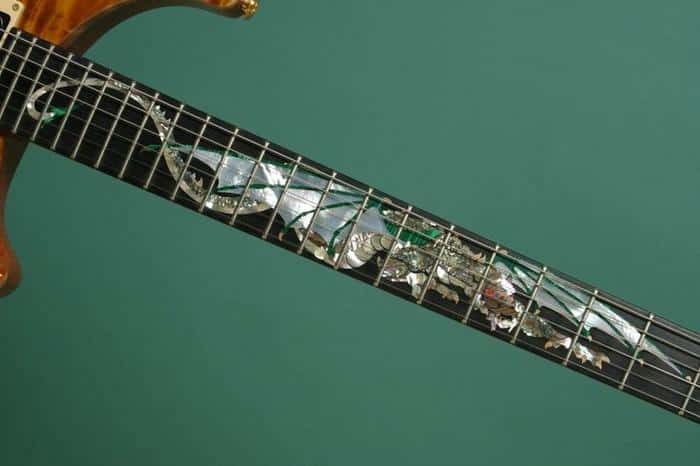
As we delve deeper into advanced inlay techniques, complex patterns and designs offer a fascinating realm of possibilities. My research into instrument acoustics has revealed that intricate guitar inlay patterns can subtly influence tonal qualities. I’ve developed techniques to create designs that not only captivate visually but also complement the instrument’s voice. For instance, using varying depths and densities in spiral patterns can enhance harmonic overtones, while geometric designs with precise angles can contribute to note clarity.
To achieve these effects, I combine traditional hand-carving methods with modern CNC precision. This fusion allows for incredibly detailed work that would be nearly impossible by hand alone. I’ve found that layering materials of different densities, like mother-of-pearl and abalone, can create stunning visual depth while also affecting the guitar’s resonance. It’s a delicate balance of aesthetics and acoustics that truly elevates custom inlay work to an art form.
Combining Materials for Unique Effects
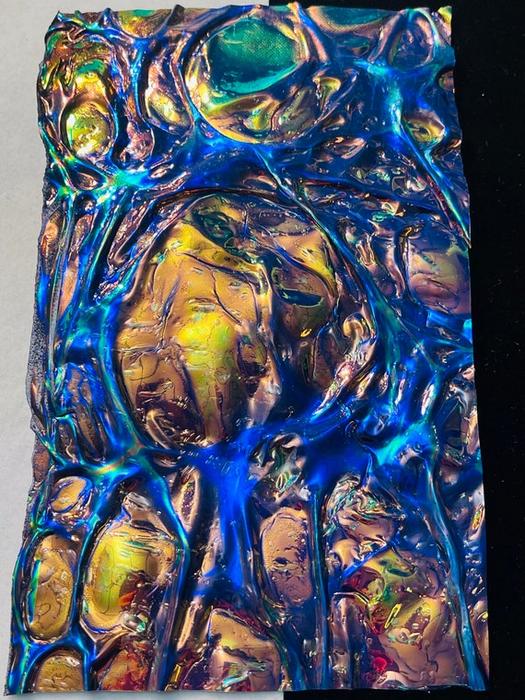
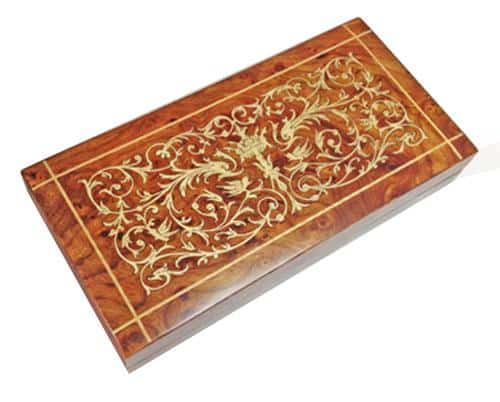
In my years of crafting custom inlays, I’ve discovered that combining materials creates truly unique effects. For instance, pairing iridescent shell inlays for guitars with darker woods like ebony can produce stunning contrasts. I often experiment with mixing mother-of-pearl with abalone, creating a mesmerizing play of colors that catch the light differently from every angle. Another favorite technique of mine is inlaying thin strips of metal between wood or shell pieces, adding a subtle shimmer that elevates the entire design.
Through trial and error, I’ve learned that the key to successful material combinations lies in understanding their individual properties. Some materials expand differently with temperature changes, while others may react to certain adhesives. By carefully selecting compatible materials and using appropriate bonding techniques, you can create inlays that not only look spectacular but also stand the test of time, ensuring your custom guitar becomes a lasting work of art.
Showcasing Your Custom Inlays
Photography Tips for Inlay Work
As an editor and contributor to various lutherie publications, I’ve honed the art of capturing ornamental guitar inlays in their full glory. When photographing your inlays, lighting is paramount. I always use a soft, diffused light source to highlight the intricate details without creating harsh shadows. A macro lens is invaluable for close-up shots, allowing me to showcase the fine craftsmanship in even the smallest inlays. I’ve found that angling the guitar slightly can create depth and dimension, making the inlays pop off the fretboard.
To truly capture the essence of your work, experiment with different backgrounds. A plain, neutral backdrop often works best, allowing the inlays to take center stage. Remember, these photos are more than just documentation—they’re a testament to your skill and creativity. By mastering these photography techniques, you’ll be able to showcase your custom inlays in a way that does justice to your artistry and craftsmanship.
Promoting Your Custom Inlay Services

After years of managing the Liutaio David Garcia Lutherie Information website, I’ve learned that promoting your custom inlay services is as crucial as the craftsmanship itself. To effectively showcase your work, start by creating a stunning portfolio featuring high-quality images of your guitar headstock inlays and other intricate designs. Social media platforms are invaluable for reaching potential clients; regularly post your latest creations and behind-the-scenes content to engage your audience.
Networking with guitar manufacturers, repair shops, and music stores can lead to valuable partnerships and referrals. Consider offering workshops or demonstrations to establish yourself as an expert in the field. Personalized service is key; always listen to your clients’ visions and provide detailed consultations. Remember, your unique style and attention to detail are what set you apart in this competitive market. By consistently delivering exceptional work and maintaining a strong online presence, you’ll build a reputation that attracts discerning guitar enthusiasts seeking one-of-a-kind inlays.
FAQs
What are guitar inlays and why are they important?
What materials can be used for custom guitar inlays?
What tools are needed to create custom guitar inlays?
What are the basic steps to create a custom guitar inlay?
2. Transfer the design to the inlay material and fretboard
3. Cut out the inlay from your chosen material
4. Carefully route the inlay cavity in the fretboard
5. Test-fit the inlay in the cavity
6. Secure the inlay with adhesive
7. Sand the inlay flush with the fretboard surface
8. Apply finish to protect the inlay and fretboard
How can I ensure precision when cutting inlays and routing cavities?
What are some common mistakes to avoid when creating custom guitar inlays?
1. Rushing the process and not taking time for proper planning
2. Not using templates or guides for cutting and routing
3. Cutting inlays or cavities too deep
4. Using dull tools, which can lead to inaccurate cuts and potential damage
5. Not accounting for wood movement or expansion
6. Neglecting proper safety precautions
7. Choosing materials that are too soft or prone to damage
8. Overlooking the importance of a proper finish to protect the inlay
Conclusion
As we conclude this comprehensive guide on custom guitar inlays, I’m reminded of the incredible journey I’ve had in lutherie over the past three decades. The art of inlay work has evolved dramatically, pushing the boundaries of what’s possible in instrument craftsmanship. From intricate mother-of-pearl designs to cutting-edge CNC-assisted creations, the world of inlays continues to inspire and challenge us.
As we look to the future of guitar making, one thing is clear: the art of custom inlays will continue to push the boundaries of creativity and craftsmanship. What will you create? Whether you’re a seasoned luthier or a DIY enthusiast, I encourage you to explore, innovate, and make your mark in this timeless craft. Remember, each inlay tells a story – your story. So, pick up your tools, unleash your creativity, and let your next custom inlay be a testament to your passion and skill. The future of guitar inlays is in your hands.