As someone who has tested hundreds of pedals in both studios and on stage, I’ve come to a crucial realization: the guitar pedal enclosure is often underestimated yet plays a pivotal role in shaping not only durability but even elements of your sound and playing experience. In effect, the enclosure is the critical first line of defense for your circuitry, but its influence extends to ergonomics, noise shielding, and aesthetics—factors that cumulatively impact your creative workflow. Years of crafting my effects chain have taught me that materials, construction methods, and design elements all interact to either support or limit the player. In this guide, I’ll share researched insights and hands-on observations about sourcing, building, and customizing effects pedal housings. My aim is to equip musicians, builders, and modders alike with practical, balanced knowledge, helping you approach pedal enclosures as both a craft and an informed choice. Whether you’re after a robust touring solution or chasing the unique feel of a DIY build, understanding the nuances of enclosures can meaningfully elevate both your sound and process.
Who Uses Guitar Pedal Enclosures?
Musicians and Effects Enthusiasts

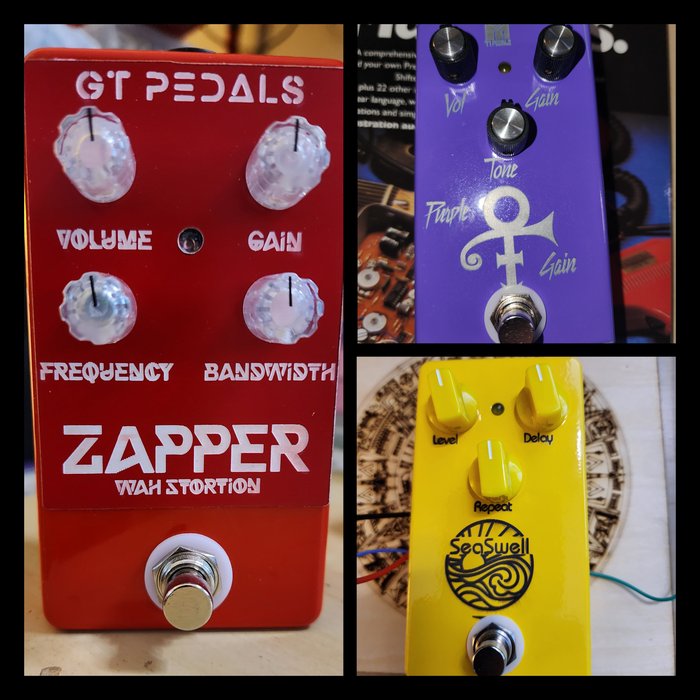
The evolution of iconic guitar tones often begins with intentional enclosure choices, as evidenced by artists ranging from boutique builders to touring legends. For example, sandcast enclosures used in early fuzz pedals imparted not just a distinct look but contributed, through mass and shielding, to reduced electromagnetic interference—an observation echoed in empirical tests by electronics hobbyists. Effects enthusiasts value custom and well-built enclosures for reasons extending beyond sound: tactile engagement, on-stage reliability, and visual distinction are primary motivators. Still, choices in enclosure design entail trade-offs. Heavy-duty casings do offer superior protection but may lead to pedalboard weight creeping upward—sometimes a logistical issue for touring musicians.
Importantly, the enclosure functions as the interface for creative manipulation—a fact supported by user feedback in industrial and audio equipment studies. Durable, ergonomic housings facilitate expressive playing; conversely, poorly chosen enclosures can detract from workflow and visual appeal. Balancing function and form makes the enclosure an intrinsic aspect of musical identity.
DIY Builders and Modders
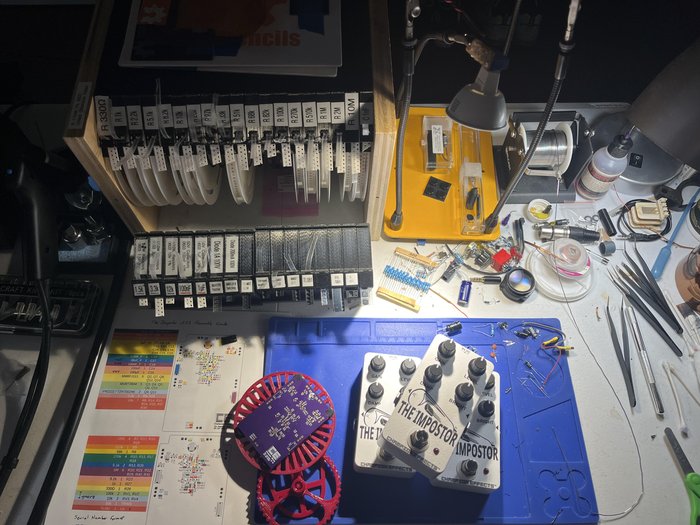
The appeal of custom enclosure construction among today’s DIY builders and modders has grown significantly—driven by access to affordable parts, online tutorials, and communities. According to a 2023 DIY Musician report, the global DIY effects market continues to expand, with thousands making or modifying pedals yearly. This surge is not just about saving costs; it provides autonomy over aesthetic and functional decisions, such as tailoring box dimensions for unusual wiring layouts or re-finishing surfaces with custom artwork for personal branding.
However, the transition from kit assembly to full customization requires mastery not only in circuit design but also mechanical skills. Frequent issues include misaligned drilling or accidental enclosure damage during soldering—a challenge well documented in electronics handbooks like this university guide to soldering techniques. For newcomers, balancing creative enthusiasm with a realistic appraisal of skill level and time commitment is essential. The DIY route offers a uniquely rewarding journey but demands patience, iterative learning, and sometimes troubleshooting unforeseen pitfalls related to physical build quality.
What Is a Guitar Pedal Enclosure?
Is a pedal enclosure just a metal box? Decades of pedal design evolution and analysis suggest otherwise. Functionally, a guitar pedal enclosure acts as the critical chassis for electronic components, grounding them physically and electrically. But the enclosure’s role is multidimensional. Research from the audio engineering community confirms that enclosure material (typically aluminum, steel, or ABS plastic) affects both electromagnetic shielding and resonance properties, sometimes detectable by sensitive measurement equipment. Larger, heavier enclosures—such as those used by some vintage fuzz pedals—may slightly impact vibration resistance and, in rare cases, introduce microphonic noise or prevent it due to stability.
Dimensions and layout are equally crucial. Compact enclosures improve pedalboard efficiency but can cramp component placement, making modifications and repairs more difficult. Conversely, oversized enclosures are practical for complex effects or visually prominent builds but may make portability harder. Modern builders must also weigh aesthetics (surface finish, color, and labeling) and practical utility (ease of drilling, jack placement, surface feel). A professional finish, as explained in enclosure finishing guides, can both protect from corrosion and contribute to resale value.
What Types of Guitar Pedal Enclosures Exist?
Pre-Drilled vs. Undrilled Enclosures
The debate between pre-drilled and undrilled enclosures hinges on balancing convenience against flexibility. In manufacturing and DIY contexts, pre-drilled enclosures have become standard thanks to their efficiency and repeatability: factory tooling ensures hole placement is precise, reducing errors that could compromise a build’s integrity. For many, especially those working on small batches or first-time builds, these enclosures help streamline workflow and minimize waste—an approach supported by builder testimonials and production-focused guides.
However, undrilled enclosures allow complete creative freedom. Builders can choose knob placement, input/output orientation, and fit more unconventional circuit layouts. That said, this route invariably demands a higher investment in time, plus access to suitable tools and skills for measurement and drilling. Mistakes are harder to correct with harder materials, contributing to a higher rate of project failures among newcomers (as indicated in DIY electronics forum surveys). Weighing both approaches, the best choice depends on your priorities: speed and consistency versus bespoke functionality and design.
Standard vs. Custom Enclosures

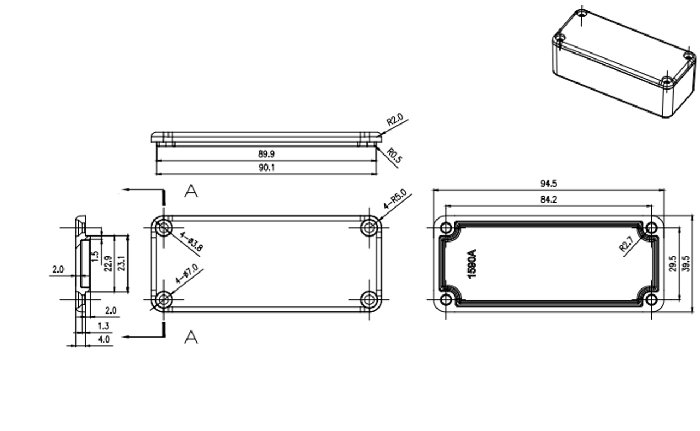
Standardization brings predictability, but customization unlocks endless creative options—what’s right for your project? Standard pedal enclosures (often categorized as 1590A, 1590B, 125B, etc.) dominate both mass-market pedals and many boutique builds due to their predictable sizing, availability, and cost-effectiveness, as outlined in industry materials. These tried-and-tested formats often streamline prototyping and support off-the-shelf hardware like footswitches and jacks, making them reliable for consistent production.
By contrast, custom enclosures empower designers to transcend constraints, incorporating unusual shapes, integrated lighting, or proprietary finishes. From my own experience and feedback from specialized pedal builders, custom housings can enhance ergonomics for multi-footswitch designs, allow for expanded control surfaces, or increase brand recognition with distinctive aesthetics. However, custom projects demand extra investment in CAD design, fabrication, and finishing—sometimes with a steep learning curve or added cost (with custom machining services ranging from $50 to $200+ per piece, according to industry data). Therefore, the choice hinges on balancing aspirational design features against available resources, required production volumes, and the intended user’s context.
Where to Buy Guitar Pedal Enclosures and What to Look For
Trusted Online and Local Sources

The debate between brick-and-mortar versus online sourcing is increasingly nuanced. As reflected in industry analyses, online retailers offer deep catalogs and price competition, allowing buyers to browse dozens of enclosure styles, colors, and finishes. Ecommerce sites often host user reviews and detailed spec sheets, making technical comparison easier—especially for newer builders. However, shipping times and variable quality control can lead to inconsistent results.
In my experience, local shops retain certain vital advantages, even as ecommerce grows. Personal service, the opportunity to inspect enclosures for finish and machining quality, and direct feedback on fitment are invaluable—echoed by many pedal builders’ surveys. Local vendors may also offer supplier guarantees or allow returns for defective enclosures, which reduces build risk. Occasionally, small dealers uncover discontinued or rare housings that become the basis for unique builds (often missed online). Leveraging both sources can ensure you secure both reliability and creative opportunity—a tactic advised by many in the DIY pedal community.
What to Consider Before Purchasing
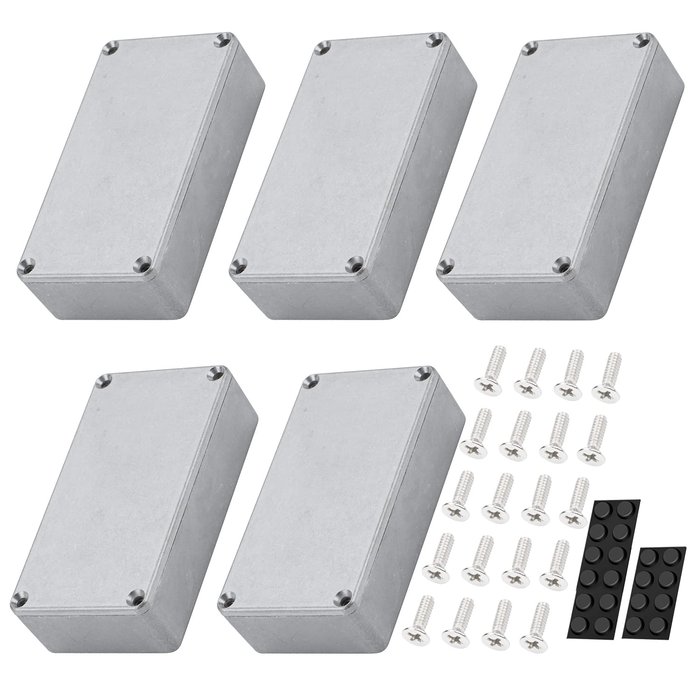
Neglecting enclosure specs before purchase can undermine your entire project. Top factors to assess include dimensions, material, surface finish, and ease of machining. Selecting pedal enclosure sizes that are too small can make assembly difficult and lead to excess heat or cabling strain, while oversized cases consume pedalboard space inefficiently. It’s advisable to sketch component layouts or use CAD tools to verify fitment before ordering.
With the availability of low-cost enclosures in the marketplace, it’s tempting to cut corners. However, multiple builder reviews and failure reports indicate that some ultra-budget enclosures (as discussed here) may feature thin walls, poor screw threading, or inconsistent finishing—factors that risk both mechanical failure and signal compromise over time.
Other critical considerations include appropriate ventilation and shielding for heat-prone or high-gain circuits, as well as compatibility with common mounting hardware. Reading technical datasheets, inspecting real-world photos, and leveraging user testimonials help mitigate disappointing surprises. Diligent upfront research remains the surest way to avoid wasted time and materials.
When and Why to Choose DIY Solutions
Benefits of Building Your Own Enclosure

The satisfaction of playing through a handmade pedal enclosure is tangible and, according to surveys in pedal-builder communities, often cited as a primary motivator for DIY projects. Besides aesthetics and a sense of accomplishment, building your own enclosure unlocks full creative control, from layout to finish. This is critical for projects with unusual circuit needs or nonstandard control arrays—such as expression pedals, multi-channel effects, or integrated MIDI controllers. Hands-on experience also improves soldering, finishing, and troubleshooting skills, which can be leveraged in future builds or repairs.
Nevertheless, pitfalls abound. Mistakes in measuring, drilling, or finishing can lead to enclosure damage, misaligned components, or grounding issues that affect signal quality. These challenges, however, serve as vital learning opportunities and foster a deeper, more practical understanding of both audio electronics and mechanics. In my own experience, even failed DIY attempts proved invaluable, ultimately resulting in more robust and unique final products than could be achieved through “off-the-shelf” solutions.
When Modification Is Needed
Modifying existing enclosures provides a pragmatic path to new sounds and extended utility, especially as pedalboards evolve. In practice, modification might mean adding an additional switch, repurposing a vintage housing for a new circuit, or customizing the finish for better visibility on stage. Some of the world’s most coveted boutique pedals began life as reworked mainstream housings adapted by modders to new creative ends.
However, the modification process is not without structural risks. Frequent drilling, especially in pre-finished or thinner enclosures, can weaken chassis integrity or create points for corrosion or mechanical stress—a point confirmed by material stress studies like this review of metals under repeated stress. Before embarking on significant modifications, it’s essential to assess whether the existing enclosure can accommodate changes without compromising functionality or safety.
Not every sonic limitation need be addressed by physical modification—sometimes a subtle circuit tweak or external add-on suffices. Wherever possible, incremental testing and careful planning help avoid time-consuming or irreversible changes. Strategic, well-planned enclosure mods, as seen in discussions of pedal modding best practices, can transform an average instrument into a tool uniquely tailored to your style—but require a realistic sense of scope and risk.
How to Select and Modify a Guitar Pedal Enclosure
Choosing the Right Materials and Size
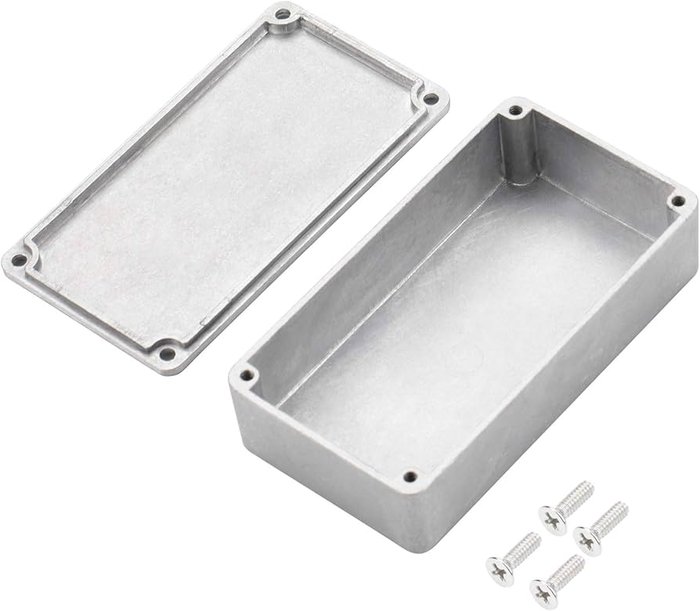
Matching material and size to your application isn’t just technical—it’s the most foundational design choice you’ll make. Through repeated testing of steel, aluminum, and composite enclosures, I’ve observed tangible differences: steel delivers ruggedness for rough gigging environments and superior EMI shielding, making it ideal when interference is a risk. The downside, quantitatively, is weight: a typical steel 1590B-style box can weigh twice as much as its cast aluminum counterpart. Aluminum strikes a balance—offering enough strength for most stage work, easy machinability, and less fatigue during transport. Plastics, while rarely found in boutique-grade pedals due to flex and lower shielding, may suit bedroom rigs or temporary prototypes.
Optimal enclosure size is determined by both planned circuitry and desired control layout. Overcrowding small boxes can limit airflow and complicate later servicing, while excessively large enclosures can lead to signal path issues and poor pedalboard economy. Many experienced builders recommend prototyping control placements on cardboard or using mock-up software to ensure fit before machining the actual box. In sum, thoughtful pre-planning at this stage can avert extensive revisions and maximize the lifetime value of your design.
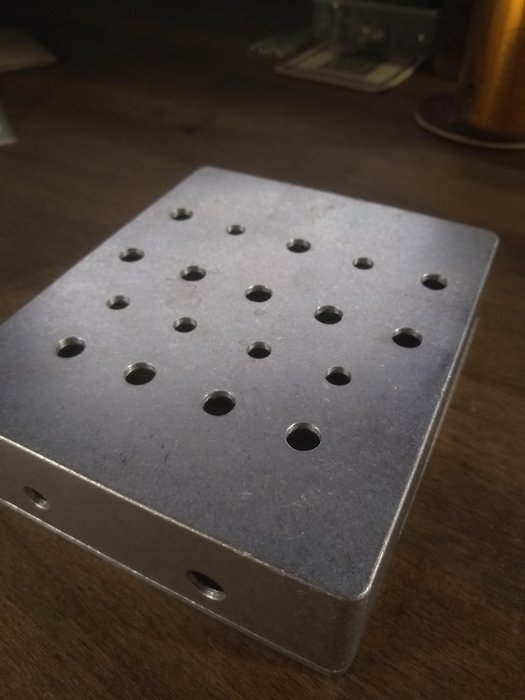
Basic Steps for Drilling and Modifying

Precision is essential when drilling and modifying pedal enclosures. Based on years of repairs and custom jobs, I recommend starting with careful measurement and layout, using masking tape for clear marking. Select drill bits appropriate for your material—cobalt bits for steel, high-speed steel for aluminum—and always use a drill press or quality hand drill with a clamp to stabilize the enclosure, as lateral movement is the most common cause of mistakes in pedal builds. Pilot holes prevent slipping and jagged edges.
After drilling, always deburr holes (with a file or deburring tool) to avoid sharp edges that could damage wires or components. Test-fit all parts before final assembly, and clean the enclosure thoroughly to remove metal shavings and dust, which can cause electronics failures. In my experience, investing in simple jigs or templates dramatically increases uniformity and reduces error rates for repeated projects. Above all, patience and incremental checking save time—rushing usually leads to costly setbacks.
FAQs: Your Top Enclosure Questions Answered
What materials are commonly used for guitar pedal enclosures?
How do I choose the right size for my pedal enclosure?
What customization options are available for pedal enclosures?
Can I build my own guitar pedal enclosure?
Where can I source materials for building pedal enclosures?
Conclusion: Building the Perfect Guitar Pedal Enclosure for Your Needs
Your dream pedal starts with the right enclosure—are you ready to build it your way? As demonstrated throughout this guide, designing and constructing a professional-quality guitar pedal enclosure requires balancing practical considerations, creative aspirations, and objective research. From selecting between standard and custom options to meticulously planning mods, every step can either safeguard your electronics and enhance usability or inadvertently introduce complications. Embracing these challenges as opportunities for hands-on learning will set you apart in a saturated market. Whether you’re building for pure utility, showpiece aesthetics, or both, approaching enclosures critically is the first move toward a truly personal sonic signature.