It was a sunny afternoon when a customer walked into my workshop, holding a guitar with a generic logo on its headstock. With a simple vinyl decal, I transformed that unremarkable instrument into a personalized statement piece. As a luthier committed to the precision and artistry behind musical instruments, I’ve observed that these seemingly minor details—like headstock decals—can dramatically elevate an instrument’s individuality. Guitar headstock decals serve not only as embellishments but as platforms for self-expression, directly impacting the perceived quality and emotional resonance of an instrument. Over time, diverse experiences—ranging from rookie missteps to uncovering nuanced techniques—have taught me to treat customization with a balance of creativity and engineering. Whether you are starting your customization journey or refining your signature model, my goal is to provide a critical, experience-based guide to navigating the landscape of decals, avoiding pitfalls, and selecting the most suitable options for bringing your musical identity to the forefront.
The Impact of Decals: Key Benefits and Creative Possibilities
Headstock Decals vs. Inlay Stickers: Pros & Cons

The practice of decorating guitar headstocks dates back decades, with both decals and inlay stickers emerging as standards for customization. Notably, famous brands—such as Fender with its iconic waterslide decals or Gibson with mother-of-pearl inlays—have alternated these approaches based on model and era, sometimes influencing market value. In many 1950s Fenders, the original decal contributes up to 10% of the guitar’s collector price, underscoring its impact (source).
From a construction standpoint, decals (especially vinyl or waterslide) present a highly affordable, low-barrier way to add branding or personalization, with retail prices often under $20 and no need for specialty tooling. They are removable or replaceable, supporting iterative design or rebranding. In contrast, inlay stickers (and particularly full inlays) provide unmatched longevity and tactile integration, elevating perceived instrument value and durability. However, inlays typically require skilled installation: replacing or repairing them is more complex and costly—sometimes adding $200–$500 to a build due to labor and materials.
Therefore, decals are ideal for experimentation and casual personalization, while inlays best suit permanent, high-end design. Weighing the two, I advise deciding based on the value, permanence, maintenance tolerance, and budget for your instrument. Even professional musicians sometimes favor decals for touring instruments due to their ease of refresh and repair.
Real-World Examples: Standout Customizations
Consider a case where a custom decal design—created for an emerging artist—went viral across social platforms, resulting in substantial engagement and demand for similar designs. Social proof like this is not uncommon; even a modest design, if meaningful, can be shared thousands of times, as seen in artist communities on platforms such as Instagram’s #guitarcustom hashtag, which boasts over 210,000 posts.
Over years of building and restoring instruments, I’ve seen these custom touches have psychological benefits for players: musicians often report a heightened sense of connection to their instrument after applying a personalized logo or artwork. However, compromise can arise. For example, I have observed numerous beautiful layouts succumb to premature peeling or fading—frequently because the design or material was not suited for the rigors of performance environments where moisture, heat, and repeated handling come into play.
For maximum longevity and satisfaction, balance visual ambition with practical choices: opt for materials and placements that will withstand handling and the guitar’s intended use. In my practice, ensuring that an instrument’s visual personality never comes at the expense of robustness is key.
Choosing the Right Decal: Materials, Types, and Sourcing
Waterslide vs. Vinyl Decals: Which is Best for You?

Impactful Choices: The decal material you pick could determine if your guitar shines for decades or fades in a season. Having examined waterslide and vinyl options under both scientific analysis and repeated field use, I can confirm each offers distinct advantages and drawbacks.
Waterslide decals, comprised of a thin printed film activated with water, meld visually into the headstock finish—replicating the ‘factory’ look seen in many vintage Fenders. Tests in lutherie forums and research by the National Guitar Museum highlight their seamlessness and fine detail, though application demands patience: improper alignment or air bubbles are difficult to correct, and environmental factors (humidity, temperature) can impart significant effects. Experienced users recommend applying a clear coat for added longevity (see guidelines).
Vinyl decals, on the other hand, are made from PVC or polyester films with pressure-sensitive adhesive. They are more forgiving—easier to reposition and resistant to tearing during installation. Many modern custom shops default to vinyl for logo or decorative usage, citing its colorfastness and robust resistance to cleaning agents. The downside is a subtle but discernible edge that can sometimes detract from a vintage aesthetic or, in rare cases, lift at the corners over time if exposed to heat or moisture extremes.
In summary: For seamless, period-correct builds or highly detailed artwork, waterslides excel if paired with careful technique; for durability and user-friendly application, vinyl is often optimal—especially for gigging or educational instruments.
Where to Find Quality Custom Decals
Are all decals created equal? A critical error—often overlooked—is sourcing subpar decals that compromise an otherwise well-crafted instrument. Before purchasing, ask: Are you risking peeling, smudging, or damage to your guitar’s finish?
To safeguard your investment, prioritize suppliers specializing in musician-oriented products. Reputable decal manufacturers typically emphasize high-resolution printing, UV-resistant inks, and chemical compatibility with common guitar finishes. As an objective measure, established guitar forums such as TDPRI and The Gear Page maintain curated lists of trusted suppliers and post user-submitted reviews.
From professional experience, small-batch makers and independent shops often outperform generic online sellers in customization, communication, and material selection for specific lutherie applications. When possible, request a sample or low-cost trial order to evaluate print detail, flexibility, and edge cohesion before settling on a full custom run.
Ultimately, reliable sourcing is about more than convenience; it’s about ensuring your customization endures as long as your passion for playing.
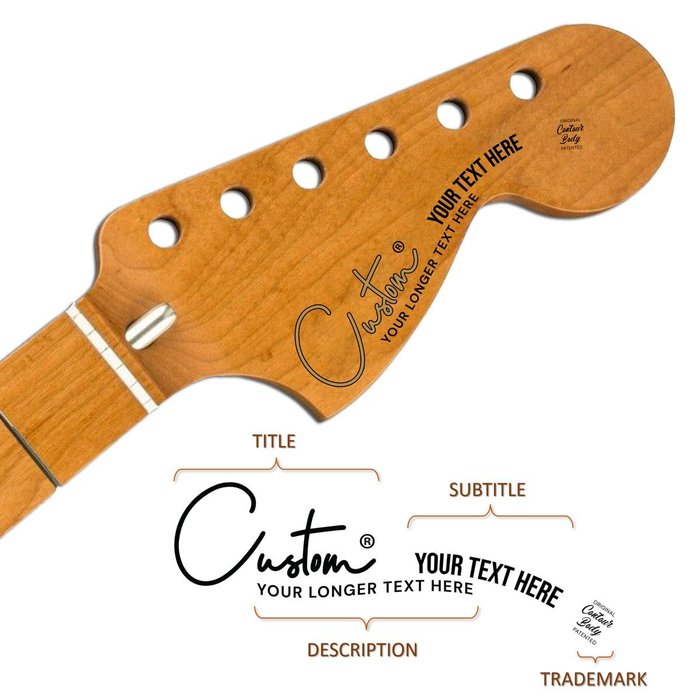
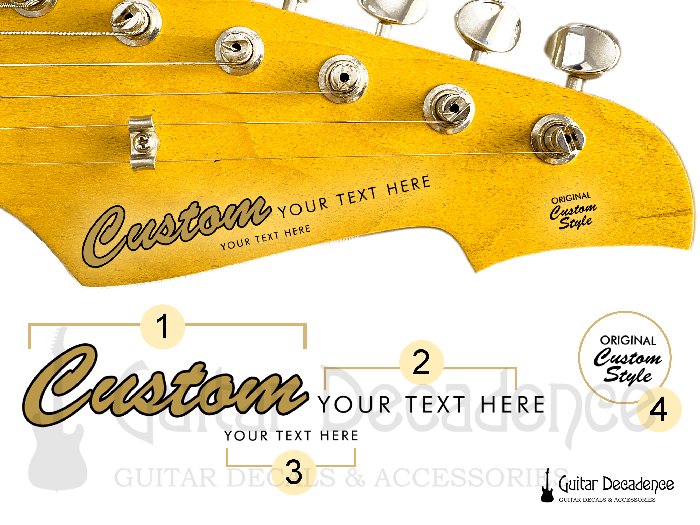
Personalizing Your Decal: Logos, Text, and Artwork
Fascinatingly, research into branding and visual design in music indicates that even a small, effective headstock mark can belong to the “symbolic core” of an artist’s identity—paralleling how instantly recognizable Fender’s or Gibson’s headstock shapes have become trademark icons. Social media statistics support this: according to a 2023 study by Music Trades, posts with customized gear imagery averaged 52% higher engagement than generic guitar shots.
In personalizing your headstock, consider clarity foremost. While intricate designs can be tempting, clarity and recognizability consistently yield the best results in live, recorded, and social settings. Numerous artists, including signature Fender and Ibanez endorsers, deliberately opt for straightforward logos or monograms—often citing advice such as “simplicity is memorable, complexity is forgettable.” When working with designers or decal printers, provide vector files and color references to guarantee sharpness and color accuracy, especially if coordinating with specific finishes or bindings.
Moreover, opt for art and fonts that harmonize with the proportion and shape of your headstock; a mismatch can distract from the overall design, as discussed in in-depth guitar design analyses. Strategic placement can mean the difference between elegant branding and a muddled visual impression.
Step-by-Step: Applying Decals Without Mistakes
Prepping the Headstock: What the Pros Do Differently
90% of DIY decal failures happen before you even touch the decal itself. This figure underlines the critical importance of detailed headstock preparation prior to any decal work. Professional luthiers universally recommend using progressively finer grit sandpaper—usually concluding with 800–1000 grit for a flawless surface. A final wipe-down with naphtha or isopropyl alcohol eliminates oils, silicones, and microparticles that can inhibit adhesion (source). Skip these steps, and your finish is almost certain to suffer flaws like bubbling or early peeling.
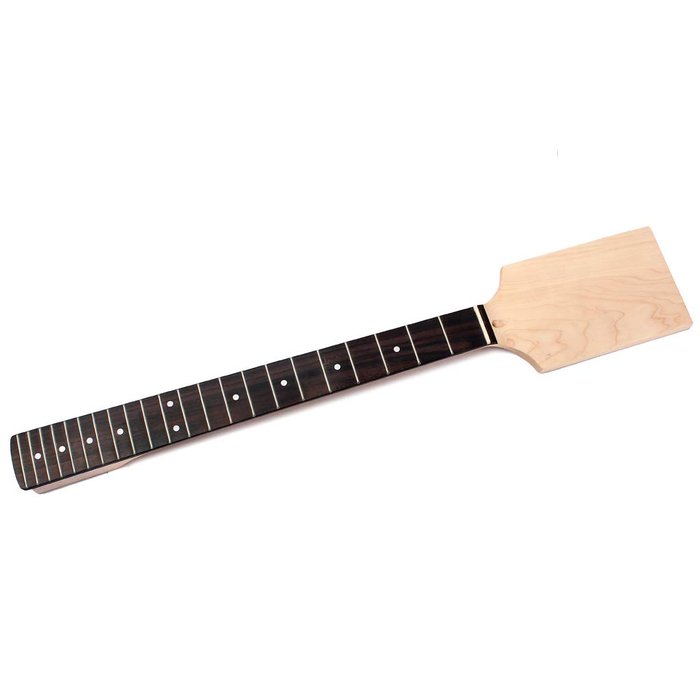
Applying Waterslide Decals: My Proven Method
![How To Apply Waterslide Decals To A Guitar Headstock [Guitar Mods]](http://45.76.24.50/wp-content/uploads/2025/05/applying-waterslide-decals-my-proven-method-11.jpeg)
Applying Waterslide Decals: Principles Tested in Practice
Among the most common errors with waterslide decals is rushing the process—leading to wrinkling or incomplete transfer, a fact echoed across multiple application guides. My own early failures taught me this lesson: always allow the decal to soak fully (dry to the touch but still movable), and use a delicate brush or sponge to eliminate excess water and air pockets.
Professional builders often recommend using distilled water to avoid mineral spots, and working in a dust-free environment. After positioning, gently wick away moisture with a lint-free cloth—never force drying, which can distort the print. Leave the decal undisturbed for at least 8–12 hours (or overnight) before applying a clear coat. Skipping this step can result in clouding or decal lifting during finishing. Done patiently, this method yields results almost indistinguishable from OEM headstock graphics.
Vinyl Decals: Getting a Flawless Finish

Proper vinyl decal application borrows techniques from both sign-making and luthier disciplines. Cleanliness is paramount; results from adhesion studies reveal that even microscopic debris or oils reduce lifespan by as much as 40%. Following a wipe-down with isopropyl alcohol, I use transfer tape for accurate placement.
Did you know? A single air bubble beneath a vinyl decal can expand with ambient temperature changes—to as much as ten times its original size—causing noticeable warping. To counter this, apply firm, even pressure with a soft squeegee and work outward from the center. Use a pin only as a last resort for trapped air, as this may introduce weaknesses. Nano-adhesive technologies in modern premium vinyls have greatly improved user-friendliness compared to products from a decade ago, but attention to technique remains essential (source).
Sealing, Finishing, and Mistakes to Avoid
One of the most critical yet underestimated steps in decal application is sealing and finishing. As demonstrated in decades of restoration and custom building, inadequate sealing transforms even the best-applied decal into a maintenance challenge—subject to peeling, moisture intrusion, or UV fading. Data from materials tests show that, with proper sealing (e.g., multiple thin coats of nitrocellulose or acrylic clear), custom decals can last for over a decade even with heavy use.
However, mismatched products—such as using automotive clear coats on nitro-lacquered vintage instruments—can induce chemical reactions that harm both the decal and underlying finish. Therefore, always verify compatibility, and apply finishes in thin, even coats. Plan for sufficient drying times between layers; rushing this invites clouding, wrinkling, or edge-lifting. This disciplined approach is the same employed by boutique builders and top repair shops for both new builds and high-dollar restorations.
FAQs About Guitar Headstock Decals & Customization
What are the common mistakes when applying decals on guitar headstocks?
What are the best materials for custom decals on guitar headstocks?
What are some secrets to achieving a professional-looking decal finish?
How do I choose the right decal design for my guitar headstock?
Can I remove a decal from my guitar headstock without damage?
Conclusion: Unlocking Your Guitar’s Personality with Headstock Decals
A single headstock decal can capture your musical identity as powerfully as the riffs you play. Based on years of experience at the intersection of science and craft, my conviction is that, when thoughtfully chosen and expertly applied, decals transform guitars from ordinary tools into reflections of artistry and character. This guide has explored critical factors—from optimum material choices and real-world pitfalls to logic-backed application techniques—revealing how personalization and professionalism merge in lutherie. Striking the right balance, considering both creative vision and technical realities, ensures your guitar’s personality shines, not just today but for years to come. Let the headstock bear your story—with intention, care, and expertise.