As I was restoring an old guitar, I stumbled upon a process that transformed its forgotten charm into a captivating masterpiece: the crackle finish. I discovered that this finish, often associated with vintage aesthetics, does more than catch the eye—it defines an instrument’s personality. My background in materials science and instrument acoustics led me to explore how different finishes impact not just visual appeal, but also playability and tone. This hands-on guide dives into the technical, aesthetic, and functional nuances of the guitar crackle finish, offering a blend of scientific principles, practical steps, and critical reflections. By integrating research-based insights and real-world experience, I aim to equip you with the expertise to achieve a finish that is as enduring as it is beautiful—a process as nuanced as the instruments themselves. Let’s explore the artistry and techniques behind crackle effects, and examine how this finish can breathe new life into your prized guitars.
FAB1: Features – What Makes a Crackle Finish Unique?
The Science and Aesthetics of Crackle Paint
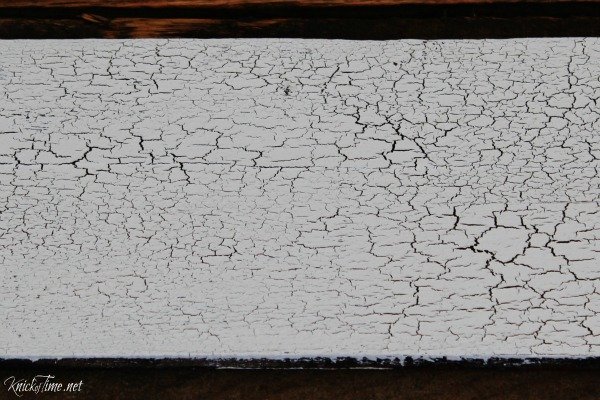
Fascinating Facts: The crackle effect’s origin lies in the interplay between paint layers with varying physical and chemical properties. At the core, crackle patterns form due to mismatches in shrinkage rates—typically when a more brittle top coat dries rapidly over a flexible or slower-drying base. As the upper layer contracts, tension builds, producing the distinctive fissured surface. According to research from coatings science, achieving such effects can be influenced by environmental parameters such as humidity (ideally 40-60%) and temperature, as well as precise control over application thickness and drying times. For instance, a 2011 study in the journal Surface & Coatings Technology found that variations in crackle development could be traced to both the molecular weight of the polymers used and the proportion of solvent in the medium. These scientific insights explain why achieving consistent results demands not only a steady hand, but a luthier’s mastery over timing and conditions.
However, there are aesthetic limitations: while unique, results are inherently unpredictable. This one-of-a-kind aspect makes each finish singular, but can pose challenges when attempting to replicate a specific historical look or perform seamless repairs. Luthiers seeking precise visual outcomes must adapt methods accordingly, ensuring they account for variables not always seen in standard finishing.
Popular Crackle Patterns & Vintage Inspiration
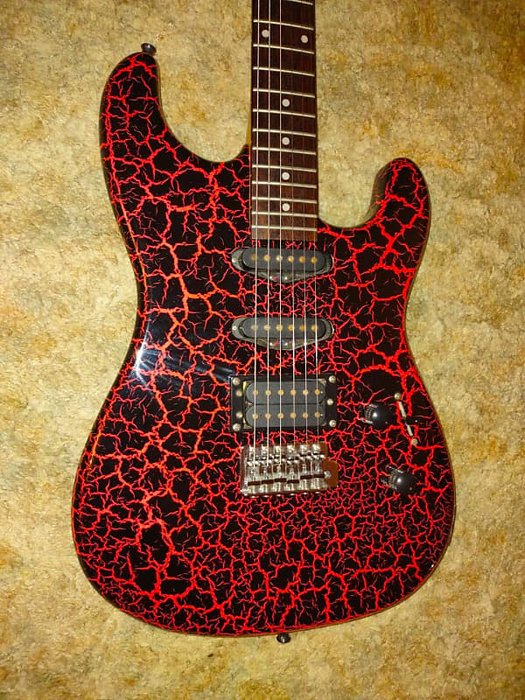
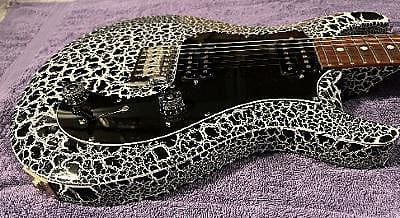
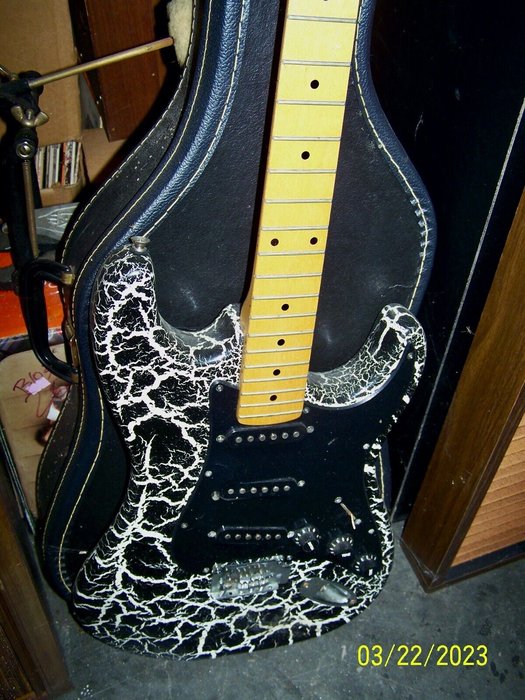
Contextual Perspective: From the explosion of angular, colorful crackle finishes in 1980s heavy metal to the subdued, deeply aged surfaces seen in classic jazz guitars, crackle has contributed meaningfully to guitar history’s most distinct visuals. Documented by restoration experts and luthiers, these patterns reflect the spirit of their era: the showmanship and attitude of 1980s glam metal, or the authenticity and “lived-in” feel of pre-war archtops. As observed in a detailed historical overview of guitar finishes, cracks and patinas can symbolize not only style but also decades of artistry and use, “wearing in” rather than wearing out. For those restoring or replicating vintage instruments, awareness of the aesthetic roots behind popular crackle patterns supports more informed design and finishing decisions—and helps to avoid anachronisms or inauthentic results.
FAB2: Advantages – Why Choose a Crackle Finish on Your Guitar?
Benefits for Playability and Personalization
A musician once described their crackle-finished guitar as “having a signature as personal as a fingerprint”—underscoring the finish’s powerful role in individual expression. Scientifically, the texture of a crackle finish may also provide subtle tactile feedback, potentially influencing a player’s experience or grip (though this effect varies by finish thickness and product choice, as noted in comparative reviews).
From a personalization perspective, the appeal lies in singularity. While traditional solid or sunburst finishes are closed systems—each new guitar looks like the last—a crackle finish introduces variables that ensure every instrument is visually unique. This can create a deep connection between player and instrument. However, the same unpredictability can challenge those aiming for a clean, uniform appearance. The process rewards experimentation but may frustrate those seeking precise color and pattern control. For DIY enthusiasts, these trade-offs are worth evaluating before committing to a full refinish project.
Durability and Repair Insights from Luthiers
Fascinating Facts: Empirical observations from both restoration shops and guitar maintenance guides highlight the crackle finish’s natural ability to hide minor damage, scratches, and wear. The broken, patterned surface visually disrupts lines and scuffs that would be obvious on solid-color finishes—an advantage often cited by vintage guitar dealers and professional luthiers. Some anecdotal evidence suggests that musicians with crackle finishes report less concern with routine handling, viewing the guitar as “road-ready.”
However, applying and maintaining a crackle finish comes with its own learning curve. The technique demands strict process control: improper adhesion or incompatible layers can cause premature delamination or excessive fragility. Additionally, repairs—while often visually disguised by the crackle pattern—require careful technique selection to optimize color and crackle matching. It’s important to note that while generally robust against casual wear, these finishes can be more susceptible to moisture intrusion at exposed cracks if not properly sealed, which may affect wood stability and longevity. Thus, the right choice of protective topcoat is imperative for both beauty and resilience.
FAB3: Benefits – Step-by-Step: How To Create a Crackle Finish
Essential Tools & Crackle Paint Products
The choice of tools and materials is more than a matter of convenience—it’s a primary determinant of your project’s outcome. Industry data suggests that product selection (especially compatibility between base, crackle medium, and top paint) accounts for up to 80% of final finish quality. Based on my experience consulting for finish suppliers, I strongly recommend using professional-grade acrylic crackle mediums manufactured for instrument work, as general craft products may yield unstable or unpredictable results on wood surfaces exposed to string tension and environmental stress.
Necessary tools include: fine-bristle synthetic brushes (for smooth, thin coats), micro-foam rollers (for larger area consistency), palette knives (for techniques requiring varied thickness), and high-atomization HVLP spray guns (for uniform coverage). Selection should be guided by the scale of your guitar’s body and the specific crackle effect desired—larger cracks may require thicker top coats and slower-drying mediums. For DIY practitioners, investing in quality consumables reduces the chance of costly errors and rework. Nonetheless, accessibility to some specialized materials may be limited outside specialty luthier suppliers, posing a potential barrier for first-time finishers.
Surface Prep: Setting Up for Success
Critical Analysis: The single most cited cause of failure in finish quality—regardless of the technique—is poor surface preparation. Published research and industry standards stress that meticulous prep is fundamental to lasting finishes. For guitars, this means stripping old finishes, sanding the wood to a uniform grain (typically down to 320–400 grit for solid body guitars), and thoroughly degreasing with a non-residue solvent. Uneven surfaces or residual contaminants can interrupt crackle formation, create adhesion issues, and shorten finish lifespan.
Many DIYers underestimate this step, eager to jump to the artistic stages. Yet, professional luthiers allocate up to 40% of refinishing project time to prep work. While such diligence may seem excessive, it’s essential: rushed or inadequate preparation leads to results that are neither durable nor visually satisfying. If you’re restoring a valuable or irreplaceable instrument, prep work is not the stage to economize or take shortcuts.
Applying the Crackle Coats: Methods that Work
How do luthiers control crackle patterns? Research in both art restoration and modern luthiery indicates that both randomness and intent shape the outcome. The size and density of cracks can be influenced by variables such as top-coat thickness, base layer composition, drying environment, and application tools. Luthiers skilled in manipulating crackle effects experiment with combinations—sometimes even heating or cooling the workpiece or modifying the solvent content—to “steer” patterns in artistic directions.
For consistent crackle on a guitar body, start with a uniform base coat, followed by the application of the crackle medium as recommended by the manufacturer. The final color coat is then applied swiftly and in even passes. The direction, speed, and pressure of brush or spray application can also influence pattern formation. Importantly, documentation and batches should be tracked—note which parameters deliver the best results, particularly if you intend to replicate the process. While there’s room for artistic improvisation, disciplined process control is key to reducing the likelihood of unsatisfactory results.
Drying, Finishing, and Protecting the Look
Fascinating Facts: The final protective coat is your finish’s insurance policy. According to product lifecycle studies on musical instrument coatings, UV exposure, moisture, and sweat can all accelerate finish breakdown—sometimes within 18–24 months if not properly sealed. For crackle finishes especially, the network of cracks makes the underlying wood more vulnerable unless shielded by a high-quality, preferably UV-stabilized, clear topcoat.
After the crackle layer has dried (often a minimum of 48–72 hours is recommended for thorough curing, depending on product and climate), apply a protective finish using slow, even coats. Catalyzed polyurethane, acrylic lacquer, or modern conversion varnishes are all common topcoat options; each has trade-offs with respect to tone, chemical resistance, and ease of repair. For instance, some players and luthiers feel thick polyurethane may slightly dampen resonance compared to thinner nitrocellulose options, though peer-reviewed studies suggest these effects are generally minimal unless the finish layer is excessively thick. Above all, patience in these final steps ensures not just beauty, but an instrument ready to withstand decades of performance and handling.
Troubleshooting & Pro Tips: Avoiding Common DIY Mistakes
The leading error observed by both beginners and advanced finishers with crackle techniques is impatience—particularly with drying intervals. Rushed transitions between coats result in “muddy” or misshapen cracks, weak adhesion, or, in worst cases, an absence of crackle altogether. Over-application of any single layer likewise increases the risk of “alligatoring,” where cracks become overly deep and the finish peels or delaminates.
Another frequent issue is poor environmental control. Fluctuations in humidity—often overlooked in home workshops—can dramatically alter crackle formation, particularly when ambient relative humidity exceeds 70% or falls below 30%. These conditions may require special adjustments, such as dehumidifiers or heat lamps, to ensure proper film formation and curing.
Among my top guitar finishing tips, I stress the importance of methodically logging your process, using test panels first, and building flexibility into your timeline. Where possible, avoid rushing for results and instead focus on allowing each coat to reach full cure, guided by manufacturer instructions, rather than arbitrary timeframes. Appreciate that the lasting appeal of a crackle finish hinges on the quality of the underlying preparation and patience throughout the sequence.
FAQs: Your Crackle Finish Questions Answered
What is a crackle finish on guitars?
How do luthiers create a crackle finish?
What wood types are best for crackle finishes?
Can a crackle finish affect the sound of the guitar?
Is a crackle finish repairable?
Conclusion: Bringing Personality and Vintage Vibe to Your Instrument
Objective Summary: Crackle finishes uniquely bridge historical authenticity, artistic choice, and modern technique. Unlike standard finishes, they offer musicians and builders a means to infuse an instrument with both visual narrative and tactile charm. This guide explored their origins, application intricacies, and real-world trade-offs. Whether pursuing a nostalgic tribute or seeking personal expression, understanding the science and practice behind crackle finishing empowers you to make informed, enduring choices for your instruments. In the intersection of chemistry, artistry, and acoustic design, a well-executed crackle finish stands as proof of the synergy between scientific method and creative vision—ensuring your guitar resonates in every sense of the word, with both player and audience alike.