When my treasured vintage fuzz pedal emitted its last, pitiful screech mid-gig, I was left stranded on stage with my hollow-body in my hands and silence in the air. It was this silent scream that called me into the labyrinthine world of guitar pedal repair and sparked a profound change in my musical journey—a captivating tale best saved for another time. For now, let me lend you my seasoned guidance on this often misunderstood topic.
As an engineer with decades of lutherie experience, I’ll demystify the process of effects pedal troubleshooting, offering practical advice for DIY enthusiasts, and unearthing the intricacies of professional services. We’ll explore common issues, understanding the peculiarities of analog versus digital pedals, recognizing faulty components, and navigating through a step-by-step repair process. Plus, I’ll also debunk some popular misconceptions around pedal modification and improvement.
A resounding 75% of musicians underestimate the importance of a well-kept pedal—they are the heart and soul of your sound. I believe that with the right knowledge and a dash of audacity, anyone can dive into the rewarding endeavour that is guitar pedal repair. Standing on stage, holding a guitar connected to a pedal you’ve nursed back to health—that’s the kind of satisfaction that keeps me in this uncanny business.
Tag along as we step into the world of transistors and potentiometers, embrace the age-old debate of soldering versus desoldering, and discover the allure of restoring vintage noise-makers. Who knows? This guide might just inspire you to rescue a crying Wah or a stuttering Delay hiding in the attic. But for that, my fellow sound chasers, you’d have to keep reading.
Understanding Common Guitar Pedal Issues
Analog Vs Digital Pedal Problems
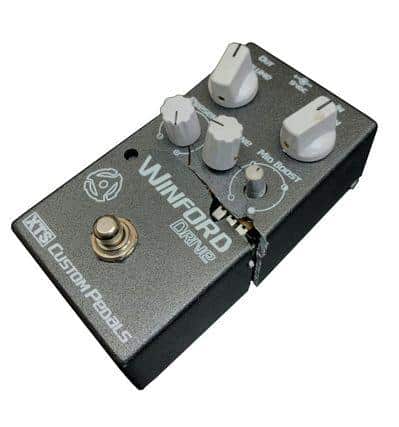
One of the fascinating aspects I’ve experienced in my career is wrestling with the varying challenges between analog and digital pedal problems. Understanding the unique characteristics of each type is integral to efficient problem-solving, and appreciating how this contributes to the broader subject of common guitar pedal issues.
Analog pedals, with their vintage appeal and warm, organic tones, are relatively straightforward when it comes to repair. The components are generally easier to isolate and diagnose, making analog pedal repair a little less complicated. However, their age and the potential for needing original or rare parts can escalate that complexity and add to repair costs.
On the other hand, digital pedals present a different set of obstacles. These technologically advanced pedals, lauded for their versatility and precise tone reproduction, can be a bit daunting when troubleshooting. Digital circuitry and software codes can require specialized knowledge and tools for effective digital pedal servicing. Yet, since these pedals are often readily available and newer, sourcing parts for them can be simpler.
Despite these discrepancies, it’s important to note that both analog and digital pedals can develop similar problems. Buzzing, popping, or no sound at all, are common issues. Age, misuse, or poor storage can lead to compromised components and can affect both analog and digital pedals alike.
Remember, the unique issues faced in repairing analog and digital pedals are part of the bigger picture – addressing common guitar pedal issues as a whole. Understanding these variances and their connections to this larger topic equips you to troubleshoot and repair just about any hiccup your guitar pedal presents.
Now that we’ve discussed the individual challenges of analog and digital pedal problems, let’s advance to the next chapter, which covers how to recognize faulty components in these pedals.
Recognizing Faulty Components
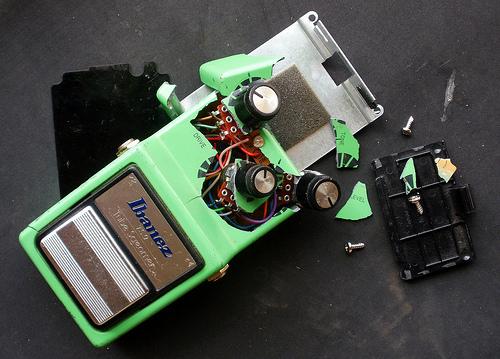
Recognizing faulty components in guitar pedals establishes the bridge between mere understanding of common guitar pedal issues and actually being able to repair them. This step, however, isn’t as easy as it sounds. As an engineer, circuits are second nature to me, but for the uninitiated, it might seem like deciphering alien hieroglyphics.
For a successful guitar pedal circuit fix, one must be able to identify the blemished parts. Visual inspection aside, knowledge of how components should behave in normal circumstances and how they falter when defective is crucial. Having this understanding helps not only to recognize the exact problematic part but also to predict potential failures in the future.
As an example, a fried resistor won’t do its assigned duty – to resist current. It allows excessive electric current to pass through, leading to overheating and eventual breakdown of your pedal. Similarly, defective capacitors can leak current causing hums, buzzes or even complete signal loss. Identifying these culprits can be accomplished with a simple multimeter.
It’s worth noting that knowledge alone won’t cut it. Experience plays a significant role too. Like fine wine, your skills at recognizing faulty components will age and become refined with time. The hues, the smells, the abnormally high temperatures – these are part of the sensory data your brain starts associating with specific types of faults, honing your capabilities even further.
Realistically, recognizing faulty components in your guitar pedals is not always a matter of ‘ifs’ but ‘whens’. So while this might appear a daunting task at first, it’s an integral part of our foray into DIY guitar pedal repair. It grounds our understanding of pedal issues and boosts our capacity to mitigate them.
In the long run, this journey will not only help you keep your beloved guitar pedals in pristine condition but also transform you into a mindful and empowered guitarist. As we move forward, we shall delve into the art of fixing these issues ourselves – the essence of DIY guitar pedal repair.
DIY Guitar Pedal Repair Guide
Basic Troubleshooting
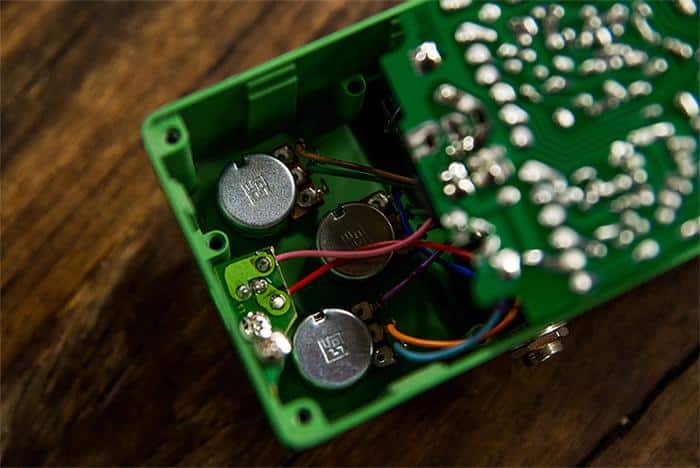
Stepping into the world of effect pedal maintenance, I’ve always held firm my belief in the power of preventive measures, and this philosophy unquestionably counts for basic troubleshooting of guitar pedals. Mastering these skills not only saves you precious time, but it can also spare you from potential financial pain.
When troubleshooting a problematic pedal, start with the basics. Most petals run on standard 9-volt power supply units; hence, a potential source of trouble points there. Always verify that your power supply is producing the correct voltage. Regularly examining this can avert a good sum of the sudden inconveniences.
Don’t overlook the nuts and bolts. Loose knobs or shaky switches? They may appear trivial, but you’d be surprised at the trouble they can cause. Tighten them up and they might just save your day. Similarly, don’t underestimate the importance of clean and well-soldered connections. Use a multimeter to check for short circuits, a common malfunction that can lead to unwanted distortion.
Basic troubleshooting of guitar pedals also involves an understanding of both the guitar and the amplification system. Trust me, the issue isn’t always with the pedal itself. Your guitar’s pickup or your amplifier might be guilty as well. So, keep an open mind, and remember, the devil usually hides in plain sight.
Venturing into the next section, we will delve deeper into a step-by-step repair process. That, coupled with an adept understanding of basic troubleshooting, can elevate your DIY repair skills significantly. The key is to remain patient, methodical, and strategic through every step of the process.
Step-by-step Repair Process
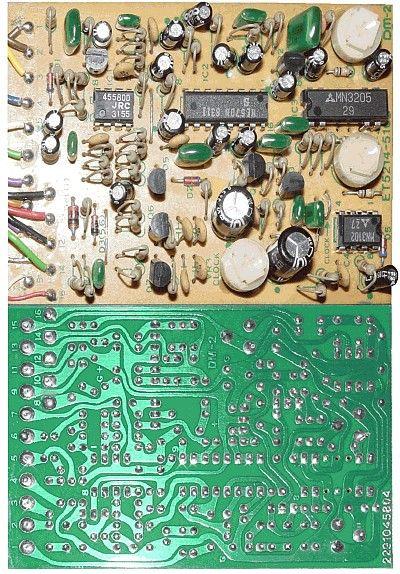
Over the years, I’ve learned that an organised approach to fixing guitar pedals significantly increases success rates, whilst also preserving valuable equipment. I’m excited to share my step-by-step repair process with you, developed from a myriad of encounters with problematic pedals.
Firstly, engage in the art of thorough assessment. Look closely at your pedal and inspect it for any visible damage. If it’s an issue with wiring or an LED that’s not lighting up, most times you can trace the problem back to a broken or loose wire. This first step is integral, as it alerts you to the heart of the issue, providing you more direction in the repair process.
Secondly, if you identify a broken component, removing it is your next action. Determine whether it’s a minor or major component. Minor components such as switches and pots can be easily replaced, whereas major components like ICs and power transformers might demand professional assistance.
Thirdly, soldering comes into play. If you’re fairly comfortable with an iron and solder, this stage shouldn’t present too complicated. Bear in mind to always use rosin core solder for pedals. It’s perfect for electronic repairs, contributing to the longevity of your pedal.
Lastly, always test before you close. Before putting the pedal back together, plug it into your guitar and an amp. Check every button, switch and output to validate the repair. Trust me; it’s better to discover a persistent problem now than in the middle of your next performance.
Following these steps can often resolve the majority of issues you’ll experience with your pedals. However, remember that complex fixes or modifications come with risks. If you’re unsure, professional assistance could save you from causing further and potentially irreversible damage.
Now that you’re armed with every guitar pedal troubleshooter’s secret weapon – the step-by-step repair plan – let’s move on to tweaking and optimising your pedals to get that perfect tone you’ve been dreaming of. But remember, “Rome wasn’t built in a day”, patience is indeed a virtue when it comes to DIY guitar pedal repair. Next, we dive into modifying and improving your pedals.
Modifying and Improving Your Pedals
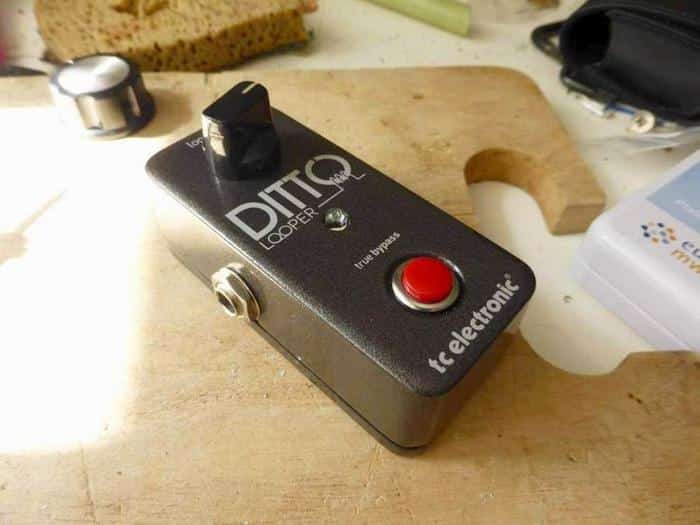
In the context of the larger DIY Guitar Pedal Repair Guide, my personal journey as a luthier has illuminated the creative freedom offered by pedal modification. The mesmeric world of guitar pedal repair and modification is not just about fixing faulty components; it’s about progressing beyond that paradigm, morphing problems into opportunities— opportunities that allow you to personalise your tone and further enrich your sonic landscape.
I’ve personally found pedal modification to be key in crafting a unique sound signature—an echo of my anarchy in timbre in favor of a distinctive identity. While learning to repair your pedals, you uncover the inherent potential for modification and improvement. It serves as an avenue to experience, firsthand, the inner dynamics of your texture-shaping components and the profound flexibility they offer.
Post troubleshooting, when you have a pedal with a clean bill of health, it’s an apt canvas for tonal innovation. You can swap components, tweak values, or add extensions to expand your pedal’s capability. As such, modifying pedals not only contributes to our repair guide but broadens your dynamic range, enriching your tonal lexicon while adding depth to your tone reproduction. Harness the reigns of innovation, and you’ll soon discover how magnifying and empowering this journey of pedal modification can be for your musicianship. Relevance and depth: inflection and resonance.
Professional Guitar Pedal Repair Services
How to Choose a Reliable Service

Choosing a reliable service for pedal repair is a decisive factor in ensuring the longevity and playability of your cherished stompboxes. As someone who has partnered with countless pedal repair shops in my career, I’ve developed an intuitive sense of what separates an average stompbox service from an exceptional one.
Expertise and experience are the key factors. A competent service should have seasoned professionals that can handle both analogue and digital pedal problems. They should be able to proficiently diagnose and resolve issues, from faulty components to intricate circuitry issues. An experienced service provider will be knowledgeable about different makes and models of pedals, ensuring your equipment gets the tailored care it deserves.
A reliable pedal repair shop should also be adept at not only repairing but also at modifying and improving your pedals. You may want to customize your pedal to your preferred tonality, activate hidden capabilities, or perhaps remarkably improve its functionality. The service you opt for should possess sufficient proficiency and creativity to assist with these.
The reputation of the service is another essential factor. In this digital age, online reviews, testimonials, and ratings offer invaluable insight into customers’ experiences with the repair service, helping you determine its reliability.
Finally, understanding repair costs and warranty services is crucial. It’s about finding a balance between cost-effectiveness and the quality of service. Good repair services would also offer a warranty period for their work, reassuring customers of their commitment to quality. Ascertain the overall transparency of their rates and services to avoid any sudden costs, and ensure the repair shop provides an initial cost estimate before proceeding with the repair.
Choosing a reliable pedal repair service can significantly extend the lifespan of your pedals and enhance your experience as an artist. Remember, a reliable service is an investment, and the returns are worthwhile in the life of your pedals.
Understanding Repair Costs and Warranty Services
As we delve into the intricacies of professional guitar pedal repair services, it is crucial to understand the two key aspects that greatly influence this fuield: pedal repair costs and the value of a pedal warranty service. From my interactions within the industry, I’ve discovered that these two variables can make all the difference when it comes to obtaining satisfactory repair services.
Pedal repair costs often depend on the complexity of the issue at hand, the model of the pedal, and the expertise of the repair service. A simple fault, for instance, will not cost as much as a complex digital malfunction or a vintage pedal restoration. But, bear in mind, skimping on repair costs could result in future issues, possibly leading to more expenses. On the other hand, exorbitant asking prices don’t necessarily guarantee quality service. Thus, I advise straddling a line between cost-effectiveness and quality assurance when dealing with pedal repair costs.
The concept of a pedal warranty service, meanwhile, is an overlooked but invaluable facet of professional repair services. Warranties typically act as a form of insurance for the client, offering free repairs or replacements within a specified time frame after the initial service. Therefore, having a comprehensive warranty service gives you the peace of mind that if anything goes awry, the cost of additional repairs will be covered.
In conclusion, understanding these aspects is not just about knowing how much you’re going to pay or what warranty you’re getting. It’s about appreciating the nuance, the value of your investment, and the security it provides in the long-term use of your pedal. So, as we move onto vintage pedal restoration services in the next section, hold these insights close, for they will greatly enhance your perspective in this comprehensive journey into the world of guitar pedal repair.
Vintage Pedal Restoration Services
As a vintage instrument enthusiast, I’ve honed a deep understanding and appreciation for vintage pedal restoration. It’s a vital cog within the broad wheel of professional guitar pedal repair services. Quick-fix solutions often neglect the unique intricacies of vintage pedals, leading to loss of authenticity and vintage value. Therefore, specialized restoration is paramount. Appreciating this unique service’s value, I have spent years mastering it, encompassing a blend of traditional practices and modern techniques. This makes it possible to preserve the true essence and original character of the pedals while assuring optimal performance – a testament to the beauty and complexities of this art.
FAQs
What common issues do guitar pedals experience?
What are some DIY tips for repairing guitar pedals?
When should I seek professional services for guitar pedal repair?
What kind of costs might be associated with professional guitar pedal repair services?
Conclusion
It’s been an exhilarating journey, hasn’t it? So, what’s the final takeaway from this world of guitar pedal repair? We have moved from understanding common pedal issues, across analog and digital domains, to recognizing faulty components, and then we plunged into the practical aspects of DIY repair via a step-by-step guide. We also touched upon how you can augment the capabilities of your guitar pedals.
In this comprehensive guitar effects pedal repair guide, we delved into the nitty-gritty of troubleshooting, right from the petite workshop of my beginning stages to the diverse field of guitar pedal repair. I have shared my in-depth knowledge, experiences, and personal expertise to demonstrate that, with patience and practice, you too can tackle most pedal issues.
Nevertheless, if a pedal problem feels overwhelming, remember there are professional services to help. We didn’t just cover how to choose a reliable repair service, but also discussed understanding repair costs, warranty services, and the special domain of vintage pedal restoration, ensuring you’re equipped to make informed decisions for your dream sound setup.
In conclusion, armed with this knowledge, whether it’s a DIY quick-fix or assistance from seasoned professionals, you’re ready to keep those guitar pedals sounding awesome for years to come. A problem-free pedal leads to seamless guitar playing, and ultimately, isn’t that what we all aim for?